
You load a pile of damp towels into the drum, turn the dial, press start, and hear nothing but silence. When a dryer refuses to power on or begin a cycle, the culprit is often something simple rather than a catastrophic motor breakdown.
Before you assume the worst, walk through these practical troubleshooting steps to pinpoint why your machine will not kick on. Always prioritize safety first: disconnect the power cord from the wall outlet or flip the dedicated circuit breaker off before opening any access panels, testing parts, or inspecting internal wiring.
Reset the Breaker and Inspect the Outlet
Electric dryers run on a heavy-duty 240-volt circuit powered by a double-pole circuit breaker. Gas dryers use a standard 120-volt plug for the motor and controls. A common reason an electric dryer fails to turn on is a tripped breaker where only one half of the double breaker has tripped. In that scenario, an interior light might still glow inside the drum, tricking you into thinking the unit has full power even though the motor circuit is dead.
- Locate your home electrical service panel.
- Find the breaker marked for your dryer.
- Push the double-pole switch firmly to the full OFF position, then switch it back to ON.
- If the unit uses a 120-volt plug (common for gas dryers or compact units), plug a working lamp or hair dryer into that same outlet to confirm power is flowing.
- Inspect the heavy power cord behind the dryer for burn marks, loose terminal screws, or frayed insulation.
If resetting the breaker works once but trips immediately upon pressing start, stop running tests. A breaker that trips under load suggests a dead short in the heating element or motor winding, which requires careful electrical diagnosis.
Test the Door Switch Mechanism
Every modern dryer has a safety interrupter switch located near the door frame. This small mechanical switch prevents the drum from spinning and the heat source from firing whenever the door is open. Over months of use, slamming doors, lint buildup, or broken plastic actuators can stop the switch from closing the circuit.
- Open the dryer door and locate the small plastic peg or lever in the door frame.
- Press the peg down with your finger. You should hear a distinct, crisp click.
- If the button feels mushy, stays pressed in, or produces no click, the internal spring or electrical contacts have failed.
- Unplug the dryer from the wall.
- Pry up the main top panel or remove the front panel screws depending on your model.
- Inspect the switch wiring harness behind the frame to ensure neither spade terminal has slipped off.
- If you own a digital multimeter, set it to the lowest resistance (ohms) or continuity setting. Place the probes across the two terminal leads and press the switch plunger. The meter should jump to near zero ohms when pressed and show infinite resistance (an open circuit) when released.
Replacing a broken door switch is an inexpensive repair that takes under twenty minutes with a simple screwdriver.
Check for a Blown Thermal Fuse
The thermal fuse is a critical safety device designed to shut down the appliance if the internal exhaust temperature reaches dangerous levels. When lint clogs the exhaust ducting, heat builds up rapidly in the blower housing. The fuse sacrifices itself by permanently breaking the electrical circuit so the machine cannot ignite lint or overheat your home.
On most electric and gas dryers, the thermal fuse is mounted directly onto the blower wheel housing or the heating element duct. Once blown, it cannot be reset; it must be replaced.
- Disconnect the dryer from the electrical outlet and pull the machine forward.
- Remove the rear metal inspection panel or the lower front kick plate (depending on your brand).
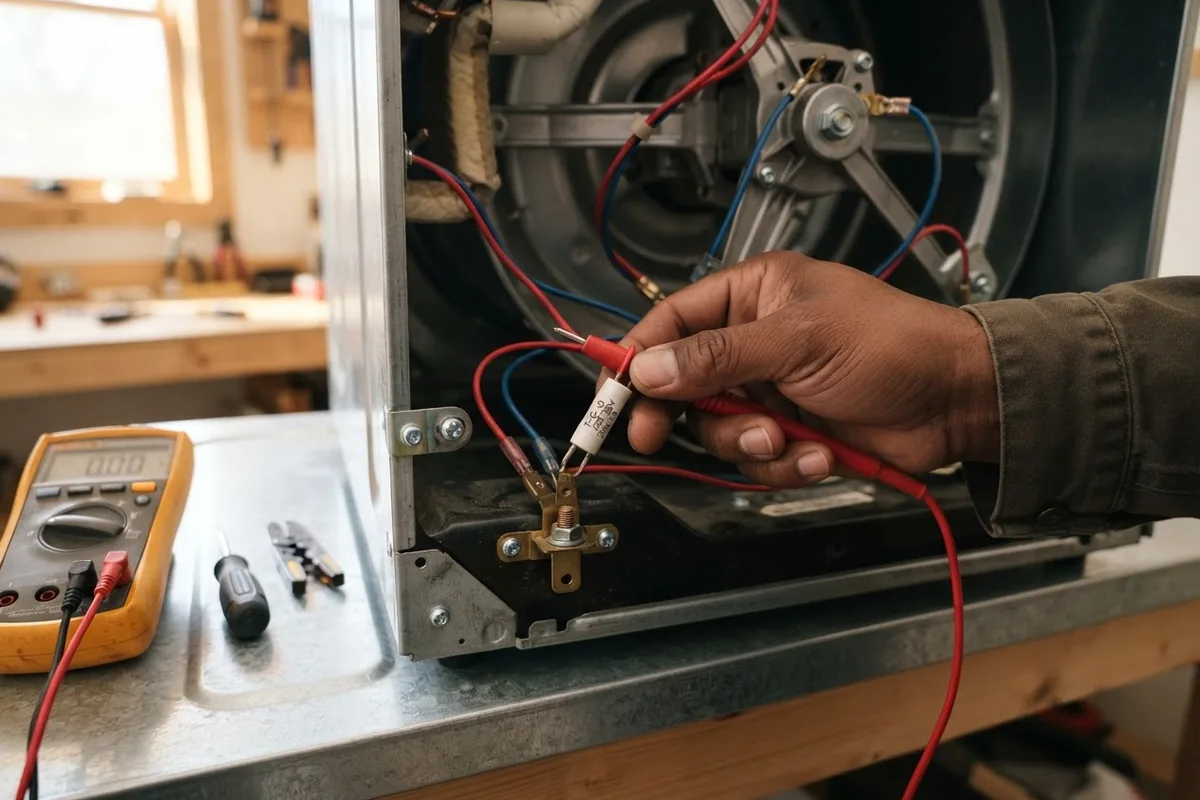
- Locate the thermal fuse—usually a small white or black plastic rectangle about one to two inches long, secured by a single screw and attached to two wires.
- Pull the wire leads off the fuse terminals.
- Touch your multimeter leads to each terminal. A functional fuse shows continuity (zero or near-zero ohms). If the meter reads open line (O.L.) or infinite resistance, the fuse is blown.
| Issue | Primary Symptom | Quick DIY Test |
|---|---|---|
| Tripped Breaker | No power, or light works but drum won't spin | Flip double-pole breaker completely off, then on |
| Broken Door Switch | Machine silent when pressing start; no click | Press switch peg by hand to listen for click; test continuity |
| Blown Thermal Fuse | Complete silence after overheating or heavy lint build | Test fuse on blower housing with a multimeter |
| Worn Push-to-Start Switch | Dial sets, but start button has no resistance | Check continuity across switch terminals while pressing button |
| Snapped Drive Belt | Motor hums or clicks, but drum sits motionless | Reach in and spin drum; check belt switch lever |
If you replace a thermal fuse, you must inspect and vacuum your entire exhaust vent line all the way to the outside wall. Installing a fresh fuse without clearing the duct buildup will cause the new fuse to blow during your next load.
Inspect the Push-to-Start and Timer Controls
On mechanical dryer models, the start button is a momentary contact switch that sends an initial burst of voltage to the motor's start winding. Once the motor spins up to speed, an internal centrifugal switch takes over to keep it running. On digital dryers, a main electronic control board performs this same task.
If the mechanical start button breaks internally, pressing it will not bridge the contact points:
- Ensure the appliance cord is fully unplugged.
- Remove the rear control console screws to access the back of the cycle timer and start switch.
- Inspect the switch casing for signs of scorching, warped plastic, or detached wiring clips.
- Disconnect the push-to-start wires and test continuity across the terminals while depressing the button.
- On older timer-driven machines, rotate the timer knob slowly through several distinct cycles (such as Timed Dry and High Heat). Sometimes copper contact fingers inside the timer wear down only on specific cycle segments. If the dryer refuses to start on Timed Dry but fires up on Auto Sensor, the timer assembly itself has worn contacts.
While working around your laundry appliances, it is also a good habit to inspect your plumbing and drainage lines. Issues like washer leaking water or slow filling can often be caught during standard laundry room checks.
Verify the Belt Switch and Drum Free-Spin
Many modern dryers include a broken-belt safety switch positioned next to the idler pulley near the motor. If the heavy rubber drive belt snaps or slips off the drum track, the tensioner arm falls downward, triggering this safety switch and preventing the motor from running.
- Reach inside the drum with your hands and spin it by hand.
- A properly connected belt provides noticeable rolling resistance as you turn the drum.
- If the drum spins freely and easily with zero drag, the drive belt has snapped or slipped off the pulleys.
- If the motor hums loudly when you press start but the drum does not turn, a seized drum roller, jammed blower wheel, or broken motor bearing may be stalling the system.
When a belt switch is triggered, replacing the drive belt and adjusting the spring-loaded idler pulley will restore the electrical path so the unit can run again.
When to Call a Pro
Many dryer start issues stem from simple component failures like a door latch or thermal cutoff that a patient homeowner can test with a basic meter. However, some problems warrant an experienced hand.
Stop troubleshooting and consult a professional if:
- You smell natural gas or propane anywhere near your laundry equipment. Shut off the gas supply line valve immediately and ventilate the room.
- The dryer trips the main electrical breaker continuously, pointing to an internal motor short or grounded heating element.
- Testing points toward a failed electronic main control board or complicated wiring harness burn.
- You hear a persistent buzzing or burning electrical smell coming from deep inside the cabinet.
If you prefer to avoid the hassle of disassembling the cabinet and testing delicate internal circuits yourself, True Appliance Repair can match you with a local appliance pro who can evaluate your dryer, test components with commercial gear, and get your laundry schedule back on track.
FAQ
Can a clogged lint trap prevent a dryer from starting?
Yes, indirect clogging is one of the most frequent reasons a dryer refuses to run. When airflow through the lint screen and vent pipe is restricted, internal cabinet temperatures skyrocket. This excess heat trips the single-use thermal fuse, which instantly cuts all electrical power to the drive motor to prevent a house fire.
Why does my dryer click when I push start but nothing happens?
A single distinct click usually indicates that the start relay or push button is sending voltage, but the motor cannot turn. This happens if the drive motor start winding has failed, the blower wheel is jammed with an errant sock or pocket debris, or the drum rollers have seized completely.
How much does it typically cost to fix a dryer that won't start?
DIY repairs for small parts like a thermal fuse or door switch typically cost $15 to $40 for the replacement component. If you hire a professional technician, typical US service repair costs range between $130 and $350, depending on your region, machine brand, and whether the issue requires a basic switch or a full motor replacement.
Why did my dryer run fine and then suddenly shut off and refuse to restart?
If a dryer halts midway through a cycle and will not respond at all, the drive motor may have overheated. Dryer motors feature an internal thermal overload protector that shuts the motor off when it gets too hot. Allow the machine to cool for 45 to 60 minutes. If it restarts after cooling, inspect your vent line for heavy lint restrictions or check the drum support rollers for friction.