DIY Whirlpool Dryer Heating Element Replacement
Dryers are the unsung heroes of household convenience—until they stop heating. If your Whirlpool dryer tumbles but doesn't heat up, you're likely facing a faulty heating element. Don't panic! Whirlpool dryer heating element replacement is a common repair you can handle with a little patience, the right tools, and a solid guide.
This in-depth blog will walk you through the process step-by-step. We'll cover everything from recognizing the signs of a failing heating element to gathering your tools, and finally, executing the repair like a pro. We’ll even dive into when it's better to call a professional instead.
Plus, if you’ve been wondering about the real cost of appliance repairs, you’ll get an honest breakdown, saving you from overpaying. Ready to fix that dryer and get your laundry routine back on track? Let’s go.
Understanding the Heating Element in a Whirlpool Dryer
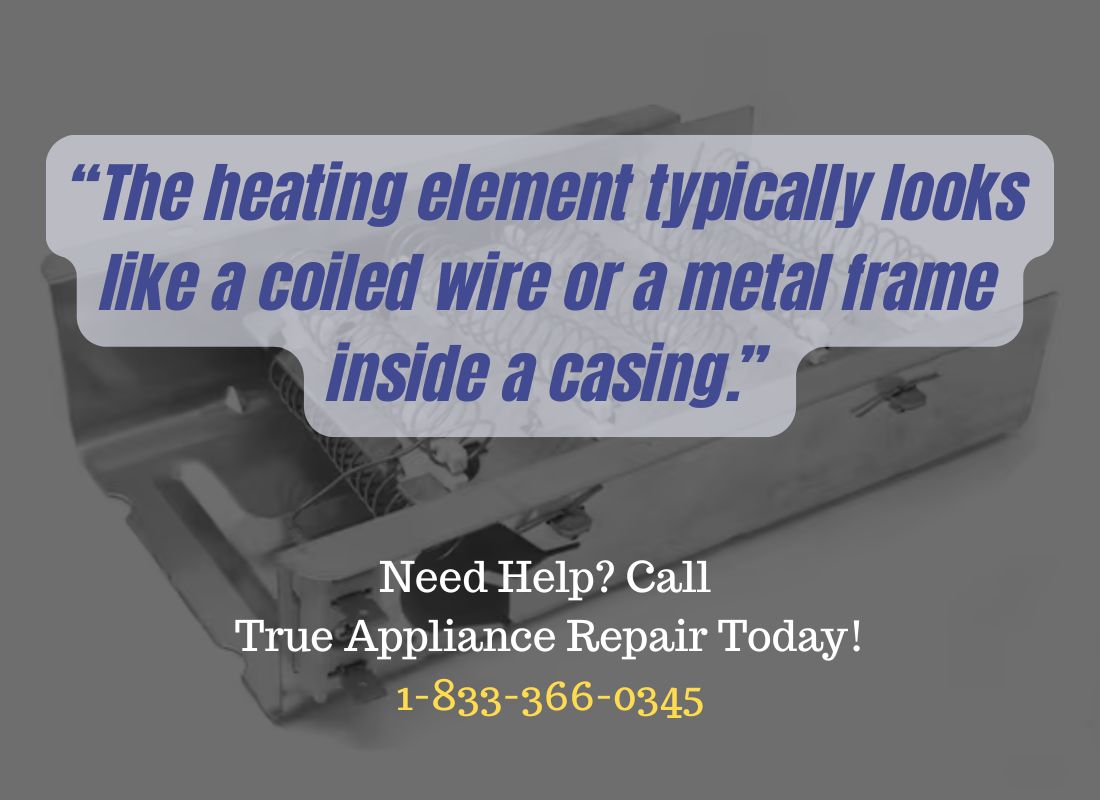
What Is a Heating Element?
A heating element is the heart of your Whirlpool dryer's heat production system. It functions similarly to an electric stove coil. When you turn on your dryer and set it to a heat cycle, electricity flows through the heating element, warming it up. This heat is then blown into the drum to dry your clothes.
The heating element typically looks like a coiled wire or a metal frame inside a casing. It heats up due to electrical resistance—basically, it turns electricity into heat. Over time, these coils can wear out, break, or short-circuit, causing the dryer to lose its ability to produce heat.
Dryer models vary, but most Whirlpool dryers have the heating element located at the back of the dryer or beneath the drum. It's essential to understand how it works so that diagnosing issues becomes a logical, not intimidating, process.
How It Powers Your Dryer
When your dryer starts, the thermostat and thermal fuse allow the current to reach the heating element. The coils inside the element begin to heat up quickly—often reaching temperatures upwards of 250°F. A fan or blower then pushes this warm air into the drum, circulating it through your clothes.
The temperature is regulated using thermostats, ensuring your clothes don't overheat. If your heating element is broken, this whole process comes to a halt. The dryer may still spin, but your clothes come out just as damp as they went in.
Understanding this mechanism is critical, especially when performing repairs or even when discussing the issue with a technician from a service like True Appliance Repair.
Signs Your Whirlpool Dryer Heating Element Needs Replacing
Common Symptoms of a Bad Heating Element
One of the first signs of a bad heating element is simple: your dryer isn’t heating up. But that’s not the only symptom. Here’s a full list to keep an eye on:
- Clothes stay damp after a full cycle
- Dryer takes longer than usual to dry clothes
- You feel no heat when the dryer is running
- You hear clicks or hums but no warm airflow
- Dryer shows error codes (if digital)
- Visible damage to the coil if inspected
You might be tempted to think it’s a clogged vent or a blown fuse, and while those are common issues, a faulty heating element is often the real culprit.
Diagnostic Tips for Homeowners
Before replacing anything, it’s smart to run a few tests:
- Inspect the circuit breaker – Make sure it hasn’t tripped.
- Use a multimeter – Check for continuity in the heating element.
- Smell for burning – A burnt element often smells like singed metal.
- Remove the back panel – Carefully inspect the heating element for visible damage like breaks or discoloration.
If you're still unsure, you might consider reaching out to a local expert, such as this Dallas appliance repair service to confirm the diagnosis before making a move.
Tools You’ll Need for Heating Element Replacement
Basic Toolkit Overview
If you’re planning to DIY your Whirlpool dryer heating element replacement, a basic set of tools will get the job done:
- Screwdrivers (Phillips and Flathead)
- Nut driver or socket wrench
- Multimeter for electrical testing
- Needle-nose pliers
- Vacuum cleaner to clean dust and lint
- Replacement heating element (model-specific)
Buying a good-quality replacement element that’s compatible with your Whirlpool model is crucial. You can typically find the model number inside the door frame or on the back of the machine.
Safety Gear and Why It Matters
Never skip the safety steps. Dryers run on 240 volts, which can be deadly. Here’s what you need:
- Rubber gloves for insulation
- Safety glasses to protect your eyes
- Non-conductive shoes to reduce electrical risk
- Disconnect power before you do anything
Trust us, getting zapped isn’t a DIY badge of honor. Taking a few minutes to protect yourself is always worth it.
If you're weighing the risk and thinking about whether to hire someone, you may want to read this in-depth guide that breaks down the pros and cons of DIY vs professional appliance repair.
Step-by-Step Guide: How to Replace a Whirlpool Dryer Heating Element
Step 1: Unplug and Disassemble Your Dryer
Always begin by unplugging the dryer or shutting off the breaker. Next, you’ll need to access the back panel (or bottom panel, depending on your model). Remove the screws holding the panel in place using a nut driver.
Clear away any dust or lint inside using a handheld vacuum. This not only keeps your repair safe but also prevents future fire hazards.
Step 2: Locate and Remove the Faulty Heating Element
Find the heating element—it typically looks like a long metal housing with coiled wires inside. Disconnect the wires attached to the terminals, noting their placement or taking a photo. Remove the screws securing the element to the dryer frame.
Gently pull out the element. If it looks burnt, broken, or discolored, that’s your smoking gun.
Step 3: Install the New Heating Element
Slide in your new element carefully, aligning it with the screw holes. Secure it with screws and reattach the wires exactly as before. Double-check all connections.
Step 4: Reassemble and Test
Reattach the back panel, plug in the dryer, and run a short test cycle on high heat. If everything works as expected—warm air and drying clothes—you nailed it.
If not, revisit your connections or consider testing the thermostats and fuses, which are also common culprits.
Cost of Replacing a Whirlpool Dryer Heating Element
DIY vs Professional Costs
When it comes to fixing a dryer, cost is one of the biggest concerns for homeowners. If you go the DIY route, the expenses are relatively low. A Whirlpool dryer heating element typically costs between $30 to $80 depending on the model and where you buy it. Add in a basic toolkit—if you don’t already have one—and you might spend a total of $50 to $120.
Now, if you decide to hire a professional, the cost will rise. You’re looking at $150 to $300, including the price of the part and labor. Some companies charge a flat diagnostic fee (around $60 to $90) which may be applied toward the repair if you move forward.
It’s important to remember that professional service offers peace of mind, especially if you’re not confident in handling electrical components. A reliable company like True Appliance Repair often provides warranties and guarantees on their service, which can make the extra cost worthwhile.
Price Range for Heating Elements
Whirlpool dryer heating elements are fairly accessible and available both online and at major appliance parts retailers. Here's a general price range you might encounter:
- Basic heating element (OEM replacement): $30 - $60
- High-end or upgraded models: $60 - $90
- Same-day delivery or expedited shipping: Add $10 - $20
Try to avoid generic or unbranded parts that are significantly cheaper. They often don’t meet the safety or performance standards of OEM parts, which can lead to future issues or even damage your dryer. If you're unsure what kind of replacement you need, browsing appliance repair advice in your area—like this article on appliance repair in Austin—can help clarify what works best for your specific location and situation.
Where to Buy Whirlpool Dryer Heating Elements
Online Stores and Marketplaces
One of the most convenient ways to buy replacement parts is through online retailers like Amazon, eBay, or appliance-specific websites. You can easily filter by your model number and compare prices. Be sure to read reviews and check seller ratings—counterfeit or poorly made parts are not uncommon.
When buying online, make sure the part is compatible with your Whirlpool model number. Some sellers even offer detailed compatibility charts and installation videos.
Local Appliance Parts Stores
Sometimes, nothing beats a trip to a brick-and-mortar appliance parts store. These stores often employ knowledgeable staff who can guide you toward the right product. Bonus? You get the part the same day, which is a lifesaver if your laundry is piling up.
Local stores might be slightly more expensive than online options, but they save you shipping time and often provide in-person support.
If you're unsure where to begin, consider reading this comprehensive guide that walks you through the steps of locating a reliable appliance repair shop near you.
Preventing Future Heating Element Failures
Regular Maintenance Tips
Replacing your heating element is one thing—but keeping it in good shape for the long haul is another. Here's what you can do:
- Clean the lint trap after every cycle
- Vacuum inside the dryer and around vents every few months
- Avoid overloading your dryer
- Check and clean the exhaust duct regularly
- Use proper drying settings for different fabrics
When lint builds up in the vent or around the element, it restricts airflow and causes the element to overheat—leading to premature failure. A few minutes of maintenance can add years to your dryer’s life.
Signs of Other Component Issues
If your heating element keeps failing, it might not be the real problem. Sometimes, faulty thermostats, thermal fuses, or poor ventilation can create the illusion that the heating element is the issue.
In smart home environments, diagnostics might even be handled by your system automatically. For more insight on how smart appliances operate and how to troubleshoot them, take a look at this blog on navigating smart appliance repair in Atlanta.
When to Call a Professional for Whirlpool Dryer Repairs
Knowing Your Limits
Let’s face it—DIY isn’t for everyone. If you find yourself second-guessing every step or getting overwhelmed by all the screws and wires, it might be time to wave the white flag. Calling a professional saves time, prevents injury, and guarantees results.
You should consider professional help if:
- You don’t own basic tools or a multimeter
- You’ve tried a repair and your dryer still isn’t working
- You’re unsure of how to test electrical components
- You notice smoke, sparks, or burnt smells
Benefits of Professional Appliance Services
Hiring a licensed technician ensures your dryer is fixed correctly. Most reputable companies provide a warranty, which gives you peace of mind. Moreover, a professional will check other components during the service to make sure nothing else is about to fail.
If you’re weighing your repair options, check out this helpful comparison on Best Buy vs Sears Appliance Repair to make an informed decision.
Comparing Whirlpool to Other Dryer Brands
Durability and Reliability
Whirlpool dryers are renowned for their durability and long-lasting performance, but how do they stack up against competitors like GE, LG, or Samsung? Whirlpool models typically last 10–15 years with proper care, and their parts are easy to find and replace—which is a huge plus when you’re dealing with common issues like a faulty heating element.
In contrast, some modern brands may offer sleeker designs or smart features, but their parts can be more expensive or harder to source. GE appliances, for instance, are well-regarded but may involve more complex repairs, such as replacing a washing machine belt, which shows how different brands handle wear and tear.
If you're looking for a solid investment with accessible repairs, Whirlpool remains a top contender.
Ease of DIY Repairs
One reason many people stick with Whirlpool is the ease of DIY repairs. With an abundance of tutorials, guides, and compatible replacement parts, you don’t need to be a technician to manage most fixes. Other brands may not offer the same accessibility—sometimes requiring specialized tools or certified technicians just to access a simple part.
If you’re the kind of homeowner who enjoys tackling repairs on your own, Whirlpool’s simplicity is hard to beat.
Common Mistakes During Heating Element Replacement
Overlooking Compatibility
One of the biggest blunders during a heating element replacement is buying the wrong part. Always double-check your dryer’s model number and confirm the compatibility of the replacement part. Getting this wrong can lead to wasted time and possibly more damage to your appliance.
Skipping the Thermal Fuse Test
Sometimes, it’s not the heating element that’s the issue—it’s the thermal fuse or thermostat. If you don’t test these components, you might replace a perfectly fine heating element and still end up with a dryer that doesn’t heat. Use a multimeter to test continuity on the thermal fuse before assuming the heating element is the problem.
For a better understanding of related components, check out this guide on washing machine gasket replacement—it highlights how one faulty part can affect the performance of the entire appliance.
Ignoring Safety Protocols
We can't stress this enough: always unplug the dryer before opening it. Skipping basic safety steps can lead to electrocution or fire hazards. It’s a mistake you don’t want to learn the hard way.
What to Do If the New Heating Element Doesn’t Work
Check Wiring Connections
If your new heating element isn’t producing heat, the issue could be as simple as a loose wire. Go back and double-check every connection, ensuring wires are securely attached and not damaged. Also, make sure no wire is touching the metal frame, which can cause short circuits.
Test for Continuity
Grab your multimeter again and test the new element for continuity. If the part itself is faulty—a rare but possible occurrence—you’ll need a replacement. Also, test surrounding components like the thermal cutoff, thermostat, and thermal fuse.
This sort of diagnostics is common in appliance repair and is part of what separates a successful DIY job from a frustrating one. For more real-world troubleshooting examples, this blog on appliance repair in Oklahoma City provides valuable insights from local professionals.
Energy Efficiency After Replacement
Why a New Heating Element Matters
You might not realize it, but a faulty heating element can dramatically reduce your dryer’s energy efficiency. When it's not working correctly, your dryer compensates by running longer cycles—which means higher electricity bills. A new, fully functional heating element restores optimal performance, shortens drying times, and reduces energy use.
If your dryer has been eating up your energy budget lately, this could be the fix you’ve been looking for.
Other Energy-Saving Tips
To boost your dryer’s efficiency even further:
- Dry full loads, not half loads
- Use the moisture sensor setting if available
- Keep the lint trap and exhaust vent clean
- Dry clothes back-to-back to capitalize on residual heat
Efficiency is especially important if you live in a tech-forward area like Dallas. Learn more about how smart homes are reshaping appliance use in this article.
Tips for Extending the Life of Your Whirlpool Dryer
Routine Cleaning
Regular cleaning is the best way to extend your dryer's life. Lint buildup not only reduces efficiency but is a major fire hazard. Clean the lint trap after every load and vacuum the interior and ducts every few months.
Don’t Overload the Drum
It might be tempting to shove in one last towel, but overloading stresses the motor and heating element. Stick to the recommended load size for longer-lasting performance.
Schedule Periodic Inspections
Every year or two, take some time to inspect the heating element, belts, rollers, and vents. Replace worn-out parts early, and your dryer will reward you with years of reliable service.
Want a deeper understanding of how minor problems affect long-term appliance performance? This article on washing machine repair costs shows how small fixes can save big money over time.
Summary
A Whirlpool dryer heating element replacement may seem daunting at first, but with the right guidance, tools, and mindset, it’s a repair most homeowners can manage confidently. From identifying the symptoms to sourcing the right part and handling installation step-by-step, you now have the complete blueprint for success.
Whether you’re a DIY enthusiast or considering hiring a pro, understanding the process puts you in control. Don’t let a cold dryer throw your home into chaos—get it fixed and get back to your daily routine. And remember, proper maintenance today prevents major repairs tomorrow.
If you want a professional touch or need help beyond the heating element, don’t hesitate to connect with experts like True Appliance Repair.
FAQs
1. How long does it take to replace a Whirlpool dryer heating element?
Typically, it takes between 30 to 90 minutes, depending on your familiarity with the appliance and tools.
2. Can I use my dryer if the heating element is broken?
You can, but it won't dry clothes. It will only spin, wasting electricity without results.
3. How often do heating elements fail?
Most last 8–12 years, but failure depends on usage, maintenance, and overall appliance condition.
4. What’s the difference between OEM and aftermarket heating elements?
OEM parts are made by Whirlpool and offer guaranteed fit and performance. Aftermarket parts may be cheaper but could compromise reliability.
5. Should I replace the thermal fuse with the heating element?
If the fuse is blown, yes. It’s inexpensive and ensures your new heating element doesn’t fail prematurely due to lingering issues.