
Household appliances handle the heavy lifting in our daily routines, but constant operation leads to gradual wear and tear. Taking a proactive approach with routine home appliance maintenance helps catch minor issues before they turn into costly mechanical failures. Performing basic inspections every few months protects your household budget, keeps utility bills manageable, and ensures your essential machines stay reliable through every season.
Safety must always come first whenever you inspect or service household equipment. Disconnect the electrical power cord from the wall outlet for electric units, or switch off the dedicated circuit breaker. Turn off the water supply shut-off valve before inspecting water-fed units, and turn off the gas supply line when working near gas connections. If you ever detect a gas odor, immediately evacuate the home and call your local gas utility provider.
Inspect and Vacuum Heavy Appliance Condenser Coils
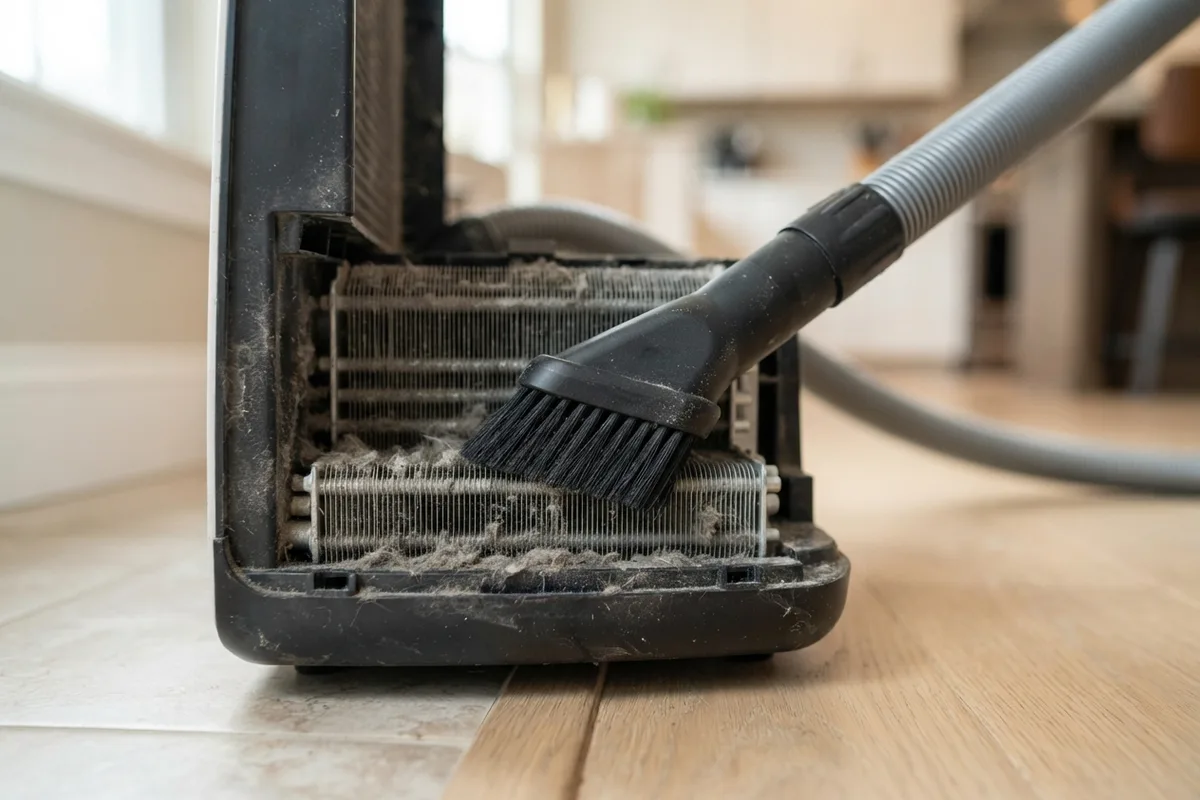
Dust, pet hair, and household lint accumulate on external condenser coils over time, forcing refrigeration systems and cooling units to work significantly harder. When air cannot circulate freely around these coils, internal temperatures fluctuate, energy consumption spikes, and compressor motors experience excessive heat stress.
To clean these vital components, start by unplugging the unit from its power source. Locate the condenser coils, which are typically situated behind a lower front kickplate or along the lower rear cabinet. Use a narrow vacuum brush attachment along with a flexible coil cleaning brush to gently lift trapped dust from between the metal fins. Avoid using rigid metal tools or excessive force, as bent cooling fins restrict airflow. Once cleared, plug the machine back in. Performing this quick check twice a year maintains operational efficiency and prevents premature motor burnouts.
Clear Mold and Debris from Door Gaskets and Seals
Flexible rubber gaskets create an airtight seal around appliance doors, keeping cold air contained in refrigerators and water sealed inside washing machines and dishwashers. Moisture, detergent film, and food particles routinely collect in the folds of these seals, creating an environment where black mold and mildew thrive.
Inspect all door gaskets monthly for visible residue, tears, or brittleness. Mix a solution of equal parts warm water and distilled white vinegar, then scrub inside the flexible folds using a soft microfiber cloth or an old toothbrush. Never use harsh solvent cleaners, which dry out rubber compounds and cause premature cracking. If you notice persistent moisture pooling near the base of your unit, review our guide on appliance maintenance steps to prevent water leaks to diagnose potential gasket failure.
Flush Water Supply Lines and Check Hose Connections
High-pressure water supply lines connect dishwashers, washing machines, and refrigerator ice makers to your home plumbing. Over time, rubber fill hoses degrade, swell, or develop micro-fissures that can unexpectedly burst and flood utility spaces.
Turn off the water supply valve behind the machine and pull the unit far enough away from the wall to access the connections safely. Inspect the entire length of the hose for blistering, kinked sections, or mineral crust around the fittings. Ensure all hose clamps and threaded couplings are snug without over-tightening. If your laundry setup still uses standard reinforced rubber hoses, consider upgrading to braided stainless steel supply lines. Replacing aged flexible hoses every three to five years protects your home against major water damage.
Inspect and Clean Internal Appliance Drainage Filters
Modern dishwashers and front-load washing machines rely on fine mesh drainage filters to catch food soil, stray buttons, paper scraps, and lint before water reaches the drain pump assembly. A clogged drain filter restricts wastewater evacuation, leaving standing water in the tub and causing unpleasant odors.
To inspect a dishwasher filter, remove the lower rack and twist the cylindrical filter assembly counterclockwise to unlock it from the tub floor. For front-load washers, open the lower access panel on the front cabinet, place a shallow pan and towel beneath the drain tube, and unscrew the coin trap filter plug. Rinse both filter types under warm running water, using a soft nylon brush to scrub away grease or lime scale. Reinstall the filter firmly before running your next cycle.
Vacuum Dryer Vents to Eliminate Hidden Lint Buildup
Lint filters catch only a portion of the debris generated during a drying cycle. Fine fibers inevitably slip past the main filter frame, gathering inside the cabinet ducting, transit exhaust pipe, and outdoor vent hood. Excess lint chokes exhaust airflow, causing cycle times to double and creating a severe fire hazard.
Unplug the dryer and disconnect the flexible exhaust pipe from the wall duct. Use a long, flexible dryer vent brush connected to a vacuum hose to clear lint built up inside the rigid wall duct and the back of the dryer cabinet. Check the exterior vent damper outside your home to ensure the louvers open freely when air blows through and are not obstructed by bird nests or yard debris. For detailed step-by-step instructions on complete laundry ventilation care, visit our full guide on washer dryer repair and maintenance tips.
Sanitize and Freshen Up the Garbage Disposal
Garbage disposals endure heavy daily use, grinding food remnants that can accumulate inside the grinding chamber and cause sour odors or slow drainage. Routine preventative care keeps internal impellers moving freely and prevents stubborn plumbing clogs downstream.
Begin by turning off power to the disposal at the main circuit breaker. Shine a flashlight down the drain guard and use long-nosed pliers—never your hands—to pull out any foreign objects like fruit pits, bones, or dropped utensils. Restore power, turn on cold water at high pressure, and drop two cups of ice cubes along with a cup of coarse rock salt into the disposal. Turn on the unit; the ice and salt scour buildup off the rotating impellers and grind ring walls without dulling metal edges. Finish by grinding fresh citrus peels to eliminate organic odors.
Test Door Latches and Leveling Feet on Major Units
An unbalanced appliance places uneven mechanical stress on suspension springs, drive belts, bearings, and leveling legs. When a washing machine or refrigerator sways during operation, internal components vibrate violently, accelerating internal wear and creating excessive noise.
Place a spirit level across the top panel of your appliances from front to back and side to side. If the bubble indicates an imbalance, rotate the threaded leveling feet at the base of the machine using an adjustable wrench until the cabinet stands perfectly true. Check door latch mechanisms on dishwashers, ovens, and dryers by opening and shutting them repeatedly. A loose door latch prevents switches from making clean electrical contact, which can cause machines to pause mid-cycle or refuse to start.
| Appliance | Check Frequency | Key Inspection Focus | Recommended Action |
|---|---|---|---|
| Refrigerator | Every 6 Months | Condenser coils & door gaskets | Vacuum dust; clean seals with vinegar solution |
| Washing Machine | Monthly | Water fill hoses & pump filter | Inspect hoses for bulges; clear trap debris |
| Clothes Dryer | Every 6-12 Months | Flexible duct & exterior vent hood | Brush out trapped lint; check flap movement |
| Dishwasher | Monthly | Fine mesh floor filter & spray arms | Rinse debris under hot water; clear spray nozzles |
| Garbage Disposal | Bi-Weekly | Grinding chamber & splash guard | Scour with ice/salt; clear non-food debris |
When to Call a Pro
While routine surface cleaning, filter rinses, and basic visual checks are simple weekend DIY tasks, complex mechanical or system failures require qualified technical experience. Stop work immediately and seek professional assistance if you encounter sealed refrigeration system issues, electrical burning smells, persistent circuit breaker trips, or internal gas burner ignition problems.
Component repairs for major household units typically cost between $150 and $450 depending on part availability, regional labor rates, and machine age. If a major repair estimate approaches 50% of the cost of a new appliance, replacement is often the more practical long-term choice. When specialized diagnostic work or component replacements are required, True Appliance Repair can match you with a local appliance pro to diagnose and resolve the issue quickly.
FAQ
How often should I perform general home appliance maintenance?
Most high-use appliances benefit from a quick monthly inspection of door seals and drain filters. Deeper maintenance tasks—such as vacuuming dryer vents, cleaning refrigerator condenser coils, and checking water supply lines—should be completed every six to twelve months to maintain optimal performance.
What safety precautions are most critical during home appliance care?
Always disconnect the power cord or shut off the main circuit breaker before touching internal components or opening access panels. Turn off dedicated water shut-off valves when checking supply lines, and shut off gas supply lines before inspecting gas-fueled equipment. Never insert hands into a garbage disposal throat.
Can basic appliance maintenance lower my monthly energy bills?
Yes. When condenser coils, exhaust vents, and filters are free of dust and obstruction, motors and heating elements run shorter cycles while consuming significantly less electricity or gas. Clean components reduce mechanical drag and operate much more efficiently.
How do I know if an appliance is worth fixing or replacing?
Consider the age of the machine compared to its average expected lifespan, which ranges between 8 and 12 years for most major units. If the unit is near the end of its typical lifespan and repair costs exceed half the price of a replacement model, investing in a new appliance is usually the best financial decision.