
Pulling a fresh load of white shirts out of the dryer only to find dark grey or black streaks across the fabric is every homeowner's nightmare. These mysterious marks are usually caused by clothes getting pinched in worn internal gaps, contacting scorched residue, or rubbing against deteriorating rubber seals. Fortunately, you can diagnose and resolve most of these issues yourself without replacing your entire appliance.
Before attempting any hands-on inspection or repair on your clothes dryer, safety comes first. Always unplug the power cord from the wall outlet. If you own a gas dryer, shut off the gas supply line completely before opening any cabinet panels or moving the unit.
1. Replace Deteriorated Drum Felt Seals
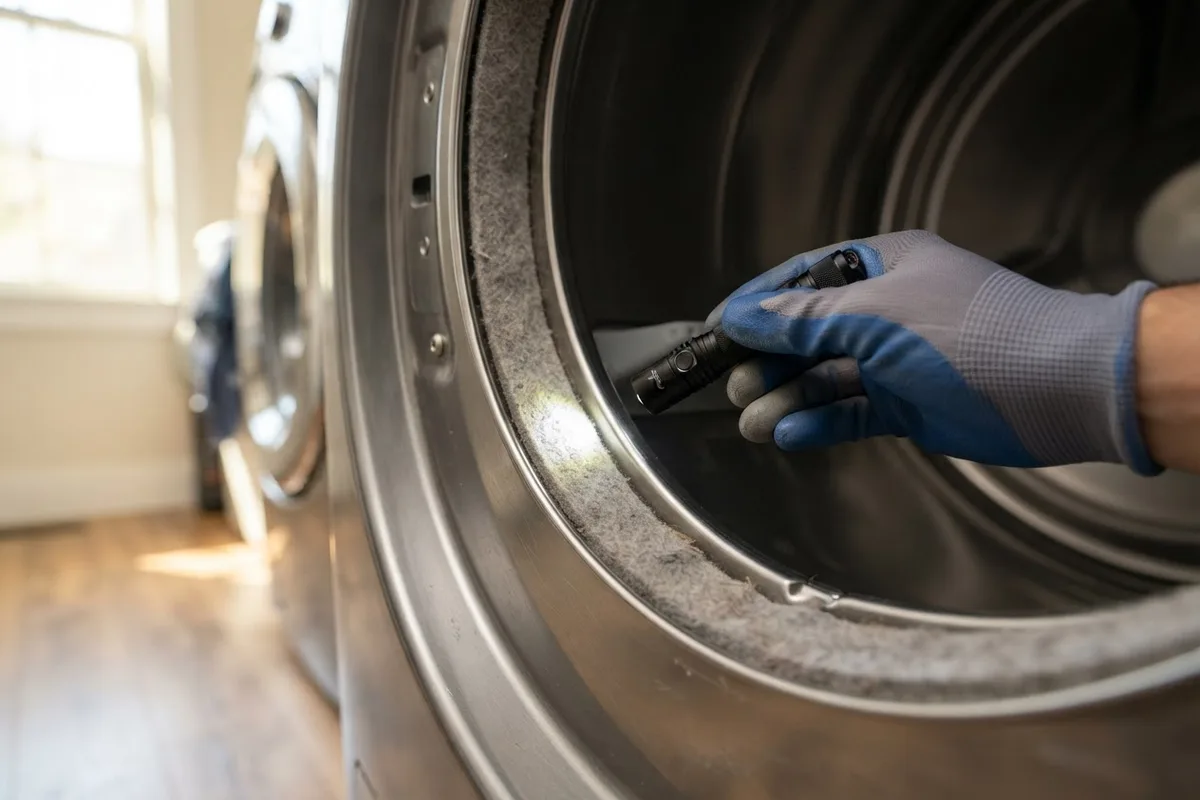
The felt seal cushions the gap between the spinning dryer drum and the stationary front or rear bulkheads. Over years of heat exposure and heavy loads, this felt lining wears down, tears, or comes unglued. When the seal disintegrates, a narrow gap opens up between the rotating drum and the housing frame.
As your clothes tumble, lightweight fabrics can slide into this gap and get pinched against the spinning drum rim. The combination of intense friction, heat, and accumulated motor grease leaves dark streak marks or scorch lines along the edges of garments.
- Unplug the dryer and open the door.
- Inspect the seam along the front and rear rim of the drum using a bright flashlight.
- Look for frayed felt strips, exposed metal edges, or sticky dark adhesive residue protruding into the drum area.
- If the felt is worn away or loose, purchase a manufacturer-approved replacement felt seal kit ($20 to $45, depending on the model).
- Disassemble the front cabinet, scrape off the old seal with a putty knife, clean the rim with rubbing alcohol, and glue down the new felt using high-temperature adhesive.
2. Clean Softener Residue and Melted Plastic
Not all dark marks come from broken mechanical parts. Frequently, black or brown residue inside the drum stems from melted synthetic items or a heavy accumulation of fabric softener and dryer sheet wax. When dryer sheets are exposed to high heat repeatedly, chemical waxes melt onto the stainless steel or enamel drum walls. Over time, this coating traps dark lint, dirt, and dye.
When damp clothes tumble against these waxy patches, heat transfers dark, greasy smudges directly onto your clean fabrics. Items with rubberized prints, plastic zippers, or synthetic trims can also melt if dried on high heat, leaving dark residue behind.
- Ensure the dryer is unplugged before cleaning.
- Scrub the interior drum surface using a soft microfiber cloth dampened with warm water and a few drops of dish soap.
- For stubborn wax or melted rubber stains, mix a paste of three parts baking soda to one part water and scrub gently with a non-abrasive sponge.
- Wipe down the entire interior with clean, damp towels until no residue remains.
- Let the drum dry completely before running another load. Avoid using harsh chemical sprays or flammable solvents inside the machine.
3. Inspect and Swap Worn Drum Rollers and Glides
Dryer drums rely on small rubber drum rollers or plastic glide strips to spin smoothly. As these components age, rubber rollers can flatten, crack, or disintegrate into fine black rubber dust. If roller bearings seize, the drum shifts out of alignment, causing internal metal components to rub together and generate fine metallic particles.
This dark dust mixes with circulating lint inside the dryer cabinet and blows through the drum airflow, leaving speckles and dark grease spots on light clothing. Incorporating regular drum checks into your routine late-summer appliance maintenance helps catch these issues before they ruin seasonal wardrobes.
- Unplug the dryer and manually turn the empty drum by hand. Listen closely for squeaking, grinding, or a deep thumping sound.
- If the drum feels loose or wobbles excessively, the glides or rollers are worn out.
- Remove the main panel or drum to access the roller assemblies at the base.
- Check for disintegrating black rubber, metal shavings, or black dust beneath the drum floor.
- Replace worn rollers or glide strips in pairs (typically $15 to $40 per set) to maintain balanced drum support and prevent premature wear.
4. Realign or Replace Loose Drum Baffles
Drum baffles (or lifters) are the plastic or metal ridges attached to the inside drum wall that lift and tumble your clothes. If a baffle gets loose due to stripped mounting screws or cracked plastic tabs, a small space opens beneath it.
Laundry items—especially thin fabrics, drawstrings, and shirt hems—can catch in this tiny gap. As the drum rotates, trapped fabric twists tightly against the metal wall, leaving dark black scorch marks or greasy streaks where the material was squeezed under the lifter.
- Unplug the unit and inspect each interior baffle by tugging on it firmly with your hand.
- Check for cracked plastic edges, missing mounting screws, or visible gaps between the baffle base and the drum wall.
- Tighten loose mounting screws from either the inside or outside of the drum (depending on your model layout).
- If a baffle is cracked or warped, replace it with a new replacement baffle ($15 to $35).
- Never run the appliance with a missing baffle, as exposed screw holes can catch clothes and leak hot air.
5. Clear Soot from Gas Burners or Scorched Lint
If you own a gas dryer and notice dark grey or velvety soot marks on your clothes, the gas burner assembly may be burning fuel incompletely. A misaligned or dirty gas burner produces carbon soot rather than a clean blue flame. This soot circulates through the heating chamber and blows directly into the laundry drum.
In electric dryers, massive lint accumulation around the heating element can scorch into fine carbon particles, distributing black speckles over wet garments.
- Unplug the dryer and turn off the gas supply valve completely.
- Remove the lower access panel or rear exhaust duct.
- Inspect the heating chamber area for black powdery soot or charred lint buildup.
- Vacuum out all dust, lint, and debris from around the burner tube or electric heating element using a narrow hose attachment.
- If a gas dryer consistently produces soot or yellow flames, stop using the appliance immediately and contact a professional to adjust the burner air shutter.
Quick Guide to Dryer Mark Causes and DIY Solutions
| Mark Appearance | Likely Cause | Recommended Action |
|---|---|---|
| Thin black lines or streak marks | Worn or torn drum felt seal | Replace the front/rear drum felt seal kit |
| Greasy dark smudges | Melted wax, softener, or plastic | Scrub drum with baking soda and warm water |
| Black speckles or dust | Worn drum rollers or scorched lint | Clean heating cabinet; replace drum rollers |
| Twisted burn streaks on hems | Loose or cracked drum baffle | Tighten mounting screws or replace baffle |
| Fine grey velvety soot | Misaligned gas burner assembly | Vacuum heating chamber; seek pro adjustment |
When to Call a Pro
While cleaning drum residue or replacing accessible felt seals are manageable DIY tasks, certain complex dryer repairs require specialized tools and expert knowledge. If your gas burner produces heavy soot, if you suspect an electrical short in the heating circuit, or if the drum motor has seized, it is safest to call a technician. Attempting complex gas or high-voltage repairs without proper training carries fire and safety risks.
When DIY troubleshooting does not resolve the issue, True Appliance Repair can match you with a local appliance pro to evaluate your dryer safely. Diagnostic service visits typically range from $70 to $130, depending on your area and machine model. If you also notice washing machine issues like a washer leaking water, addressing both appliances together keeps your laundry room operating efficiently. You can also explore professional washer and dryer repair services for comprehensive home help.
FAQ
Can fabric softener sheets really cause black marks on clothes?
Yes. Dryer sheets contain wax-based softening agents that coat fabric fibers. When used on high heat settings, this wax can melt onto the metal drum walls, creating a dark, sticky film that transfers onto clothes during future cycles.
How do I get dryer black marks out of my clothes?
Apply a small amount of liquid dish soap or a heavy-duty laundry stain remover directly to the dark marks. Rub the fabric gently together, let it sit for 15 minutes, and wash the item in warm water. Avoid putting stained clothes back in the dryer until the mark is completely gone, as dryer heat sets stains permanently.
Why does my dryer leave black marks only on white clothes?
The marks likely occur on all clothing items, but dark streaks and soot specks are far more visible on white or light-colored fabrics. Inspect your light garments carefully after every load to spot early signs of seal wear.
How often should I clean the inside of my dryer drum?
It is good practice to inspect and wipe down your dryer drum once a month. Use a damp microfiber cloth with warm, soapy water to remove wax buildup and prevent lint from sticking to drum surfaces.