
Late summer places unique strain on home systems. High temperatures force cooling equipment to run continuously, while heavy laundry cycles from summer activities leave behind lint, mineral residue, and grime. Performing a focused round of appliance care before autumn arrives keeps your household running efficiently and prevents unexpected mid-season breakdowns.
Taking time now to inspect, clear, and adjust key components protects your machinery from avoidable wear and tear. Use this step-by-step late-summer appliance checklist to prepare your kitchen and laundry space for the cooler months ahead.
1. Vacuum Condenser Coils to Restore Cooling Efficiency
During hot summer months, your refrigerator works harder than usual to maintain food-safe temperatures. Dirt, pet hair, and household dust accumulate on the condenser coils, forcing the compressor to run longer cycles and consume excess electricity.
- Disconnect the refrigerator power cord from the wall outlet for safety.
- Locate the coils behind the bottom toe kick plate or along the rear panel.
- Use a soft brush attachment on your vacuum to gently clear away accumulated dust and debris.
- Sweep away loose dust on the floor around the base of the cabinet before restoring power.
Clearing these coils improves heat release, cuts power usage, and eases stress on internal components. For a deeper step-by-step breakdown on this specific task, review our guide on how to clean refrigerator coils.
2. Deep Clean Dryer Exhaust Vent to Eliminate Fire Hazards
Heavy summer laundry loads—from beach towels to lightweight bedding—fill your dryer exhaust line with compressed lint. Trapped lint restricts airflow, extends drying times, and creates a primary ignition hazard when heating elements reach full temperature.
- Unplug the electric cord or turn off the power breaker. For gas dryers, turn the gas supply valve to the off position.
- Pull the dryer away from the wall and disconnect the flexible transition duct from the back of the unit.
- Insert a flexible dryer vent cleaning brush into the wall duct and rotate it to scrape loose lint from the pipe walls.
- Vacuum out extracted lint from inside the duct, the rear dryer exhaust tube, and the exterior exhaust hood outside your home.
- Reconnect the duct securely with metal clamps before restoring power or gas supply.
3. Flush the Dishwasher Filter and Spray Arms
Summer entertaining and quick meals often lead to food debris bypassing initial rinses. Over time, grease, seeds, and mineral deposits choke the fine mesh filter screen and clog the tiny jet holes in the rotating spray arms.
- Remove the bottom rack to access the tub floor.
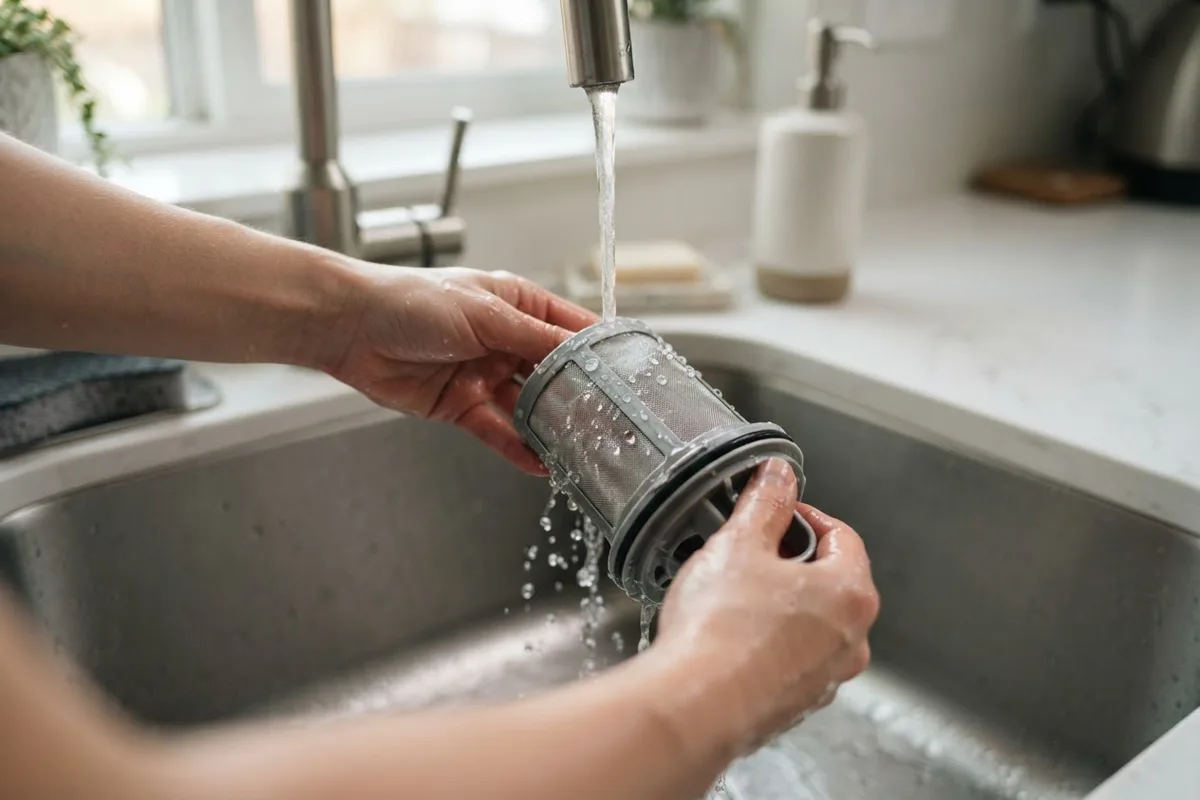
- Twist and lift out the cylindrical filter assembly located beneath the bottom spray arm.
- Wash the filter screen under warm running water using a soft nylon brush and mild dish soap.
- Unclip the upper and lower spray arms, then clear trapped mineral deposits from the jet openings using a wooden toothpick.
- Reassemble all components, ensuring the filter locks firmly back into position.
Regular filter cleaning prevents standing water in the tub and ensures full wash pressure reaches the top rack.
4. Inspect and Clean the Washing Machine Drain Pump Filter
Front-loading and many modern top-loading washers feature a drain pump filter that traps coins, stray fibers, and small debris. A clogged pump filter causes slow draining, foul odors, and excessive wash tub vibration during spin cycles.
- Unplug the washing machine from the wall electrical outlet.
- Open the small access door located on the front lower cabinet panel.
- Place a shallow pan and towel directly underneath the filter door to catch trapped water.
- Unscrew the pump filter handle counterclockwise and pull it straight out.
- Remove accumulated debris, wash the filter under hot water, wipe the housing cavity with a microfiber cloth, and screw the filter back in tight.
Addressing drainage restrictions protects the drain pump motor from burnout. If your machine experiences severe shaking after cleaning, check our guide on why your washing machine is shaking violently.
5. Freshen and Disinfect the Garbage Disposal Blades
Warm late-summer kitchen temperatures accelerate bacterial growth and odor production inside garbage disposal chambers. Scraps from summer produce leave sticky residue on the grinding components and undersides of the rubber splash guard.
- Turn off power to the disposal at the main circuit breaker panel.
- Scrub the underside of the rubber sink baffle using an old toothbrush dipped in warm soapy water.
- Restore power, turn on cold water at full flow, and turn on the disposal unit.
- Drop two cups of ice cubes and one cup of coarse rock salt down the drain to scrape food buildup off the impellers.
- Finish by grinding several citrus peels to sanitize the chamber and leave a fresh scent.
6. Inspect Water Supply Hoses for Swelling or Cracks
Rubber supply hoses connected to your washing machine and dishwasher experience continuous water pressure. High summer water usage speeds up material degradation, increasing the risk of sudden hose bursts and severe home flooding.
- Turn off the water supply shutoff valves behind the appliance.
- Examine the full length of each hose for visible blisters, hairline cracks, corrosion at the metal fittings, or soft spots.
- Wipe down connections to ensure no slow leaks exist around the brass threads.
- Plan to replace traditional rubber hoses with braided stainless steel steel-reinforced hoses every five years.
Catching small weakness in water lines prevents thousands of dollars in water damage repairs to floors and subflooring.
7. Clean Range Hood Grease Filters to Prevent Oven Flares
Summer cooking releases vaporized fats and oils into your kitchen air. When your range hood exhaust filter becomes saturated with grease, airflow drops and combustible residue drips down onto warm stovetops.
- Slide or unhook the metal mesh filters from the underside of the range hood vent housing.
- Fill a sink with boiling water, half a cup of baking soda, and a generous squirt of degreasing dish soap.
- Submerge the mesh filters completely and allow them to soak for 15 minutes.
- Scrub remaining grease with a non-abrasive scrub sponge, rinse thoroughly with hot water, and dry completely before reinstalling.
Maintaining clean grease filters preserves indoor air quality and keeps your ventilation system operating at peak performance.
8. Test Oven Temperature Accuracy Before Holiday Baking
Before autumn baking and holiday meal preparation begin, verify that your oven reaches and maintains precise temperatures. Heating elements can degrade slowly over time without failing completely, leading to undercooked meals or unevenly browned baked goods.
- Place an inexpensive, standalone analog oven thermometer in the center of the middle oven rack.
- Set the oven to bake at 350°F (177°C) and allow it to preheat fully for 20 minutes.
- Check the internal thermometer reading through the door glass without opening the oven door.
- Take three readings spaced 15 minutes apart to calculate the average temperature.
If the average temperature varies by more than 15 degrees from your set point, recalibrate the control board. For step-by-step instructions on adjusting your settings, follow our guide on how to calibrate oven temperature.
Late-Summer Maintenance Quick-Reference Guide
| Appliance | Core Maintenance Task | Ideal Frequency | Primary Benefit |
|---|---|---|---|
| Refrigerator | Vacuum condenser coils & clean drain pan | Twice per year | Lowers electricity usage & extends compressor life |
| Clothes Dryer | Clear exhaust duct & vacuum lint housing | Every 6 to 12 months | Prevents fire hazards & speeds up drying times |
| Dishwasher | Rinse cylindrical filter & clear spray jets | Monthly | Eliminates tub odor & restores washing power |
| Washing Machine | Clean drain pump filter & inspect supply lines | Every 3 months | Prevents water leaks & avoids pump drainage failures |
| Garbage Disposal | Grind ice/salt mix & clean rubber baffle | Monthly | Removes stubborn grease buildup & odor |
| Range Hood | Soak metal mesh filters in degreasing solution | Every 2 to 3 months | Reduces kitchen grease accumulation & flare risks |
When to Call a Pro
While home maintenance tasks like clearing filters, vacuuming dust, and flushing drain lines are safe DIY projects, complex mechanical issues require professional attention. Always disconnect electrical power and shut off water or gas shutoff valves before performing any hands-on inspection.
If your routine maintenance reveals gas leaks, refrigerant loss, unusual burning smells, continuous electrical shorting, or damaged internal wiring, stop immediately. Work involving sealed refrigeration systems, gas lines, or main circuit boards demands technical skills and safety gear.
When a maintenance check uncovers serious underlying mechanical trouble, True Appliance Repair can connect you with a qualified local technician in your area. Typical service call costs for professional diagnoses generally range from $100 to $250, depending on your region and machine model.
FAQ
How often should home appliances undergo deep maintenance?
Most major kitchen and laundry appliances benefit from quick monthly filter cleanings and thorough biannual maintenance checks. Completing a maintenance session in late summer and late winter helps prepare equipment for extreme seasonal temperature shifts and heavy usage demands.
Can routine appliance maintenance really lower energy bills?
Yes. Dirty refrigerator coils, clogged dryer vents, and blocked dishwasher filters force internal motors, heating elements, and pumps to run longer to achieve normal results. Keeping these systems clean optimizes airflow and heat exchange, reducing monthly utility costs noticeably.
How do I know if my water supply hoses need immediate replacement?
Inspect hoses for visible bulges, cracking along outer jackets, rust at metal couplings, or moisture dripping from connection points. If your rubber hoses are over five years old, replacing them with braided stainless steel hoses is a low-cost step to protect against home flooding.
What safety steps should I take before cleaning my appliances?
Always unplug the appliance from its electrical outlet or shut off the circuit breaker in your service panel. For gas appliances, turn the local gas valve to the off position before moving units or inspecting rear connections. Never work on live electrical components or gas lines yourself.