
When your favorite chocolate chip cookies come out burnt on the edges while remaining raw in the center, or your Sunday roast takes an extra hour to cook, your oven's internal calibration is likely off. Over years of weekly heating and cooling cycles, thermal expansion and internal electrical component drift can cause an oven temperature to deviate from its factory settings by 15 to 50 degrees Fahrenheit.
Recalibrating your range or wall oven brings the actual internal cavity temperature back into harmony with what you select on the control panel. Fortunately, you do not need complex engineering tools or specialized mechanical experience to fix this common kitchen headache. By using a basic mechanical oven thermometer and a few straightforward diagnostic steps, you can test, adjust, and restore your oven to precise baking heat in under an hour.
Before performing any hands-on testing, maintenance, or adjustments on your range, safety must come first. Always unplug electric ovens from the wall outlet or switch off the dedicated circuit breaker in your main electrical panel before accessing internal components. For gas appliances, shut off the gas supply shut-off valve behind the unit before removing panels, inspecting wires, or handling mechanical parts. If you ever detect a gas odor, immediately stop work, leave the area, and contact your local gas utility company.
1. Test Actual Temp with an Oven Thermometer
Never rely on your oven's built-in digital display or pointer knob to tell you if the temperature is accurate. Internal display boards only show what temperature the system is aiming for, not the real heat circulating inside the cooking cavity. Sensors and mechanical thermostats degrade slowly over time, giving inaccurate readings to the main board while the actual cavity stays too hot or cold.
To establish an accurate baseline, purchase a simple mechanical oven thermometer made of stainless steel with a clear, easy-to-read dial. Hang or stand the thermometer directly in the geometric center of the middle oven rack. Avoid placing it near the back wall, side panels, or directly over a heating element, as localized radiant heat will distort your test reading.
Close the door and turn your oven to 350°F (177°C). Allow the oven to preheat completely, plus an additional 20 minutes for the internal cavity walls and racks to absorb and equalize heat distribution. Once the heat stabilizes, look through the clean door glass to read the thermometer dial. Avoid opening the door, as doing so releases up to 50 degrees of heat instantly and invalidates your test.
Note the temperature reading over three separate cycle phases (when the heating elements or gas burners cycle on and off). Add those three temperature readings together and divide by three to determine your true average cavity temperature. For example, if your readings across three cycles are 320°F, 330°F, and 325°F, your true average is 325°F. Since your oven was set to 350°F, your calibration is running 25 degrees too cold and requires offset adjustment.
2. Adjust Temperature Offset on Digital Controls
Most modern electric and gas ranges equipped with digital touchpad controls feature a built-in electronic calibration feature. This function allows homeowners to adjust the display offset by up to 35 degrees Fahrenheit higher or lower without touching internal wiring or replacing expensive electronic parts.
To access this calibration mode, consult your appliance user manual, or try the standard programming sequence used by major appliance brands:
- Ensure the oven is turned off and the control display shows the standard clock time.
- Press and hold the Bake button (or Settings/Tools on newer touchscreen models) for 5 to 10 seconds until the clock display changes to show "00" or "0".
- Use the temp arrow keys, numeric keypad, or temperature control knob to enter the required adjustment offset. For instance, if your central thermometer read an average of 325°F when set to 350°F, enter a +25 degree offset.
- If your oven was running 20 degrees too hot (370°F actual reading), enter a -20 degree offset.
- Press Start, Bake, or Enter to lock the new offset into the electronic control board memory.
After setting the new offset, run another 350°F test cycle with your mechanical thermometer on the middle rack to confirm that the oven cavity now reaches the intended target temperature.
3. Calibrate Manual Oven Thermostat Knobs
If you own a classic range with physical control knobs rather than a digital touchpad, temperature calibration is handled mechanically directly behind the oven thermostat dial. These mechanical thermostats use a small calibration plate or internal adjusting screw to change the engagement point of the contact points.
- Gently pull the main temperature control knob straight off the control shaft.
- Turn the knob over and inspect the back side. You will typically see a small metal calibration plate secured by one or two small set screws.
- Loosen the set screws slightly using a small screwdriver, being careful not to remove them entirely.
- Rotate the center pointer ring toward Cooler or Hotter (or toward the + and - indicators marked on the plastic). Moving the pointer by one notch or notch mark typically alters the cooking temperature by roughly 10 degrees Fahrenheit.
- Tighten the set screws back down securely to lock the plate in place, then push the control knob back onto the shaft.
If your dial knob has a smooth back with no set screws, it likely utilizes a sealed thermostat shaft located inside the control console. You can calibrate this style by inserting a thin jeweler's screwdriver into the hollow center of the metal shaft. Turn the internal screw clockwise to lower the heat setting or counterclockwise to raise it.
4. Test and Replace the Oven Temperature Sensor
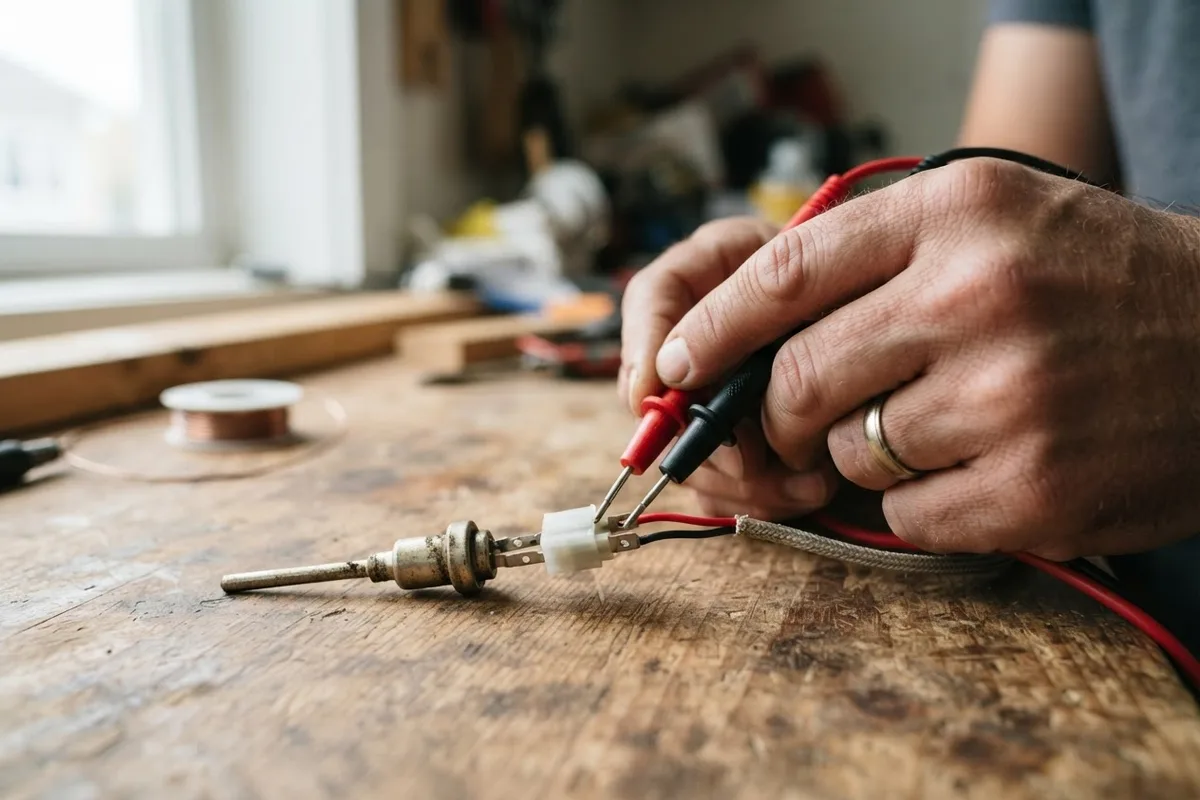
In modern electronic ranges, a slender metal probe protruding from the top rear corner of the oven cavity acts as the resistance temperature detector (RTD sensor). If this probe is failing or heavily coated in grease and burnt food residue, adjusting the control board offset will not fix your temperature problems because the sensor sends erratic electrical resistance signals to the control board.
If your food bakes unevenly or burns continuously despite offset adjustments, you should test the temperature sensor for proper resistance using a digital multimeter:
- Disconnect main power to the range at the breaker box or unplug the power cord.
- Open the oven door and locate the sensor probe protruding from the upper back wall.
- Remove the mounting screws holding the probe bracket to the wall panel.
- Pull the sensor forward carefully until the internal wire harness connector passes through the wall hole.
- Unplug the plastic wire harness connector.
- Set your digital multimeter to the ohms (Ω) setting at the 2k range scale.
- Contact the multimeter test leads to the two metal terminals inside the sensor plug.
At standard room temperature (approximately 70°F to 75°F), a healthy oven sensor probe should measure between 1,050 and 1,100 ohms of resistance. If your meter reading is significantly lower (below 900 ohms), higher (above 1,200 ohms), or shows open resistance, the sensor probe is defective and must be replaced. Replacement probes typically cost between $25 and $60 depending on your model and connect easily to the existing wire harness.
If you notice uneven browning or hotspots alongside calibration issues, review our troubleshooting guide on why your oven is baking unevenly to resolve airflow and rack positioning problems.
5. Inspect Door Gaskets and Seal Integrity
Sometimes an oven cavity is not actually out of electrical calibration—it is simply losing heat faster than the baking element or gas burner can supply it. A damaged, torn, or hardened door gasket allows hot air to escape continuously into your kitchen, causing the heating elements to cycle on too frequently and scorching food near the bottom or rear panel.
To inspect your oven door seal, perform the dollar bill test: open the oven door, place a dollar bill across the rubber or braided fiberglass seal, and close the door tightly. Pull the bill outward gently. If it slides out easily without noticeable resistance, the door gasket has lost its elasticity and seal strength.
Replacing a worn door gasket is a quick DIY repair: pull the old gasket out of its mounting holes or retention channel around the door frame, clean the perimeter with warm water and dish soap, and press the new replacement seal firmly into place. Maintaining tight heat retention also improves kitchen energy efficiency; explore our practical list of 10 home appliance care habits to cut energy bills for more effective ways to lower your monthly utility costs.
| Calibration Symptom | Probable Root Cause | Recommended Action |
|---|---|---|
| Food undercooked by 15-30° | Normal thermostat drift | Adjust display control offset (+15 to +30) |
| Food scorched outside, raw inside | Sensor probe failure or worn door gasket | Test RTD sensor with multimeter; replace gasket |
| Temperature swings by >70° | Defective sensor or sticky control relay | Replace RTD temp sensor probe |
| Physical knob value mismatch | Knob calibration plate slipped | Loosen set screws on knob back and adjust pointer |
When to Call a Pro
While adjusting digital offsets, calibrating manual knobs, or replacing an accessible temperature sensor probe are straightforward DIY projects, certain complex range issues require advanced diagnostic tools and professional expertise.
You should stop and contact a qualified technician if you experience any of the following situations:
- Gas system malfunctions: Strong gas smells, weak igniter glow, delayed gas ignition, or yellow burner flames on gas ranges.
- Electronic control board failures: The digital control touchpad fails to respond, displays unresolvable error codes (such as F30 or E15), or fails to send voltage to the bake element.
- High-voltage wiring faults: Scorched wire harnesses, blown internal fuses, or shorted heating elements inside wall cavities.
If manual calibration steps do not resolve your oven's temperature issues, True Appliance Repair can connect you with a skilled local technician to inspect electronic control boards, gas igniters, and internal wiring safely.
FAQ
How often should I calibrate my oven temperature?
It is good practice to test your oven temperature with a mechanical thermometer once every year, or whenever you notice recipes consistently taking longer or baking faster than stated recipe times. Major holiday baking seasons are ideal times to verify temperature accuracy.
Can I calibrate my oven without a thermometer?
Technically you can use the visual brownness of baked goods like canned biscuits to gauge heat, but this method is subjective and inaccurate. A simple $10 stainless steel mechanical oven thermometer is required to calculate exact degree offsets.
What if my oven runs too hot on convection mode?
Most modern convection ovens automatically reduce the set temperature by 25°F when convection bake is activated to compensate for fan-forced heat transfer. Check your owner's manual to see if automatic conversion is active before altering your display offset.
How much does it cost to fix an oven temperature problem?
If performed as a DIY calibration, the process costs nothing beyond purchasing an inexpensive thermometer. Replacement temperature sensor probes cost between $25 and $60 for parts. If a main control board or gas valve requires replacement, professional repair costs typically range from $150 to $350 depending on model and local labor rates.