
Nothing derails dinner prep or holiday baking faster than preheating your range only to find the cavity stone cold while the clock keeps glowing. Most no-heat problems trace back to a half-tripped breaker, an accidental control setting, or a worn heating part you can spot in minutes. Follow these six safe DIY checks to figure out why your electric oven is not heating—and if you actually have a gas oven with an electric clock, start with our guide on signs an oven igniter is failing instead.
1. Reset the Double-Pole 240V Circuit Breaker
Most US electric ranges rely on a 240-volt circuit made of two separate 120-volt power legs. Your clock, keypad, and oven light only need one 120-volt leg to work, whereas the bake and broil elements require the full 240 volts. If half of the double-pole breaker trips, the display stays lit while the oven stays completely cold.
- Locate your home's main electrical panel and find the double-pole breaker labeled "Range," "Stove," or "Oven" (usually 40 or 50 amps).
- Switch the handle all the way to the OFF position, even if it still appears to be on.
- Wait 60 seconds so the oven's control board fully resets, then flip the breaker firmly back to ON.
- Set the oven to 350°F for five minutes to see if heat returns.
If the breaker trips again right away, leave it off and stop. Never open the electrical panel cover or keep resetting a tripping breaker—that signals a wiring fault that needs a pro.
2. Check Control Lock, Delay Bake, and Demo Mode
Wiping down a glass touch panel before busy cooking weekends makes it surprisingly easy to trigger a lockout feature. Several built-in modes keep the display active—and may even show "Preheating"—while intentionally blocking power to the heating elements.
- Look closely at the display for icons or text reading LOC, Lock, Delay, Sabbath, or Demo.
- Press and hold the Cancel, Clear, or Control Lock pad for three to five seconds to clear an accidental lock.
- Confirm that Delay Start is not active with a future start time holding back the bake cycle.
- Check your model's manual for the specific button combination (often holding Bake and Broil together) to exit Showroom or Demo mode.
Once the display clears, press Bake, choose 350°F, and make sure you press Start—many digital ranges time out quietly if Start is missed.
3. Inspect the Bake Element for Blisters or Breaks
The bottom bake element does the heavy lifting every time you roast or bake, and over years of heating and cooling, the metal sheath can burn through internally. A quick visual inspection takes two minutes and requires no tools.
- Make sure the oven is completely cool, then switch the range breaker OFF at your electrical panel (or unplug a freestanding range) before reaching inside.
- Pull out the metal oven racks so you have a clear view of the oven floor.
- Shine a flashlight along the entire black tubular bake element, checking for blisters, bubbles, dark burn spots, pitting, or a visible split.
- Inspect the rear mounting bracket where the element enters the back wall for scorch marks or loose screws.
If your range has a smooth, solid floor with a hidden bake element underneath, skip direct inspection—reaching it requires removing panels near high-voltage wiring. Any visibly blistered or broken exposed element must be replaced before you bake again.
4. Test the Broil Element to Isolate the Fault
Testing the upper broil element is a fast, hands-off diagnostic step that narrows down whether you have a single bad part or a broader power issue. Because bake and broil share the same 240-volt supply but use different coils and control relays, comparing them reveals a lot.
- Confirm the oven cavity is empty, close the door, and flip the circuit breaker back ON.
- Select Broil on high and press Start.
- Stand back and watch the top element through the oven door window for two to three minutes—never touch the element to check for warmth.
- Turn Broil off as soon as you see an even orange glow.
If the broiler glows hot while Bake stays dead, your 240-volt power and main thermal fuse are likely fine, pointing directly to a failed bake element or bad bake relay. If neither element warms up at all, suspect the power supply, a blown thermal fuse, or the main control board.
5. Check the Oven Temperature Sensor Probe
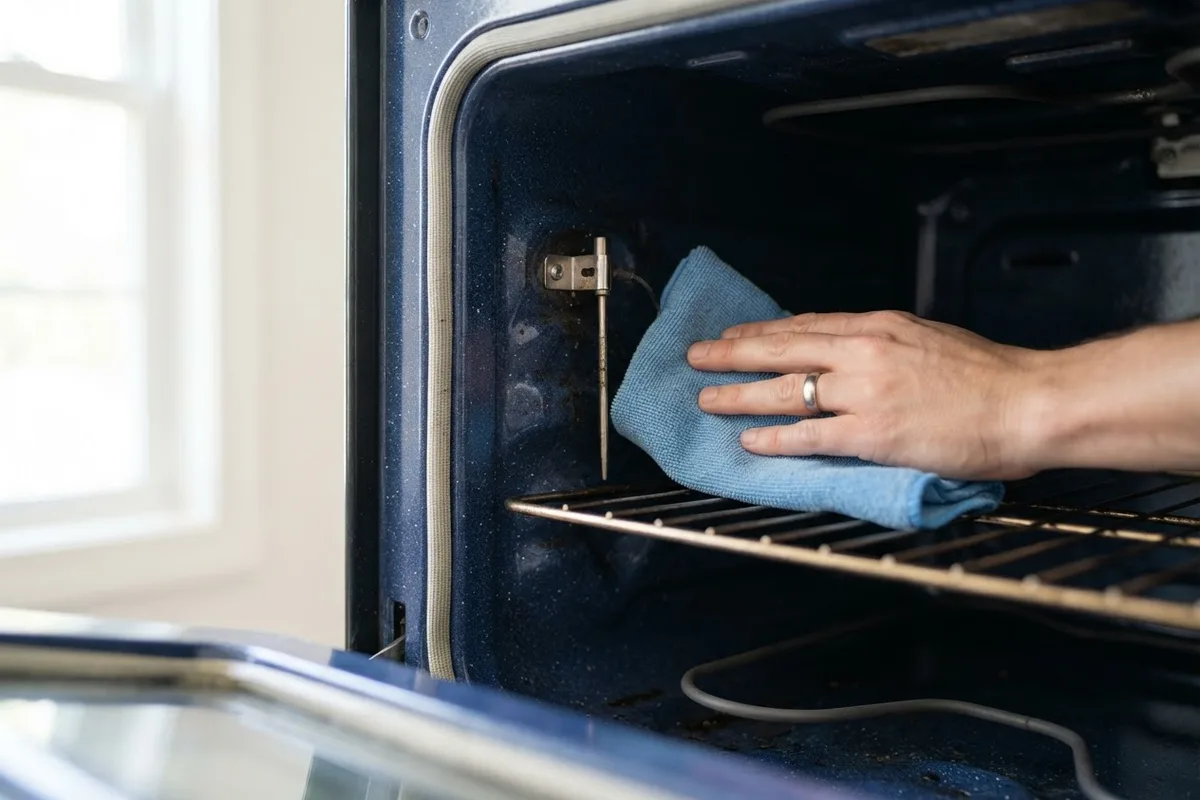
Tucked near the upper back corner of the oven cavity is a pencil-thin metal rod called the temperature sensor. It measures internal heat and tells the control board when to cycle power on and off. If the sensor gets knocked crooked, coated in heavy grease, or fails open, the oven may refuse to heat or shut down early.
- Shut power OFF at the circuit breaker and let the cavity cool completely.
- Shine a flashlight on the upper back wall to locate the slim metal probe.
- Verify that the probe sits straight and is not bent against the metal oven wall, which skews temperature readings.
- Gently wipe away baked-on grime with a dry microfiber cloth—never spray liquid cleaner onto the probe or tug on it.
If your oven warms up briefly and then quits mid-recipe instead of staying completely cold, check our guide on why an oven shuts off mid-bake for next steps.
6. Rule Out a Blown Thermal Fuse or Control Relay
Did your electric oven stop heating right after a high-heat self-clean cycle? Self-cleaning pushes cavity temperatures past 800°F, which frequently trips a one-time safety device called a thermal fuse. Once blown, that fuse permanently cuts power to the heating elements to prevent overheating.
- Think back to your last baking or cleaning session: a sudden no-heat failure right after self-clean strongly points to a blown thermal fuse.
- Listen near the control panel when you press Bake and Start; a faint click means the relay tried to close, while silence can indicate a bad control board.
- Sniff near the rear vents with power off for any sharp, burnt-plastic odor from a scorched wire harness.
- Skip self-clean cycles right before big holiday meals—use a gentle baking soda paste clean instead to avoid stressing internal safety parts.
Because thermal fuses and control boards sit behind the rear panel alongside 240-volt terminals, leave disassembly and multimeter testing to an appliance technician.
Quick-Reference Symptom & Repair Cost Guide
Use this chart to match what you observed with the most likely cause and broad US repair ranges (actual pricing varies by area and model).
| What You See | Most Likely Cause | Safe DIY or Call a Pro? | Typical US Pro Cost |
|---|---|---|---|
| Clock works, bake & broil both cold | Half-tripped 240V breaker | DIY breaker reset; pro if it re-trips | $125–$250 (if outlet/wiring) |
| Display active, "LOC" or "Demo" shown | Control lock or Demo mode | DIY button reset | $0 |
| Broil heats, bake stays cold | Burned-out bake element | Visual check DIY; pro to replace | $150–$300 |
| Neither heats after self-clean | Blown thermal fuse | Call a pro (rear panel & 240V) | $150–$275 |
| Error code (F3/F30) & no heat | Faulty temperature sensor | Visual check DIY; pro to test/swap | $125–$250 |
| Clicking/silence, burnt panel smell | Failed electronic control board | Call a pro | $250–$500+ |
When to Call a Pro
Resetting a breaker, clearing a locked display, and visually inspecting an exposed bake element are safe first steps for any homeowner. Beyond those surface checks, electric ranges run on 240-volt power—twice the voltage of a standard wall outlet—and have sharp sheet-metal panels that make internal repairs risky without proper testing equipment.
Stop and bring in a technician if your breaker trips more than once, you smell melting plastic, your range has a hidden bake element, or both bake and broil fail to heat after a breaker reset. Call an electrician directly if the wall outlet looks scorched or the breaker itself feels loose or hot.
Before paying for a major control board replacement on a range older than 10 to 12 years, compare the repair quote against a replacement unit. When you need hands-on diagnosis, True Appliance Repair can match you with a local oven and stove repair pro who can test the elements, thermal fuse, and control board safely.
FAQ
Why do my electric stove burners work when the oven won't heat?
Surface burners and the oven cavity run through separate switches and heating circuits, even though they share the same 240-volt power cord. When the stovetop works normally but the oven stays cold, your main power supply is usually fine. Focus your checks on the bake element, oven thermal fuse, temperature sensor, or electronic control board.
Can an electric oven lose heat without tripping the breaker?
Yes, and it is one of the most common failure patterns. A burned-out bake element, a blown internal thermal fuse, or a failed relay on the control board can cut heat completely while leaving the breaker on and the clock glowing. Checking whether the broiler still glows orange is the fastest way to narrow down the cause.
How much does it cost to fix an electric oven that won't heat?
In the US, most electric oven no-heat repairs fall between $125 and $350 for parts and labor, though exact costs vary by area and model. Swapping an exposed bake element or temperature sensor sits near the lower end, while replacing a hidden bake element or electronic control board can reach $300 to $500 or more.
Is it safe to keep using the broiler if the bake element is broken?
No—stop using the oven cavity until the damaged bake element is inspected and replaced. A cracked or blistered element can short against the metal oven liner, throw sparks, or damage the main control board even when you only run the broiler. Keep the oven off until a technician resolves the fault.