
A jammed garbage disposal brings kitchen cleanup to an abrupt halt. When you flip the wall switch and hear a low, dull hum instead of the usual grinding roar—or hear nothing at all—the internal flywheel or impellers have locked against foreign debris.
Forcing the motor to run while stuck generates intense heat, trips your kitchen electrical breaker, and can permanently burn out the motor windings. You can free most jams in under fifteen minutes with basic household tools and zero harsh chemicals. Work through these five safe steps to restore normal operation.
Cut Power at the Wall and Breaker
Safety is the absolute first step whenever you troubleshoot a kitchen disposal. A machine that appears unresponsive can suddenly jerk to life if a blockage shifts while the motor receives voltage. Never reach into a disposal with your hands, and never work on the unit while it remains connected to power.
- Locate the wall switch above your sink and ensure it sits firmly in the OFF position.
- Open the sink cabinet below and follow the power cord from the bottom of the disposal housing to the wall outlet. Unplug the unit completely.
- If your garbage disposal is direct-wired through flexible metal conduit rather than plugged into a standard wall receptacle, walk to your main household electrical service panel and switch off the dedicated kitchen circuit breaker.
- Return to the sink and flip the wall switch on to confirm there is zero power flowing to the unit, then switch it back off.
- Keep a bright flashlight handy under the sink so you can inspect the unit safely without guessing.
Taking sixty seconds to disconnect both the plug and the circuit ensures you can work on the mechanical components underneath without any accidental motor engagement.
Turn the Bottom Hex Socket Manually
Most modern residential continuous-feed disposals feature a small, hexagonal socket centered on the very bottom of the exterior metal housing. This socket connects directly to the drive shaft, allowing you to manually rotate the shredder plate in both directions without reaching into the grind chamber.
- Clear out cleaning supplies beneath your sink to create a clean, accessible workspace.
- Look up at the underside of the disposal cylinder using a flashlight. In the center of the bottom plate, you will see a small, recessed 1/4-inch hex opening.
- Grab a standard 1/4-inch Allen wrench (hex key). Many units ship with a small silver wrench taped to the side or manual, but any standard hardware store hex key works.
- Insert the short end of the Allen wrench firmly into the hex socket.
- Apply firm, steady rotational pressure back and forth. You will likely feel stiff resistance at first. Rock the wrench clockwise and counterclockwise repeatedly until the shaft makes a complete 360-degree rotation without catching.
Once the wrench spins smoothly in full circles, you have successfully dislodged the primary mechanical bind holding the flywheel in place.
Free Stuck Impellers from Above
If your unit lacks a bottom hex port, or if the Allen wrench cannot budge the shaft from below, you can apply top-down leverage directly against the rotating shredder ring. Never use a metal crowbar, metal screwdriver, or thin utensil for this step, as metal tools can chip the cast impellers or puncture the stainless steel grind chamber.
- Confirm the appliance remains completely unplugged from electrical power.
- Shine your flashlight directly down the sink drain opening, peering past the flexible rubber splash guard (baffle).
- Take a sturdy wooden implement, such as a thick wooden broom handle, a heavy wooden rolling pin, or a clean hardwood dowel.
- Insert the wooden handle down through the sink opening until the blunt tip rests firmly against the edge of one of the raised metal impeller lugs on the shredder plate.
- Grip the top of the wooden handle and use the rim of the sink basin as a fulcrum to apply moderate, steady leverage against the impeller.
- Work the plate counterclockwise, then clockwise. You will feel a sudden snap or give as the trapped object slips out from the wedge between the rotating plate and the stationary shredder wall.
Testing the plate with gentle wooden leverage allows you to apply significantly more torque than an Allen wrench without stripping any bottom drive gears.
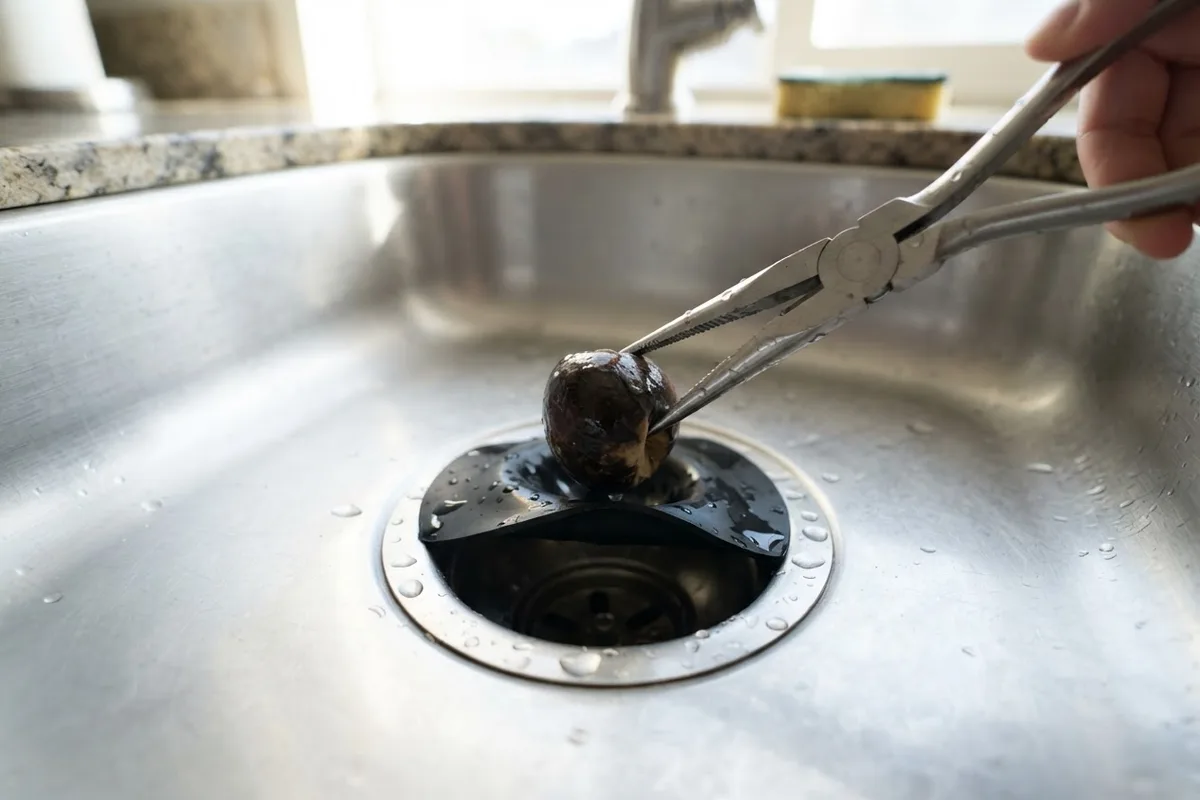
Extract Debris with Tongs or Pliers
Breaking the flywheel loose is only half the battle. If the hard object that caused the jam remains inside the grinding hopper, the disposal will seize up again the second you run water and flip the power switch. You must extract the physical obstruction before restoring power.
- Direct your flashlight down through the rubber baffle to locate the loosened object.
- Common culprits include fruit pits, chicken bones, metal bottle caps, popcorn kernels, twist ties, and small utensils that accidentally slipped past the sink strainer.
- Take a pair of long needle-nose pliers, kitchen locking tongs, or a mechanical pickup claw and reach down into the chamber.
- Grasp the foreign object firmly and pull it straight out through the rubber flaps.
- While looking inside, inspect the outer perimeter of the grind ring for fibrous materials. Celery stalks, corn husks, onion skins, and artichoke leaves frequently wind tightly around the impeller pivots, preventing them from swinging freely. Snip and remove any stubborn fibers using your pliers.
| Jam Culprit | Typical Symptom | Recommended Clearing Method |
|---|---|---|
| Fruit Pits / Olive Stones | Sudden loud clunk, immediate motor lock | Bottom hex wrench reverse rotation, then extract with pliers |
| Small Utensils / Coins | Metallic grinding screech followed by dead stop | Wooden handle leverage from above, magnetic or plier retrieval |
| Fibrous Vegetables (Celery/Husks) | Slow motor drag, heavy burning odor, hum | Clear drain baffle manually, pluck fibers from swivel lugs |
| Glass Shards / Ceramic Chips | Scraping noise, intermittent jam | Shop vacuum nozzle over sink opening to lift fine fragments |
| Hardened Animal Grease / Starch | Slow drainage, sluggish flywheel spin | Manual hex turn followed by warm water flush (never boiling) |
Taking time to pull every piece of debris out guarantees your sink will not lock up the moment you finish your repair.
Press the Red Thermal Reset Button
When a disposal motor encounters a physical blockage while energized, its built-in internal thermal overload switch trips to protect the motor from melting its electrical insulation. Once you have cleared the jam and pulled out the debris, you must manually reset this safety mechanism.
- Leave the wall switch in the OFF position.
- Reach under the sink to the lower rim or bottom exterior base of the disposal housing.
- Locate the small red square or round button. If the unit overheated during the jam, this red button will be popped out by roughly a quarter of an inch.
- If the disposal housing feels hot to the touch, wait ten to fifteen minutes for the internal thermal sensor to cool down completely.
- Press the red button firmly inward until you feel a distinct mechanical click. If it refuses to stay recessed, give the unit another ten minutes of cooling time before pressing it again.
- Plug the electrical power cord back into the wall receptacle, or switch your electrical service panel breaker back to ON.
- Turn on the cold water faucet to a steady, rapid stream. Flip the wall switch on. The disposal should run smoothly with its normal consistent hum.
Always let cold tap water flow for thirty to forty-five seconds after unjamming to rinse away fine pulverized residue and cool down the motor housing.
When to Call a Pro
Most garbage disposal jams surrender to an Allen wrench and needle-nose pliers in under ten minutes. However, mechanical components do eventually suffer fatal internal wear. If your disposal continues to trip the breaker immediately after clearing all debris, the motor windings have likely suffered an electrical short.
Similarly, if water begins dripping from the bottom reset button, the internal shaft seal has deteriorated. Water passing directly through the electric motor assembly creates a severe hazard and cannot be repaired with a simple seal swap; the disposal must be replaced. A typical garbage disposal replacement in the United States ranges from $175 to $450 for standard installations, though pricing varies by area, plumbing layout, and motor horsepower.
If you run into stubborn electrical issues, corroded drain flanges, or persistent leaks under your kitchen sink, an experienced technician can evaluate your setup safely. True Appliance Repair connects you with a trusted local professional who can inspect your plumbing connections and get your kitchen running again.
Planning ahead before big family gatherings is equally important. Review our Holiday Appliance Checklist: 6 Must-Do DIY Steps to keep your entire kitchen operating at peak performance during heavy cooking seasons, or contact True Appliance Repair when you need prompt assistance.
FAQ
Why does my garbage disposal hum but refuse to spin?
A distinct humming sound means electric current reaches the motor windings, but a mechanical bind is stopping the flywheel from turning. Turn the wall switch off immediately. Leaving a humming disposal on will burn out the motor stator or trip the electrical breaker within seconds. Use a bottom hex wrench to manually unstick the rotating plate.
Can I pour chemical drain cleaner into a jammed disposal?
No, never pour chemical lye or acid drain openers into a jammed garbage disposal. These caustic chemicals will not dissolve hard objects like bones, pits, or silverware. Worse, the caustic liquid will sit stagnant in the sink basin, creating a hazardous splash risk to your eyes and skin when you attempt manual mechanical repairs. Chemical cleaners also eat away at internal rubber shaft seals.
What size Allen wrench fits in the bottom of a garbage disposal?
The vast majority of standard disposals feature a 1/4-inch hex socket located directly in the center of the bottom baseplate. If you do not own the small wrench that came in the original packaging, any standard 1/4-inch Allen key from an inexpensive household tool set will fit the socket.
Why does my disposal jam repeatedly on soft food waste?
If your unit regularly seizes on everyday vegetable scraps, the swivel impellers mounted to the grind plate are likely frozen with mineral scale, rust, or compacted grease. When impellers cannot pivot, food jams tightly between the lug and the shredder ring. Clean the chamber thoroughly with ice cubes and rock salt to restore free movement to the internal swivel lugs.