
A gas stove burner that refuses to light can bring dinner prep to a sudden halt. Whether you hear a clicking sound with no flame or complete silence when you turn the dial, the underlying cause is often something simple you can resolve in minutes.
Most burner ignition issues stem from food residue, moisture from a recent cleaning, or a misaligned burner cap. Before you assume you need a brand-new range, walk through these five straightforward troubleshooting steps to restore your cooktop safely.
Unclog the Burner Ports and Pilot Channel
Over time, boiled-over sauces, grease mist, and stray crumbs settle into the tiny openings (burner ports) around the burner head. If the port directly adjacent to the spark igniter is blocked, the gas cannot reach the spark to ignite.
- Shut off power and gas: Turn all burner knobs to the off position. Unplug the range power cord or switch off the dedicated circuit breaker. For safety, shut off the gas supply valve behind the unit before handling components.
- Remove the grates and caps: Lift off the cast-iron grates and the round burner cap sitting on top of the burner head.
- Clear the tiny openings: Inspect the ring of small holes around the burner base. Use a straightened metal paperclip, a wooden toothpick, or a sewing needle to gently clear out baked-on grease and debris from each port. Avoid using oversized wires or drill bits that could widen the soft metal orifices.
- Vacuum loose debris: Use a handheld vacuum with a narrow brush attachment to lift away the dislodged crumbs.
- Reassemble and test: Place the burner cap back down securely, restore power and gas, and turn the dial to ignite.
Dry Out Damp Spark Igniters After Cleaning
If your gas stove burner stopped lighting right after you wiped down the cooktop or tackled a spill, excess moisture is the most probable culprit. A wet ceramic igniter electrode cannot produce a strong spark because the moisture grounds out the electrical charge.
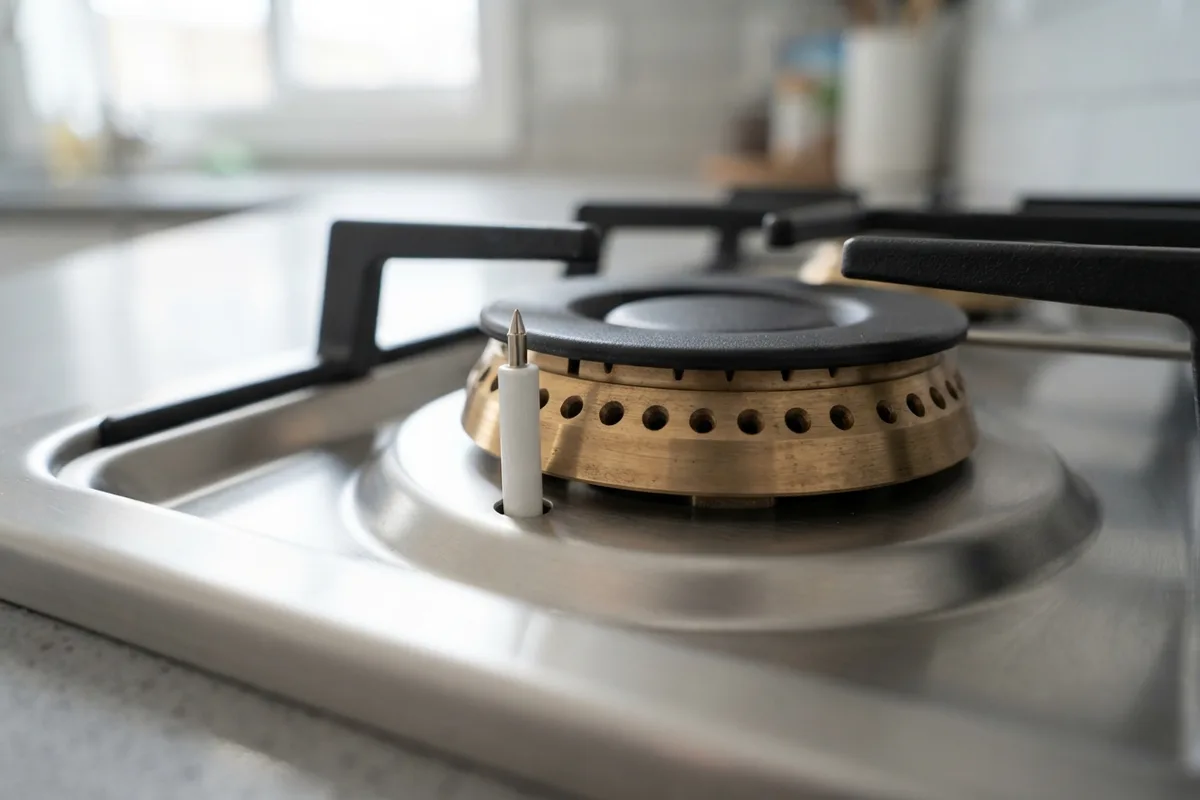
- Inspect the ceramic post: Look at the small white ceramic cylinder beside the burner head. If it looks damp or saturated with cleaning foam, it will fail to spark.
- Blot with a microfiber cloth: Dab the igniter and burner base thoroughly with a clean, dry lint-free towel.
- Use gentle heat to evaporate moisture: You can speed up drying by aiming a handheld hair dryer on low or medium heat at the burner assembly for 2 to 3 minutes.
- Allow ambient dry time: In many cases, letting the cooktop sit untouched for 24 to 48 hours is enough for the trapped moisture to evaporate completely.
Realign the Burner Cap and Base Assembly
A burner cap that sits slightly tilted or off-center prevents the correct mixture of gas and air from forming around the igniter. Even a millimeter of misalignment allows gas to disperse too quickly into the room rather than concentrating near the spark.
- Check the seating: Wait until the cooktop is completely cool. Look closely at the round metal cap resting on the burner head. It should sit completely flat with no wobble.
- Check alignment notches: Many modern cooktop caps feature small alignment pins or grooves on the underside that must lock into matching recesses on the burner base.
- Re-center the cap: Lift the cap, wipe any crumbs off the mating rim, and seat it firmly back into place. Gently nudge it with your fingertip to ensure it does not rock back and forth.
| Issue Observed | Most Common Cause | Quick Fix |
|---|---|---|
| Clicking sound, strong spark, no flame | Clogged gas port near igniter | Clear port with a paperclip or sewing needle |
| No clicking, no spark on one burner | Wet or cracked ceramic igniter | Dry igniter with a cloth; inspect for hairline cracks |
| Weak yellow flame after lighting | Dirty burner ports / misaligned cap | Clean burner head and reseat burner cap level |
| Continuous clicking across all burners | Moisture trapped in ignition switch | Dry knob switches; let sit for 24 hours |
| Gas smell but zero spark on all burners | Power disconnection or blown breaker | Check outlet plug and reset kitchen breaker switch |
Clean and Reconnect the Spark Electrode
Corrosion, hardened grease, or burnt sugar on the metal tip of the spark electrode creates electrical resistance, weakening or redirecting the spark. If you see a faint spark jumping to the wrong part of the base—or no spark at all—the electrode needs cleaning.
- Cut power: Always disconnect the stove from electrical power before working on ignition contacts to avoid a sharp shock.
- Scrub the metal tip: Dip an old toothbrush or a cotton swab in a small amount of 90% isopropyl rubbing alcohol. Gently scrub the metal pin projecting from the ceramic electrode.
- Remove stubborn carbon deposits: If burnt grease remains, buff the metal pin very lightly with fine-grit emery cloth or a small square of fine steel wool.
- Inspect the ceramic body: Look for hairline fractures or chips in the white porcelain casing. If the ceramic is cracked, electrical current will leak into the metal chassis instead of jumping to the burner head. A cracked igniter must be replaced.
If you find multiple components malfunctioning across your kitchen appliances, reviewing general advice on whether to repair vs replace appliances can help you decide on the most practical long-term approach.
Inspect the Range Power Supply and Spark Module
Gas stoves rely on household electricity to operate the electronic spark ignition system. If none of your burners click or light, the problem is usually electrical rather than a fuel supply issue.
- Check the breaker box: Head to your home electrical panel and check if the breaker serving the kitchen range has tripped. Reset it fully to the off position, then back to on.
- Test the electrical outlet: Unplug the stove and plug in a small lamp or phone charger to confirm the wall receptacle has active power.
- Inspect the power cord: Look along the length of the cord behind the appliance to ensure it has not been pinched, frayed, or damaged by heat.
- Consider electrical protection: Kitchen electronics are sensitive to voltage spikes; learning ways to protect home appliances from power surges protects spark modules and digital control boards from premature failure.
When to Call a Pro
While clearing burner ports and drying igniters are simple weekend DIY tasks, certain range repairs involve serious safety risks. You should immediately step back and call a professional technician if:
- You smell a persistent, strong gas odor (rotten eggs) that does not dissipate after turning the knobs off. In this case, evacuate the house, shut off your main gas supply, and contact your gas utility immediately.
- You suspect a faulty internal gas pressure regulator, a damaged gas safety valve, or a leak in the flexible gas supply line.
- The spark ignition module or internal wiring harness beneath the cooktop surface needs replacement.
- The burner base casting is cracked, warped, or badly corroded.
Typical cooktop burner repairs by a professional technician generally range from $120 to $320 depending on your region, appliance brand, and whether parts like a spark switch harness or spark module are needed. When DIY steps do not solve the problem, True Appliance Repair can match you with a local appliance pro to diagnose your range safely.
FAQ
Can I light my gas stove with a match if the igniter is broken?
On most standard gas cooktops, you can light a surface burner manually with a long kitchen match or wand lighter during a power outage or igniter failure. Hold the lit flame next to the burner ports before slowly turning the control dial to the "Lite" or "Low" setting. Never turn on the gas first and then hunt for a match, as accumulating gas can create a sudden flash fire. Check your stove's user manual first, as some modern sealed electronic models advise against manual lighting.
Why does my gas burner keep clicking even after it lights?
Continuous clicking after ignition usually indicates moisture inside the burner switch assembly behind the knob, a misaligned burner cap that prevents the flame from warming the flame sensor, or reverse electrical polarity at your wall outlet. Try turning off the range, lifting the knobs, and blowing warm air into the shaft wells with a hair dryer to dry out trapped cleaning fluid.
How do I safely clean a gas burner cap?
Remove the cool burner caps and soak them in warm water mixed with mild liquid dish soap for 15 to 20 minutes. For tough baked-on grease, make a paste of baking soda and water, apply it with a non-scratch sponge, and scrub gently. Rinse thoroughly and ensure the caps are 100% dry before reinstalling them on the cooktop.