
Neglecting routine appliance inspections can lead to unexpected water damage, electrical hazards, or costly sudden breakdowns. Performing home appliance safety checks helps identify early warning signs before minor wear turns into a home emergency. By taking thirty minutes every few months to inspect your core kitchen and laundry systems, you protect your house, lower energy bills, and extend machine lifespans.
Inspect Washer Supply Hoses for Bulges and Leaks
Washing machine hose failures are one of the leading causes of catastrophic indoor water damage in residential homes. Standard rubber hoses weaken over time due to constant water pressure, temperature fluctuations, and internal rubber deterioration.
- Always turn off the water supply valves behind the washer and unplug the unit from the electrical outlet before touching any connections.
- Slide the washer away from the wall to clearly access the hot and cold inlet hoses.
- Run your hand along the entire length of each hose, feeling for soft spots, cracks, bubbles, or localized bulging.
- Check the connection fittings at both the wall valves and the rear of the appliance for rust, mineral deposits, or slow drips.
- Replace traditional rubber hoses every three to five years with braided stainless steel hoses, which resist bursting under pressure.
If you discover active leaks at the valve body or suspect internal pump failure, consult a technician specializing in washer and dryer repair.
Clear Lint and Clean Exhaust Ducting on Dryers
Lint accumulation inside dryer exhaust vents poses a severe fire hazard and causes the machine to overheat, damaging internal heat sensors and thermal fuses. Inspecting and cleaning this airflow pathway ensures efficient operation and lowers household safety risks.
- Disconnect the dryer from its electrical wall outlet. For gas dryers, shut off the gas supply valve before moving the appliance.
- Pull the machine forward and disconnect the flexible exhaust duct from the wall and the back port of the dryer.
- Vacuum out built-up lint from inside the dryer rear outlet port using a long narrow vacuum attachment.
- Insert a flexible vent cleaning brush into the wall ductwork, rotating it to loosen trapped lint, then vacuum out the remaining debris.
- Inspect the exterior exhaust hood on the outside of your house to ensure the damper flap opens freely and is not blocked by lint or outdoor debris.
- Reattach rigid or flexible metal ductwork rather than plastic or foil tubing, which crushes easily and traps flammable lint.
Check Refrigerator Door Seals and Coil Clearance
A refrigerator that cannot shed heat effectively or maintain an airtight seal consumes excess electricity, strains the compressor, and risks cooling failure. Keeping coils clean and gaskets tight is a fundamental step in routine maintenance.
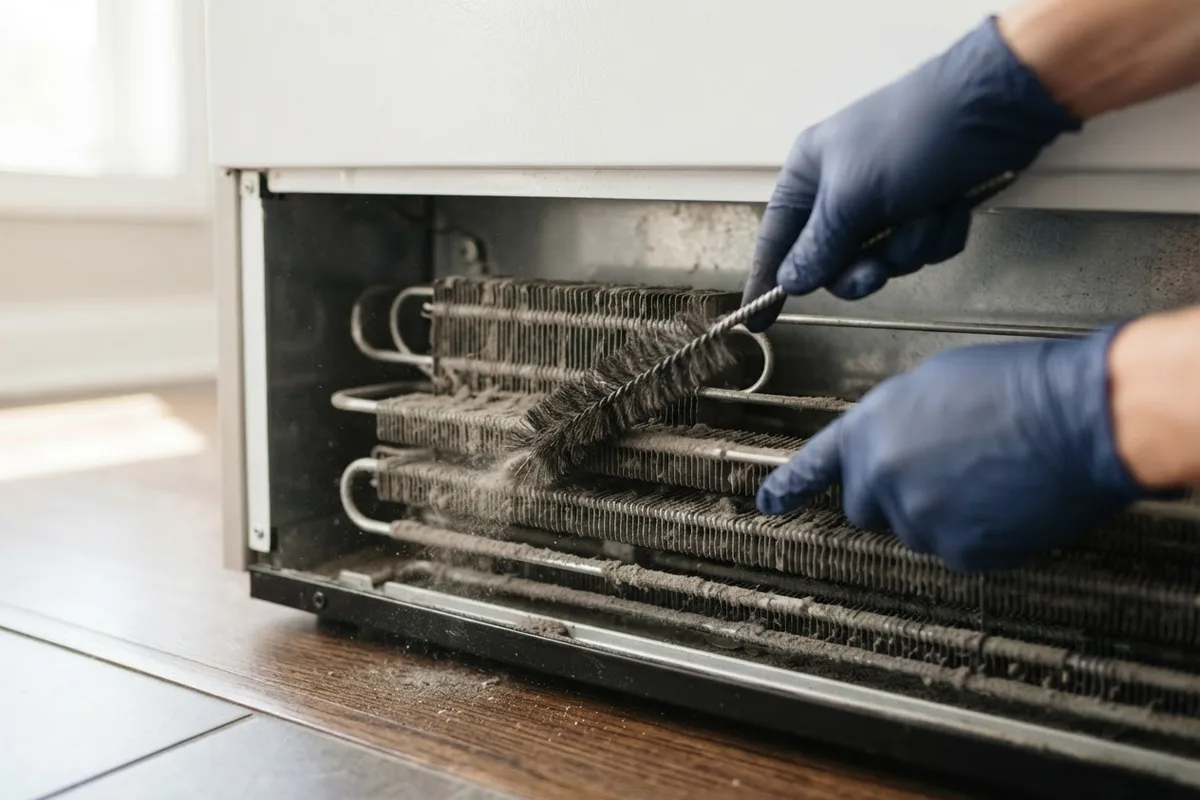
- Unplug the refrigerator from the wall outlet before cleaning condenser coils.
- Locate the coils, which are typically located behind the front lower toe kick plate or along the lower rear access panel.
- Use a long condenser coil brush and a vacuum with a narrow crevice tool to remove dust, cobwebs, and pet hair.
- Test the door gasket seal by closing the door on a dollar bill. Pull the bill straight out; if it slides out easily without resistance, the magnetic gasket is worn or misaligned.
- Wipe door gaskets clean using warm water and mild dish soap to remove sticky residues that tear rubber seals.
- Ensure at least one to two inches of open space between the back of the refrigerator and the wall for proper air circulation.
For more detailed fridge steps, follow our guide on DIY appliance maintenance steps.
Inspect Dishwasher and Ice Maker Supply Lines
Hidden water leaks under kitchen cabinets or behind refrigerators can rot subflooring, promote mold growth, and cause structural damage long before visible puddles appear on your floor.
- Shut off power at the circuit breaker and turn off the water supply valve under the sink before inspecting dishwasher connections.
- Remove the lower access kick plate of the dishwasher and use a flashlight to check the water inlet valve, brass fittings, and drain pump for moisture or green oxidation.
- Check the flexible plastic or copper water line feeding your refrigerator ice maker for kinks, stress cracks, or dripping compression nuts.
- Ensure the dishwasher drain hose routes upward in a high loop under the sink or connects to an air gap to prevent dirty sink water from backflowing into the tub.
Test GFCI Outlets and Power Cord Connections
Kitchens and laundry rooms feature high-power appliances operating near plumbing fixtures, making electrical safety checks critical. Compromised cords or faulty wall outlets present real shock and electrical fire risks.
- Inspect power cords on all major appliances for fraying, scorch marks, melted insulation, or exposed wiring.
- Confirm appliances plug directly into dedicated wall outlets without using extension cords or lightweight power strips.
- Locate Ground Fault Circuit Interrupter (GFCI) outlets near kitchen sinks, laundry tubs, and damp areas.
- Press the "Test" button on each GFCI outlet; the power should immediately trip and cut off.
- Press the "Reset" button to restore electrical power. If the outlet fails to trip or reset properly, contact an electrician.
Clean Garbage Disposal Splash Guards and Housing
Garbage disposals handle food waste daily, leading to grease accumulation, foul odors, and jammed impellers if left unmaintained. Regular cleaning prevents motor strain and plumbing line backups.
- Unplug the disposal from its under-sink outlet or switch off its dedicated breaker before performing hands-on cleaning.
- Clean the removable rubber splash guard using an old toothbrush and degreasing dish soap to scrub away food buildup from the underside.
- Look down into the grinding chamber with a bright flashlight to check for foreign metal objects, bones, or stringy fibers stuck in the impellers.
- Never place your hand directly inside the chamber; use long-nosed pliers or tongs to clear trapped debris.
- Reconnect power, run cold water at full flow, and run the disposal while feeding in ice cubes and citrus peels to scour internal grinding components.
Inspect Gas Appliance Connectors and Venting
Gas ranges, cooktops, ovens, and dryers require regular monitoring to prevent gas leaks and carbon monoxide buildup in indoor living spaces.
- Inspect flexible corrugated gas connectors behind ranges and dryers for physical crimping, corrosion, or severe bending.
- Check burner flames on gas cooktops; they should burn crisp blue. Yellow or lazy orange flames indicate improper combustion air ratios.
- Mix a few drops of liquid dish soap with water and brush it onto gas line joints. If expanding soap bubbles form, shut off the gas supply valve immediately.
- Test carbon monoxide detectors located on every level of your home, replacing batteries promptly when low.
- Stop immediately and call your local gas utility or emergency services if you smell rotten eggs or suspect a gas leak.
| Appliance | Primary Risk Area | Recommended Frequency | Key Action Items |
|---|---|---|---|
| Washing Machine | Inlet supply hoses | Every 3 to 6 months | Inspect for bulges; upgrade rubber to braided stainless steel |
| Clothes Dryer | Exhaust vent line | Every 6 months | Vacuum lint from exhaust ductwork and check exterior hood flap |
| Refrigerator | Condenser coils & door seal | Every 6 to 12 months | Brush dust off coils; verify door seal tightness with bill test |
| Dishwasher | Lower water inlet valve | Every 6 months | Remove lower kick plate to check brass fittings for leaks |
| Garbage Disposal | Rubber splash guard | Every month | Scrub underside of splash guard; clear impellers using tongs |
| Gas Appliances | Supply line & burner flame | Annually | Confirm blue flames; perform soap bubble test on gas joints |
When to Call a Pro
While general cleaning, hose replacement, and visual safety checks are manageable DIY tasks, complex component failures require professional hands. Stop work immediately and contact a specialist for the following scenarios:
- Persistent smell of natural gas or damaged fuel connectors.
- Electrical issues such as sparking wall receptacles, scorched wiring, or breakers that trip immediately when an appliance turns on.
- Refrigeration cooling failure involving sealed system refrigerant, compressors, or sealed evaporator coils.
- Internal machine leaks, failed motor bearings, or broken electronic control boards.
- Gas valve replacements or internal electrical panel repairs.
Attempting complex electrical, gas, or sealed system repairs without specialized equipment can cause property damage or personal injury. When unexpected mechanical failures occur, True Appliance Repair can match you with a local appliance pro to diagnose and resolve the problem safely.
FAQ
How often should I perform home appliance safety checks?
Perform basic visual safety checks every three to six months. Focus on high-risk features like washer inlet hoses, dryer exhaust ducts, and refrigerator door gaskets. Seasonal transitions in spring and fall provide natural reminders to go through your appliance safety checklist.
How much does professional appliance repair typically cost?
Minor repairs such as replacing a dishwasher inlet valve or dryer thermal fuse usually range from $120 to $250. Major repairs like replacing a washer tub bearing or oven control board generally cost between $250 and $500, depending on your geographic area and machine model.
What are the most dangerous warning signs of appliance failure?
Scorch marks around electrical wall outlets, burning odors while an appliance runs, water pooling beneath heavy machinery, and clicking ignition noises accompanied by gas odors are serious warning signs. Immediately disconnect power or gas supplies when these occur.
Can I replace my own rubber washing machine hoses?
Yes, replacing washer hoses is a straightforward DIY task. Turn off the hot and cold water supply valves, unplug the washer, place a small bucket beneath the valves to catch excess water, and unscrew the old fittings with pliers before installing new braided stainless steel hoses.