
A foul odor wafting from your kitchen sink usually points directly to buildup inside your garbage disposal. Food particles, grease, and soap scum accumulate under the rubber splash guard and along the grinding chamber wall over time, creating a breeding ground for bacteria and unpleasant smells. Cleaning your garbage disposal using simple household items restores fresh air to your kitchen while extending the life of your unit.
Taking fifteen minutes once a month to deep clean your disposal prevents stubborn clogs, reduces wear on internal impellers, and stops kitchen odors at the source. Follow these five straightforward steps to clean your garbage disposal safely and effectively.
Disconnect Power and Clear Visible Debris
Before performing any physical cleaning inside or around your garbage disposal, safety must come first. Always turn off the electrical power to the unit. Flip the wall switch to the off position, and locate the dedicated breaker in your home's main electrical panel to switch off the breaker supplying power to the disposal, or unplug the unit directly from the outlet located inside your sink cabinet.
Once power is completely disconnected, shine a bright flashlight directly down into the drain opening. Never place your hands directly into the disposal chamber. Instead, use a pair of long-handled kitchen tongs or pliers to retrieve any foreign items, such as stray cutlery, fruit pits, twist ties, or fibrous food bones stuck between the grinding plate and side walls.
Removing large obstructions manually prevents jamming when you turn the disposal back on and ensures your cleaning solutions contact the metal surfaces directly. If you notice persistent drainage issues or signs of moisture pooling inside your cabinet floor while checking under the sink, consult our guide on appliance maintenance steps to prevent water leaks to catch plumbing issues early.
Clean the Underside of the Rubber Splash Guard
The black rubber baffle or splash guard sitting at the mouth of your sink drain is the single biggest culprit for kitchen sink odors. Food debris and grease splatter upward during normal grinding, clinging to the underside of the flexible rubber flaps where normal water rinsing cannot reach.
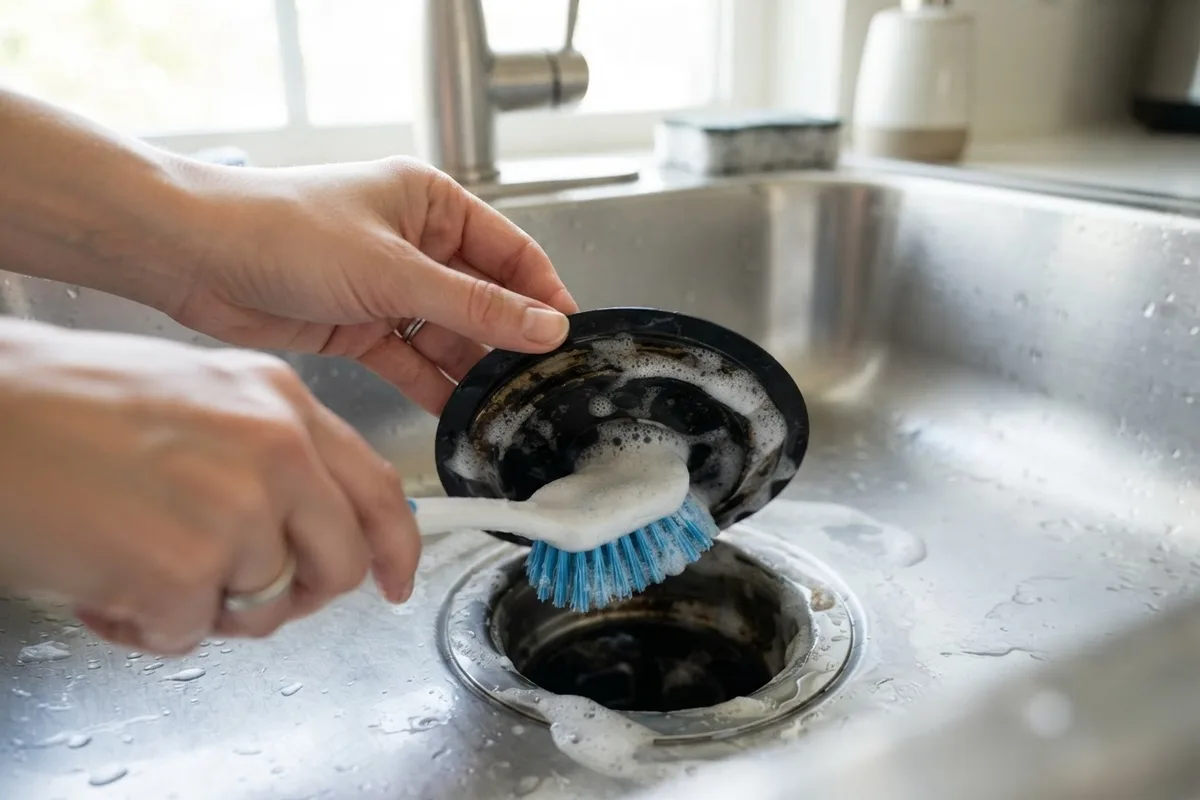
To clean this area thoroughly, mix a few drops of grease-cutting liquid dish soap into a small bowl of warm water. Dip an old toothbrush or a stiff-bristled kitchen scrub brush into the soapy water. Lift each individual flap of the rubber splash guard upward and scrub the underside vigorously.
You will likely see a layer of dark residue come away onto your brush. Periodically rinse the brush under running tap water and scrub until the rubber flaps are free of sludge on both top and bottom surfaces. Wipe down the rim of the sink opening with a damp microfiber cloth before restoring power.
Scour Internal Impellers with Ice and Coarse Salt
Once the splash guard is clean and you have reconnected electrical power, turn your attention to the internal grinding ring and swivel impellers. Over time, thick grease coatings and starch form a film over the grinding surfaces, dulling efficiency and trapping odor-causing particles.
To scour these hard-to-reach internal components without damaging the unit, use a combination of ice cubes and rock salt or coarse kosher salt:
- Fill the disposal chamber with two cups of ice cubes.
- Pour one cup of coarse rock salt or kosher salt directly over the ice.
- Turn on the cold water faucet to a steady, medium flow.
- Flip the disposal wall switch on and allow the unit to run until the ice is completely crushed and cleared (about 30 to 45 seconds).
As the rotating impellers break down the hard ice, the sharp salt crystals act as a gentle abrasive scrub against the chamber walls and grinding ring. This mechanical action knocks free impacted food residue, mineral deposits, and grease buildup without dulling the internal metal components.
Deodorize the Chamber with Baking Soda and Vinegar
After removing physical debris and scoured grease, neutralize deep-seated odors using a classic natural reaction: baking soda and distilled white vinegar. Baking soda neutralizes acidic odor compounds, while white vinegar breaks down lingering organic grime and freshens stainless steel surfaces.
Pour one-half cup of baking soda directly into the disposal drain, ensuring it falls down onto the grinding plate. Next, slowly pour one full cup of distilled white vinegar into the drain. The mixture will immediately begin to foam vigorously, expanding upward into the sink neck and penetrating tiny crevices behind the impellers.
Allow the foaming mixture to sit undisturbed for 10 to 15 minutes. During this time, the mild acid breaks down mineral scale and bacteria. Finish the process by running warm tap water into the sink for one full minute while running the garbage disposal to flush away the loosened residue and neutralized acids.
Citrus Peel Flush for Long-Lasting Freshness
To complete your deep cleaning process and leave your kitchen with a natural, pleasant aroma, use citrus peels from lemons, limes, oranges, or grapefruits. Citrus peels contain natural essential oils like d-limonene, which cut through remaining oils and leave a clean scent.
Cut your citrus peels into small, manageable pieces about one to two inches in size. Avoid throwing whole fruit halves or large thick rinds into the drain at once, as large chunks can jam the motor or clog your drain pipes.
Turn on a cold stream of tap water, start the disposal, and drop the citrus peel pieces into the drain one by one. Listen for the blades to grind each peel completely before adding the next. The mechanical action releases aromatic oils that coat the interior housing while the cold water solidifies any tiny lingering grease drops so they grind up cleanly.
| Cleaning Method | Primary Purpose | Recommended Frequency | Key Ingredients |
|---|---|---|---|
| Manual Scrub | Clean rubber splash guard underside | Weekly | Dish soap, warm water, scrub brush |
| Ice & Coarse Salt | Scour mechanical impellers & walls | Every 2 weeks | 2 cups ice, 1 cup rock salt |
| Baking Soda & Vinegar | Deodorize & dissolve organic buildup | Monthly | 1/2 cup baking soda, 1 cup vinegar |
| Citrus Peel Grind | Freshen drain aroma & cut grease | Weekly | Lemon or orange peels, cold water |
Routine Habits That Keep Your Disposal Clean
Preventing future odor buildup requires only a few slight adjustments to your daily kitchen clean-up routine. Following simple operational habits reduces how frequently you need to perform deep scrubbing sessions:
- Always run cold water: Run cold water for five seconds before turning on your disposal, throughout the grinding process, and for ten seconds after turning the unit off. Cold water keeps fats and grease in a solid state so the impellers can chop them up and flush them down the drain line.
- Avoid problem foods: Never put fibrous materials (celery stalks, corn husks, onion skins), expandable starches (cooked rice, pasta, potato peels), coffee grounds, eggshells, or bones down your disposal. These items bind together, dull impellers, or form dense clogs inside sink plumbing.
- Never pour pure cooking grease down the drain: Pour hot cooking oil or bacon grease into a sealable container or tin can for disposal in the trash. Grease coats the interior surfaces of your unit and drain lines, hardening into a sticky film that traps passing food bits.
- Flush with dish soap after heavy cooking: After preparing large meals, squirt a small dab of degreasing dish soap into the running stream of warm water while operating the unit for 30 seconds to flush away fresh residue.
If your kitchen disposal is connected directly to your dishwasher drain line, keep an eye on dishwasher discharge performance as well. Persistent drainage backing up into the disposal can indicate a restriction in the drain hose. Learn more about managing home drainage connections with our guide on dishwasher repair options.
When to Call a Pro
While regular cleaning keeps most garbage disposals running cleanly and quietly, mechanical issues can arise over time. Knowing when to stop DIY troubleshooting prevents electrical hazards or costly plumbing leaks beneath your kitchen sink cabinet.
Contact a qualified technician or plumber under the following conditions:
- Persistent motor humming without rotation: If the disposal hums when switched on but the blades do not spin, the unit is jammed or the motor bearings have seized. Turn off power immediately at the circuit breaker to prevent motor burnout.
- Water leaking beneath the unit: Leaks originating from the lower housing of the disposal assembly indicate a blown internal motor seal. In most cases, a leaking lower housing requires unit replacement.
- Frequent breaker trips or total power loss: If resetting the small red button on the bottom of the disposal or flipping the main circuit breaker fails to restore power, an internal electrical fault may be present.
- Loud metallic rattling or squealing: Grinding metallic sounds that persist even when no foreign objects are inside the chamber indicate damaged impellers or failed motor bearings.
For complex plumbing connections or severe mechanical breakdowns, professional evaluation ensures safe service. True Appliance Repair can match you with a local appliance pro to diagnose unit failures, repair drain lines, or install a replacement unit efficiently. If you suspect an issue beyond basic cleaning, feel free to reach out to our team for expert help.
FAQ
Can I use liquid drain cleaners or bleach in my garbage disposal?
No, you should never pour commercial chemical drain cleaners, lye, or concentrated chlorine bleach into a garbage disposal. Chemical drain openers contain harsh caustic agents that can degrade the rubber splash guard, break down internal seals, and splash back up into your eyes or skin when the unit runs. Bleach can also react with food residue inside the chamber and harden grease into stubborn clogs. Stick to gentle natural ingredients like baking soda, vinegar, and dish soap.
Why does my garbage disposal smell like sewage?
A sewage smell coming from your kitchen sink typically indicates that food waste trapped under the splash guard or inside the grinding chamber has decomposed into sludge. Alternatively, it can mean the sink's P-trap dry-out has allowed sewer gas to travel back up the pipe, or the dishwasher drain line connection is clogged with decaying food debris. Deep cleaning the splash guard and flushing the system with baking soda and vinegar usually eliminates the stink.
Is it safe to put ice cubes down a garbage disposal?
Yes, putting ice cubes down your garbage disposal is completely safe and highly recommended for maintenance. Ice does not dull or damage the internal impellers because garbage disposals use blunt swivel impellers rather than sharp knives to break down waste. Crushing ice helps knock stubborn food crust off the walls and impellers while chilling trapped grease so it breaks apart easily.
How often should I clean my kitchen garbage disposal?
Perform a basic freshening rinse using dish soap or citrus peels once a week, especially after heavy cooking. Deep clean the splash guard with a scrub brush and scour the grinding chamber using baking soda, vinegar, and ice once every month to keep odors at bay and prevent grease accumulation.