
A slow drip tucked behind your refrigerator, dishwasher, or washing machine can warp hardwood floors and soak drywall long before a puddle ever reaches your feet. Taking an hour to run through a few preventive checks helps you catch brittle hoses, loose clamps, and clogged drains before they turn into a major cleanup. Use these seven practical DIY inspections to prevent appliance leaks and keep your kitchen and laundry room bone-dry.
1. Upgrade Washing Machine Supply Hoses
Washing machine fill hoses stay under constant household water pressure even when the laundry room is quiet, making them a top source of sudden indoor floods. Before inspecting behind your washer, unplug the power cord and turn both the hot and cold wall shutoff valves clockwise until closed.
- Pull the washer gently away from the wall without kinking the drain standpipe.
- Run a dry paper towel over the hot and cold couplings at both the wall and the back of the machine to spot tiny seeps.
- Squeeze standard black rubber hoses to check for soft spots, blisters, or cracking near the metal crimps.
- Swap rubber hoses—or any hose older than five years—for burst-resistant braided stainless steel hoses fitted with fresh rubber washers, tightening a quarter-turn past hand-tight with pliers.
2. Inspect Refrigerator Water and Ice Lines
Thin supply tubing feeding your water dispenser and ice maker can chafe against the wall or loosen from everyday compressor vibrations. Unplug the refrigerator before pulling it straight out on furniture sliders so you protect your flooring.
- Locate the water shutoff valve—typically behind the fridge, under the kitchen sink, or in the basement below—and close it before touching any fittings.
- Trace the tubing from the wall to the inlet valve near the bottom rear panel, looking for kinks, white mineral crust, or brittle plastic.
- If your fridge uses older white plastic tubing, consider upgrading to a braided stainless steel or flexible copper line, which resists pinholes when the fridge is pushed back.
- Leave at least three inches of clearance behind the cabinet so coils breathe and the water line coils smoothly without pinching.
3. Clean Dishwasher Seals and Float Switches
Food grease and hard-water buildup along the perimeter of a dishwasher door can break its watertight seal, while a sticky float switch can let the tub overfill onto your kitchen floor. Shut off power to the dishwasher at your home circuit breaker or unplug it under the sink before starting.
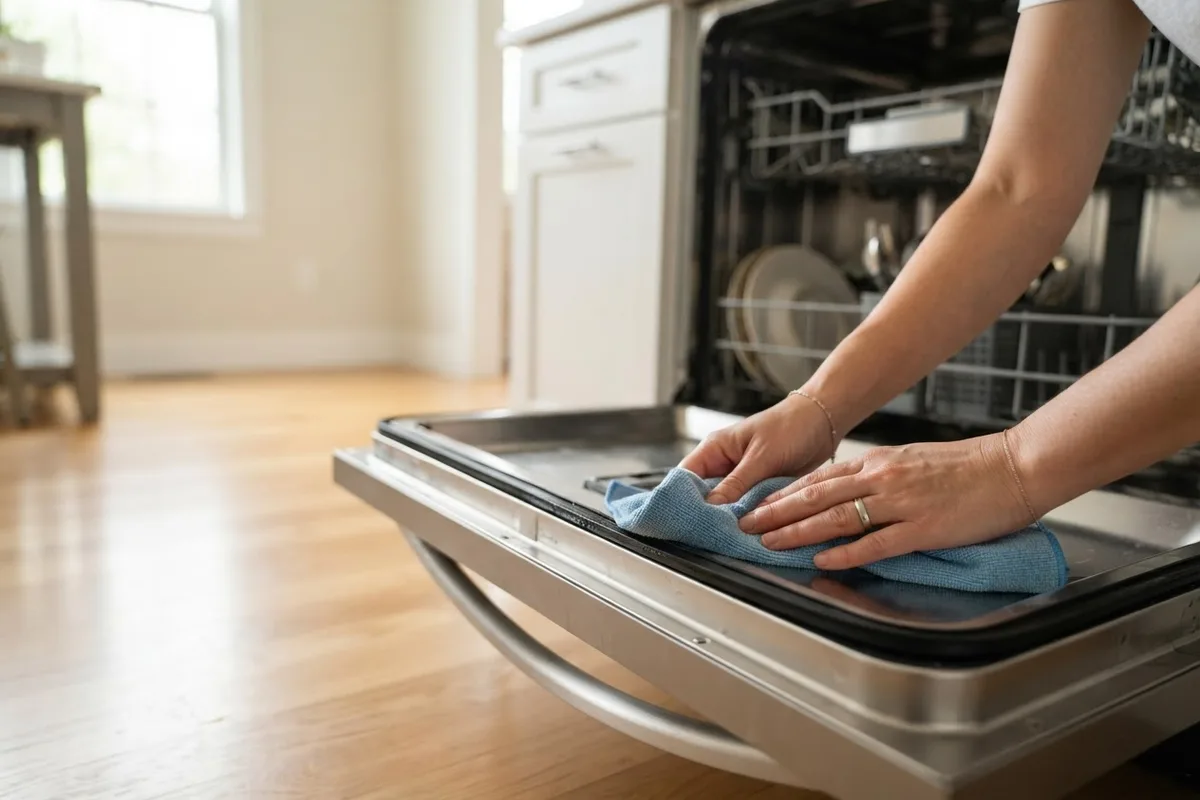
- Open the door and run your fingers along the rubber tub gasket to check for tears, flattened corners, or crusty detergent residue.
- Wipe the gasket and the lower door lip thoroughly—especially the bottom corners—using warm water, mild dish soap, and a soft cloth.
- Slide out the bottom rack and locate the small cylinder or dome-shaped float switch on the tub floor.
- Lift the float gently up and down to make sure it moves freely and clicks; soak away sticky grime with warm white vinegar if it drags, which can also resolve issues if you have a dishwasher taking too long to finish cycles.
4. Clear Clogged Appliance Drain Filters
Not every puddle comes from a fresh water line—backed-up drain paths in washers, dishwashers, and refrigerators frequently force dirty or defrosted water out onto the floor. Always unplug the appliance before opening access panels or removing internal filters.
- On a front-load washing machine, pop open the small lower-front access door, place a baking sheet and thick towel underneath, and slowly uncap the drain pump tube to empty trapped water before rinsing lint and coins from the filter basket.
- Inside your dishwasher, twist out the cylindrical mesh filter at the bottom of the tub and scrub it under warm running water with a soft brush.
- Check the bottom of your freezer or fresh-food compartment for sheets of ice or pooled water, which point to a clogged defrost drain tube that needs flushing with warm water and a turkey baster.
5. Tighten Garbage Disposal Connections
Under-sink vibrations can gradually loosen the mounting ring and hose clamps around your garbage disposal, letting sink water drip unnoticed into your cabinet base. Unplug the disposal under the sink—or switch off its dedicated circuit breaker—before reaching underneath.
- Clear items out of the cabinet and wipe the outside of the disposal and nearby pipes completely dry with a clean cloth.
- Place dry paper towels flat across the cabinet floor, put the stopper in the sink, fill the basin halfway with cold water, and pull the stopper to test under load.
- Watch the three main leak points: the top sink flange (indicating dried-out plumber's putty), the side dishwasher inlet hose clamp, and the black discharge elbow.
- Snug a weeping dishwasher hose clamp or discharge flange bolt with a screwdriver, taking care not to overtighten plastic fittings.
6. Level Appliances and Add Leak Pans
An unlevel appliance puts uneven stress on door seals, sloshes water past internal tub guards, and rocks hoses loose during spin cycles. Unplug your machine before tilting it or adjusting the leveling feet beneath the cabinet.
- Set a carpenter's level front-to-back and side-to-side across the top of your washing machine and refrigerator, or along the inner tub rim of your dishwasher.
- Turn the threaded front leveling feet with a wrench until the unit sits solid on all four corners without rocking, and tighten the lock nuts if equipped.
- For upstairs laundry rooms or hardwood kitchens, slide a heavy-duty plastic or metal drain pan under your washer and place inexpensive battery-powered water leak alarms behind the fridge, dishwasher, and laundry hookups. If violent shaking persists during spin cycles, schedule washer and dryer repair before internal tub bearings or hoses fail.
7. Test Shutoff Valves Before Cold Weather
A leak emergency gets much worse when you grab a wall shutoff valve only to find it corroded stuck—or when winter drafts freeze an appliance supply line along an exterior wall. Run this quick check ahead of freezing temperatures and holiday travel.
- Locate every appliance water shutoff valve in your home, including the laundry wall box, under-sink dishwasher stop, fridge supply valve, and your main household water shutoff.
- Slowly turn stuck multi-turn valves closed and back open, then back off a tiny fraction of a turn from fully open so mineral deposits do not seize the stem; check the packing nut afterward for drips.
- Before leaving town for more than a couple of days, shut off the hot and cold washing machine valves completely, and leave kitchen sink cabinet doors cracked open during deep winter freezes if pipes sit on an outside wall.
When to Call a Pro
Routine hose swaps, gasket cleanings, and filter rinses are safe weekend projects, but internal water leaks and plumbing valve issues often require specialized tools and experience. Stop immediately, shut off the water supply, and leave the appliance unplugged if water has reached a control board, wiring harness, or wall outlet. Never attempt DIY work involving gas connections on dual-fuel ranges or gas dryers, refrigerator sealed refrigerant systems, or your home electrical panel.
Use this quick-reference guide to compare typical US DIY supply costs against professional repair visits (exact pricing varies by area and model):
| Leak Source | DIY Prevention or Part Cost | Typical Pro Repair Range | Best Action |
|---|---|---|---|
| Rubber washer supply hoses | $20–$45 for braided steel pair | $120–$220 (varies by area/model) | DIY upgrade every 5 years |
| Fridge water supply tubing | $15–$35 for braided kit | $130–$275 (varies by area/model) | DIY if accessible; pro if valve leaks |
| Dishwasher door gasket | $25–$70 for replacement seal | $140–$260 (varies by area/model) | Clean first; replace if torn |
| Internal washer or dishwasher pump | Not recommended for most DIYers | $180–$380 (varies by area/model) | Call an appliance technician |
| Corroded wall shutoff valve | Stop—risk of pipe flood | $150–$350+ (varies by area/model) | Call a local plumber |
If you discover water pooling from underneath a sealed motor housing, a cracked dishwasher sump, or a faulty refrigerator water inlet valve, True Appliance Repair can match you with a local pro for dependable home appliance repair before minor moisture causes structural damage.
FAQ
How often should you replace washing machine hoses?
Even if braided stainless steel or rubber washing machine hoses look fine on the outside, internal rubber liners degrade from water pressure and chlorine over time. Plan to inspect them twice a year and replace them roughly every three to five years as low-cost flood prevention.
Are smart water leak detectors worth putting behind appliances?
Yes, small battery-powered or Wi-Fi water sensors cost roughly $15 to $50 apiece (varies by brand and features) and sound a loud chime or phone alert the moment moisture touches the floor. Placing one behind your washing machine, dishwasher, and refrigerator can save thousands in flooring and cabinet repairs.
Should I turn off my water supply before going on vacation?
Shutting off the hot and cold valves behind your washing machine—or turning off your home's main water valve if your heating system allows it—is one of the smartest steps before leaving town. If you shut off the water supply to your refrigerator, remember to flip the ice maker arm or power switch off first so the inlet valve does not burn out trying to call for water.
Why does an appliance leak only sometimes instead of every cycle?
Intermittent puddles usually point to load-dependent issues like oversudsing from using too much detergent, a partially clogged drain line that only backs up on heavy cycles, or a sticky dishwasher float switch. Start by cleaning all accessible filters and measuring high-efficiency detergent carefully before assuming a major seal has failed.