
Opening your laundry room door only to find standing water inside an idle washer drum is an unsettling surprise. When your washing machine fills with water when turned off, the issue typically traces back to two opposing plumbing sources: pressurized household supply lines creeping past a weakened valve, or wastewater siphoning backward from a household drain. Left unaddressed, that slow puddle can overflow your tub, soak subflooring, and spawn stubborn mildew smells.
Before taking any tool to your appliance, safety comes first. Always unplug your washing machine from the wall electrical receptacle and turn off both the hot and cold water shutoff valves behind the unit. If you ever need to access main electrical panels or handle complex in-wall plumbing stacks, pause and reach out to an experienced technician.
Check Water Clarity to Pinpoint the Leak Source
Before disassembling any hoses, perform a quick visual inspection of the standing water inside the wash basket. The appearance and smell of the fluid will immediately tell you whether the problem originates from incoming municipal water or outgoing wastewater.
- Inspect the water color using a clear plastic cup. Crystal-clear, unscented water indicates that pressurized supply water is slowly seeping past a defective water inlet valve solenoid.
- Note any cloudiness, lint, or detergent odor. Grey, murky, or foul-smelling liquid confirms backflow entering through your external drain hose from a nearby sink, garbage disposal, or clogged standpipe.
- Perform the overnight shutoff test. Bail out the standing water, dry the drum with an old towel, and close both wall water spigots completely. If the drum stays dry overnight, your water inlet valve is failing under pressure. If water still creeps into the drum while the supply spigots are shut tight, your drain line is siphoning household graywater backward.
Test and Replace a Stuck Water Inlet Valve
By far the most frequent culprit behind fresh water pooling in an idle washer is a mechanically failed water inlet valve. Your washer uses electric solenoids to open internal rubber diaphragms when calling for water. Over time, internal springs lose tension or mineral scale jams the plunger slightly ajar, letting water drip 24 hours a day.
- Unplug the washing machine from the electrical outlet.
- Pull the unit away from the wall to access the rear connection panel.
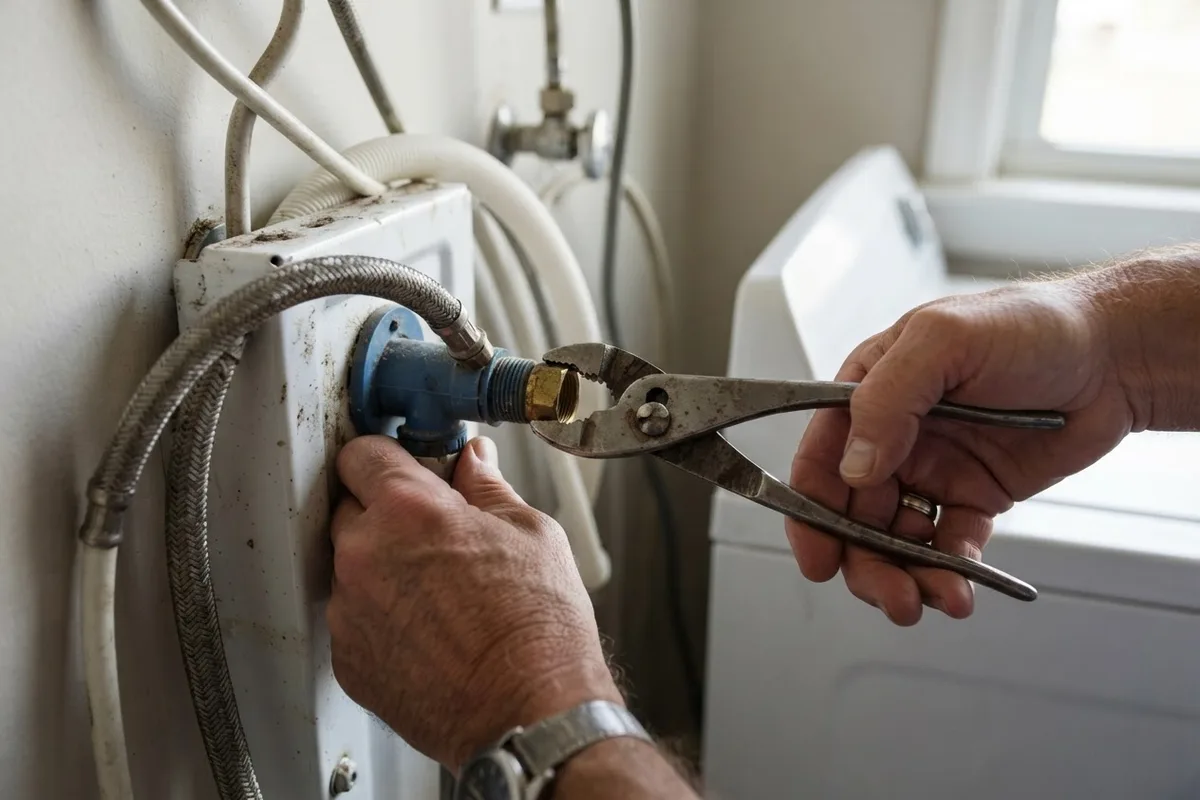
- Shut off the dual hot and cold spigots, then unscrew both supply lines using tongue-and-groove pliers. Keep a small bucket nearby to catch residual line drainage.
- Remove the top panel or rear access cover (depending on whether you own a front-load or top-load model) by backing out the perimeter hex screws.
- Disconnect the wire harness plugs from the valve solenoids, labelling each wire set with masking tape.
- Unthread the mounting screws holding the valve bracket to the chassis, detach the internal dispenser hoses, and install a matching replacement valve assembly.
A replacement valve assembly generally costs between $25 and $90 for parts alone, though overall expenses vary by area and model.
Adjust Drain Hose Depth to Stop Back-Siphoning
When a washing machine drain hose sits too deeply inside a standpipe or utility sink drain, it creates an unintended siphon. As water moves through nearby house pipes, negative atmospheric pressure pulls standing water from the trap right back into your empty washer drum.
- Inspect the rear standpipe connection behind the washer. Homeowners often push the ribbed plastic hose all the way down into the P-trap to prevent it from slipping out during violent drain cycles.
- Measure the insertion depth. Your washer drain hose should only extend 4 to 7 inches down into the vertical standpipe.
- Ensure an atmospheric air gap exists around the pipe opening. Never seal the gap between the drain hose and the standpipe with duct tape, expanding foam, or tight zip ties. The drain line requires air flow around the perimeter to break siphoning action.
- Install a plastic U-bend guide bracket to hold the hose firmly at the 5-inch mark without letting it plunge deeper down the pipe during heavy spin vibration.
Clean Sediment from Water Inlet Valve Screens
Fine sand, well sediment, and broken-down water heater anode particles frequently travel through household plumbing lines. If coarse sediment slips past municipal supply pipes, it lodges directly against the fine mesh filter screens recessed inside the washer inlet valve ports. When grit wedges into the valve seat, the rubber diaphragm cannot make a watertight seal.
- Disconnect power to the washer and turn off both supply faucets.
- Unscrew the hot and cold fill hoses from the back of the washer cabinet.
- Look directly into the threaded plastic valve ports. You will see small convex mesh screen inserts.
- Use needle-nose pliers to gently grasp the center tab of each filter screen and pull it straight out.
- Submerge the screens in a small dish of warm white vinegar for 15 minutes to dissolve calcified crust, then scrub them with an old toothbrush under a running faucet.
- Reinsert the screens securely, hand-tighten the hoses, snug them an extra quarter-turn with pliers, and turn the water back on to verify the drip has stopped.
If you find your machine throwing drainage codes or unusual signals while handling these connections, reference our guide on why your washing machine is beeping to clear common control alerts.
Clear Shared Drain Line Backups and Traps
In many modern homes, the laundry room shares a vertical plumbing waste stack with a kitchen sink, dishwasher, or upstairs half-bath. If hair, lint, and grease partially restrict the main drain pipe below your laundry P-trap, water takes the path of least resistance. When an adjacent fixture drains, wastewater surges upward into your washer discharge tube.
- Observe your laundry standpipe while running water in the nearest sink or running the kitchen disposal. If you hear gurgling behind the washer or notice liquid rising, the drain line is choked.
- Disconnect the washer drain hose and place it temporarily inside an empty five-gallon bucket.
- Shine a flashlight down the open standpipe to check for lint mats, fabric softener sludge, or pet hair accumulated above the water curve of the P-trap.
- Feed a hand-crank 25-foot plumbing snake down the standpipe, rotating through the P-trap bend until you hook and pull back the obstruction.
- Pour two gallons of hot water mixed with mild grease-cutting dish soap down the standpipe to rinse the inner pipe walls smooth.
Install an Anti-Siphon Air Gap on the Hose
If your laundry setup requires draining into a low utility basin, an under-sink branch, or a standpipe that sits below the manufacturer's minimum height threshold (typically 36 inches from the floor), gravity alone will cause the washer to flood when turned off. Installing a dedicated anti-siphon valve eliminates this hydrodynamic vulnerability permanently.
- Verify your drain discharge elevation. The top curve of your drain hose must arch higher than the internal water level of the washer tub (at least 36 to 39 inches off the finished floor).
- Purchase an inline anti-siphon valve designed for 1-inch or 1-1/4-inch washing machine corrugated discharge lines.
- Cut the flexible discharge hose at the highest point of its upward loop behind the machine.
- Insert the barbed ends of the anti-siphon valve into both cut halves of the hose, facing the one-way directional arrow toward the drain outlet.
- Fasten stainless steel worm-gear hose clamps across both joints using a flathead screwdriver to ensure an airtight, watertight joint.
Washer Water Leak Diagnostic Comparison
Use this quick-reference table to match your washer's standing water symptoms with the correct mechanical resolution.
| Water Appearance | Odor Present | Primary Source | Recommended Action |
|---|---|---|---|
| Crystal clear | None / Fresh tap | Water inlet valve stuck open | Replace dual/triple water inlet valve assembly |
| Clear with sand or flakes | Slight metallic smell | Sediment in valve seat | Clean inlet mesh filters; flush supply lines |
| Murky grey or cloudy | Musty detergent or lint | Standpipe back-siphon | Shorten hose depth to 5 inches; add U-bracket |
| Dark brownish water | Foul sewer gas or food rot | Main drain stack stoppage | Clear household branch line with a plumbing snake |
| Sudsy puddle | Stale soap odor | Shared fixture backflow | Install an inline anti-siphon valve on drain line |
When to Call a Pro
While unscrewing water lines and clearing standpipe lint are straightforward weekend tasks, certain washing machine water leaks call for specialized equipment. If your home features corroded copper supply valves that will not budge, or if water is backing up out of the drywall from a cracked waste stack inside the framing, call in a plumbing expert immediately.
Similarly, if your washer continues filling when unplugged despite installing a brand-new inlet valve assembly, you may be dealing with extreme household water pressure exceeding 80 PSI or an internal tub pressure switch wiring fault. When high-voltage testing or complex internal disassembly is required, True Appliance Repair can match you with an independent local appliance pro to diagnose your machine quickly. You can also review options through our broader home appliance repair resources before small water drips lead to major floor repairs.
Typical professional service calls for washer water supply diagnostics generally range from $130 to $275, while full valve replacement services often range between $175 and $350, depending on regional labor rates and machine brand.
Frequently Asked Questions
Why does my washer fill with water even when it is unplugged?
If your washer fills with water while unplugged from the wall, the problem is 100% mechanical rather than electronic. The water inlet valve relies on internal physical spring pressure and rubber diaphragms to block incoming water pressure. When internal seals degrade or mineral scale wedges the valve open, pressurized water seeps into the tub continuously, regardless of whether the appliance has power.
Can a clogged drain hose cause water to sit in my washer?
Yes. If the drain hose is inserted too far down the standpipe or lacks an air gap, it creates a hydraulic siphon that pulls water from the plumbing trap back into the empty tub. Additionally, if the household drain pipe backs up downstream, wastewater from sinks or dishwashers will flow upward into the lowest available exit point, which is often your washer drum.
How do I know if my water inlet valve is bad?
Turn off both the hot and cold wall shutoff valves behind your machine and bail out any standing water in the drum. If the leaking stops completely while the wall spigots are shut, but resumes as soon as you turn the spigots back on (with the washer powered off), your water inlet valve has failed mechanically and needs replacement.
Can high household water pressure make my washer fill on its own?
Excessive residential water pressure (anything over 75 to 80 PSI) can physically overpower the internal spring-loaded solenoids inside your washing machine inlet valve. If municipal water surges or your home pressure-reducing valve (PRV) fails, water can push past brand-new inlet seals into the drum. Installing a simple pressure gauge on your laundry faucet helps you verify safe household levels.