
Opening your dishwasher expecting sparkling, dry plates only to find dripping glasses and puddles on top of mug bottoms is a frustrating daily chore setback. When your dishwasher stops drying properly, the issue is rarely a sign that you need an immediate replacement. More often, the culprit is an empty fluid dispenser, misstacked dishes, or a worn heating element that needs a quick inspection. This step-by-step troubleshooting guide breaks down the six most common causes of a dishwasher not drying and gives you practical DIY solutions to get your kitchen routine back on track.
Refill the Liquid Rinse Aid Dispenser
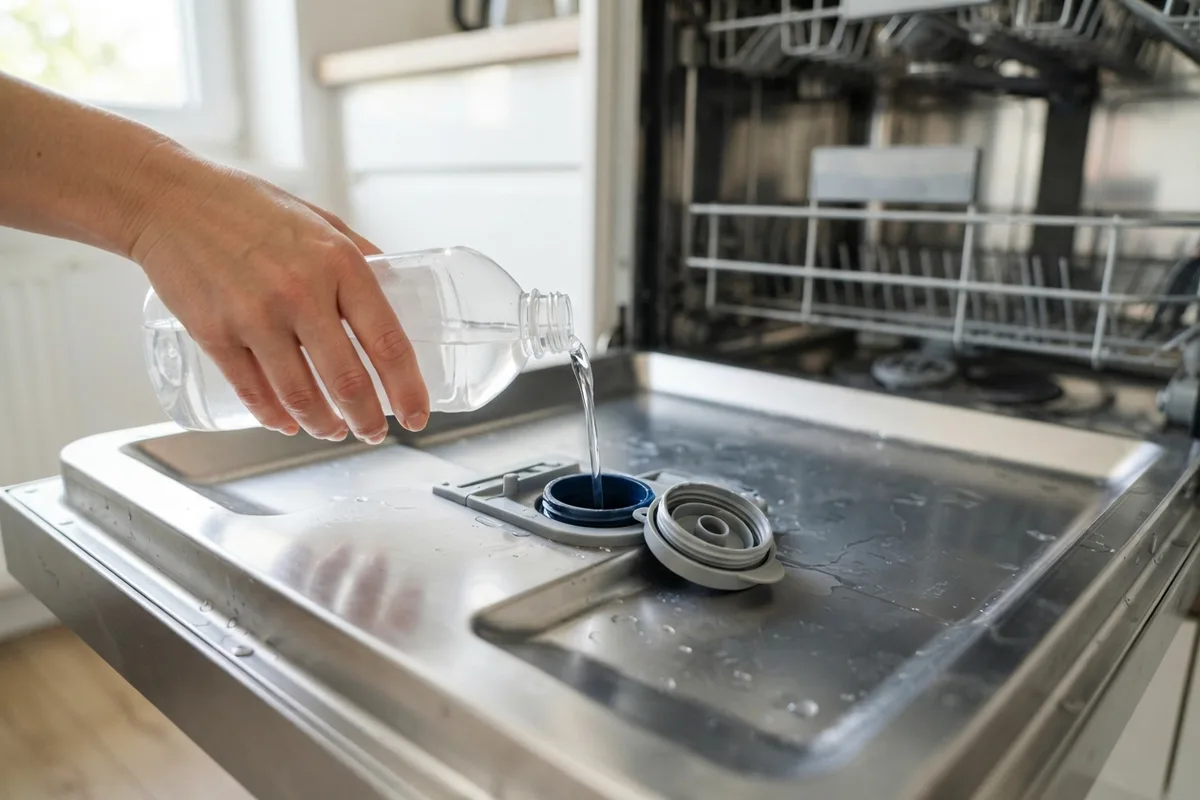
Many modern dishwashers rely heavily on liquid rinse aid to deliver bone-dry dishes at the end of a cycle. Contrary to popular belief, rinse aid is not just a cosmetic shine booster—it breaks the surface tension of water drops so liquid sheets off dishes rather than forming stubborn beads.
Modern energy-efficient dishwashers use less heat than older models and often rely on condensation drying, where moisture sheets off hot dishes onto the cooler stainless steel tub walls. Without rinse aid, water droplets cling to ceramic, glass, and plastic surfaces, leaving everything soaked at the end of the cycle.
- Locate the round rinse aid cap on the inside door panel next to the detergent cup.
- Twist or flip open the cap and pour liquid rinse aid into the reservoir until the optical indicator window shows full.
- Adjust the dosage dial inside the dispenser compartment. If your dishes feel sticky, turn it down to 2; if dishes remain dripping wet, turn it up to 4 or 5.
- Wipe away any spilled liquid with a damp towel to prevent excess foam during the next wash.
Refilling this chamber every few weeks is the single easiest fix for poor drying results, particularly in homes with hard water.
Rearrange Dishes to Improve Air Circulation
How you load your dishwasher directly affects both cleaning performance and air circulation during the drying phase. Overcrowding items or nesting nesting bowls together prevents hot air and steam from evaporating evenly.
Plastics are notoriously bad at retaining heat during the final hot rinse. Unlike ceramic and glass, plastic items cool down rapidly, causing steam to condense on their surfaces rather than evaporating into the cabinet vent.
- Angle cups, mugs, and small bowls downward on the upper rack so water drains off concave bases.
- Stagger plates on the lower rack with adequate spacing between items to allow hot air currents to circulate freely.
- Keep plastic storage containers on the top rack only, and place them at an angle rather than lying completely flat.
- Ensure long utensils or spatula handles do not block the pop-open action of the dispenser door or block top spray arms.
If you consistently struggle with overall performance, taking time to learn how to fix a dishwasher through proper loading and maintenance makes a massive difference.
Enable Heat Dry and Extended Vent Options
If your dishes are wet after running an eco-friendly cycle, your settings might be skipping the heat-assisted drying phase altogether. Eco or Express cycles prioritize reduced energy consumption by turning off the internal heating element and relying solely on ambient cooling.
While air-drying saves electricity, it requires significantly more time and depends heavily on low room humidity to work effectively.
- Check the control panel before starting a wash cycle to confirm the "Heat Dry," "ProDry," or "Sanitize" option is toggled on.
- Use the Sanitize cycle for items like cutting boards and baby bottles; this boosts the final rinse water temperature significantly, promoting faster moisture evaporation.
- Turn on extended drying or open-door drying options if your appliance model features an automated door-latch release.
- Avoid using short 30-minute quick-wash cycles when cleaning full loads of heavy dinnerware or mixed plastic items.
Inspect the Heating Element for Visible Damage
If your dishes come out ice-cold and dripping wet at the end of a full heated cycle, the heating element at the bottom of the tub may have failed. The heating element is a metal tube shaped like a loop or horseshoe near the bottom floor of the machine.
Safety First: Before performing any hands-on inspection of electrical components, always turn off power to the unit at your home's main circuit breaker box and unplug the machine.
- Remove the bottom dish rack to expose the heating element at the tub floor.
- Inspect the metal loop visually for visible cracks, blisters, flaking coating, or black scorch marks.
- If you own a multimeter, test the element for electrical continuity by removing the bottom access kickplate and checking the terminal leads underneath. A healthy element usually reads between 15 and 30 ohms of resistance.
- Replace damaged heating elements promptly; replacement parts typically cost between $35 and $90, though exact pricing varies by area and model.
Check and Clean the Moisture Exhaust Vent
During the drying portion of the cycle, warm moist air must escape the dishwasher cabinet through an exhaust vent—usually located on the upper left corner of the inner door or within the console assembly. If this vent is clogged with food debris, soap scum, or a stuck damper flap, moisture remains trapped inside the machine.
Safety First: Ensure the appliance power is turned off at the breaker panel before dismantling any vent covers or handling electrical wiring inside the door panel.
- Inspect the interior vent grille inside the door for visible grease buildup or trapped food particles.
- Clean the grille using a soft-bristled brush soaked in warm water and mild dish soap.
- On models equipped with an active vent fan, check that the small fan motor spins freely and is not obstructed by debris.
- Test the vent damper door manually to ensure it flips open smoothly during the dry cycle to release rising steam.
Test the High-Limit Thermostat Switch
The high-limit thermostat is a safety switch mounted underneath the floor of the dishwasher tub. It monitors water and air temperatures to prevent the unit from overheating. If this switch trips or fails permanently, it shuts off power to the heating element completely.
Safety First: Disconnect all electrical power to the appliance before removing access panels or touching internal components.
- Remove the lower front access panel or toe kick plate near the floor.
- Locate the small metal cylinder thermostat pressed against the bottom of the tub base.
- Disconnect one wire lead from the switch and use a multimeter set to ohms to test for continuity at room temperature.
- If the multimeter shows no continuity (infinite resistance) when cool, the switch is defective and must be replaced.
Dishwasher Drying Problems: Troubleshooting Reference Table
| Symptom | Primary Cause | Recommended Solution |
|---|---|---|
| Dishes cold & dripping | Blown heating element or thermostat | Test continuity with multimeter; replace bad component |
| Water pooling on mug tops | Improper item loading angle | Tilt cups and bowls downward at a 45-degree angle |
| Plastic items wet, ceramics dry | Plastic material properties | Use rinse aid and select High-Temp Wash or Heat Dry |
| Humid air trapped inside | Blocked exhaust vent or damper | Clean interior vent grille; inspect fan motor |
| Water beads on glasses | Empty rinse aid chamber | Refill liquid rinse aid reservoir and adjust setting |
When to Call a Pro
While simple operational adjustments like loading techniques and rinse aid refills are easy DIY fixes, complex electrical issues require technical expertise. If you have tested your heating element and thermostat but your appliance still leaves dishes soaking wet, you may be facing a faulty main control board, damaged internal wiring harness, or a failing door latch assembly.
Stop and call an experienced professional immediately for any complex wiring repairs or electrical panel troubleshooting. Continuing to run an appliance with electrical faults can damage sensitive circuit boards.
If you prefer to have an expert diagnose the problem safely, True Appliance Repair can match you with a local appliance pro to inspect your machine. Knowing when to get professional help saves valuable time and ensures your appliance is repaired safely.
If your unit is more than a decade old and experiences frequent operational failures, review the key signs your dishwasher is dying to decide whether repair or replacement makes the best financial sense for your home.
FAQ
Why are my plastic dishes still wet after a heated dry cycle?
Plastics do not hold thermal energy like glass, ceramic, or metal. When the heating element warms the dishwasher cabinet, dense materials store heat and evaporate moisture off their surfaces. Lightweight plastics cool down rapidly, causing airborne steam to condense back into water drops. Using liquid rinse aid and placing plastics at an angle on the top rack provides the best results.
Is liquid rinse aid strictly necessary for dishwasher drying?
Yes, especially for modern energy-efficient dishwashers with stainless steel interiors. Modern units use lower water temperatures and closed-system condensation drying to meet energy standards. Rinse aid breaks surface tension so moisture sheets off dishes into the drain rather than remaining behind as water drops.
How much does it cost to fix a dishwasher that won't dry?
Replacing simple DIY components like a rinse aid cap or cleaning a clogged vent costs virtually nothing. If a technician needs to replace a faulty heating element, high-limit thermostat, or vent fan motor, typical repair costs range between $150 and $300, though final pricing varies by area and model.
Can a clogged drain filter cause drying issues?
Yes. If leftover rinse water cannot drain properly out of the bottom sump after the final rinse cycle, standing water remains at the base of the tub. During the heating phase, this standing pool continuously turns into steam, keeping the cabinet interior humid and preventing dishes from drying. Cleaning your filter regularly ensures proper drainage before drying begins.