
Finding your dishwasher rack rusting right before a stretch of heavy family meals is frustrating, especially when orange flakes start transferring onto your favorite plates and silverware. Most dishwasher racks are built from steel wire dipped in a protective PVC or nylon coating, and even one tiny nick lets steam and hot water eat away at the metal underneath. The good news is that catching corrosion early lets you patch, cap, and protect the rack yourself in an afternoon instead of spending hundreds on replacements.
Before reaching inside the dishwasher cavity to inspect tracks, mounting brackets, or the tub interior, turn off power at the circuit breaker or unplug the unit and shut off the under-sink water supply valve. Never attempt electrical panel repairs or interior wiring fixes yourself—stop and call a pro if you notice frayed wires or water leaks near electrical parts.
1. Pull Out the Racks and Map Every Rust Patch
Surface corrosion rarely shows up in just one place. A single visible orange tip usually means several neighboring wires have hairline cracks trapping moisture beneath the vinyl sleeve.
- Slide both the upper and lower dish racks completely out of the dishwasher by flipping open the plastic rail stops at the ends of the upper tracks.
- Lay an old bath towel across your kitchen counter or table and set the racks down under bright overhead or window light.
- Run your fingers gently along every vertical tine, cross-wire, and welded joint—avoid pressing hard on sharp flakes—to feel for tiny bumps, split seams, or spongy bubbles in the coating.
- Mark every damaged section with small loops of painter's tape so you do not miss a hairline split once you start sanding and sealing.
2. Trim Loose Vinyl and Sand Away Flaking Rust
Painting straight over bubbling vinyl traps moisture against the steel core, allowing rust to keep spreading out of sight. Taking five extra minutes to prep the bare metal helps your sealant adhere properly through hundreds of hot wash cycles.
- Use sharp nail clippers or a utility knife held angled away from your fingers to trim back any lifted, cracked, or hollow vinyl coating until you reach tight, intact plastic.
- Fold a strip of 220-grit sandpaper or an emery board and scrub each exposed wire until all orange, chalky rust flakes off and dull silver steel shows through.
- For tight welded intersections where sandpaper cannot reach, twist a small brass wire brush or folded abrasive cord back and forth around the joint.
- Wipe every sanded area with a cloth dampened in isopropyl rubbing alcohol, then let the rack air-dry completely for 15 minutes.
3. Seal Bare Metal With Rack Touch-Up Paint
Standard household enamel or nail polish peels quickly under high-temperature wash water. Choose an appliance-grade vinyl rack touch-up paint designed to stay flexible as metal expands and contracts during heated dry cycles.
- Shake the rack repair paint bottle thoroughly for at least 30 seconds so the pigments and resins mix evenly.
- Dip the applicator brush lightly and dab a thin coat over each prepped metal section, overlapping the surrounding intact vinyl coating by about a quarter inch to form a watertight seal.
- Let the first coat dry to the touch—usually 30 to 45 minutes—then apply a second thin coat to eliminate pinholes.
- Set the rack aside in a well-ventilated room for a full 24 hours before running a wash cycle; rushing cure time causes the patch to soften and wash away.
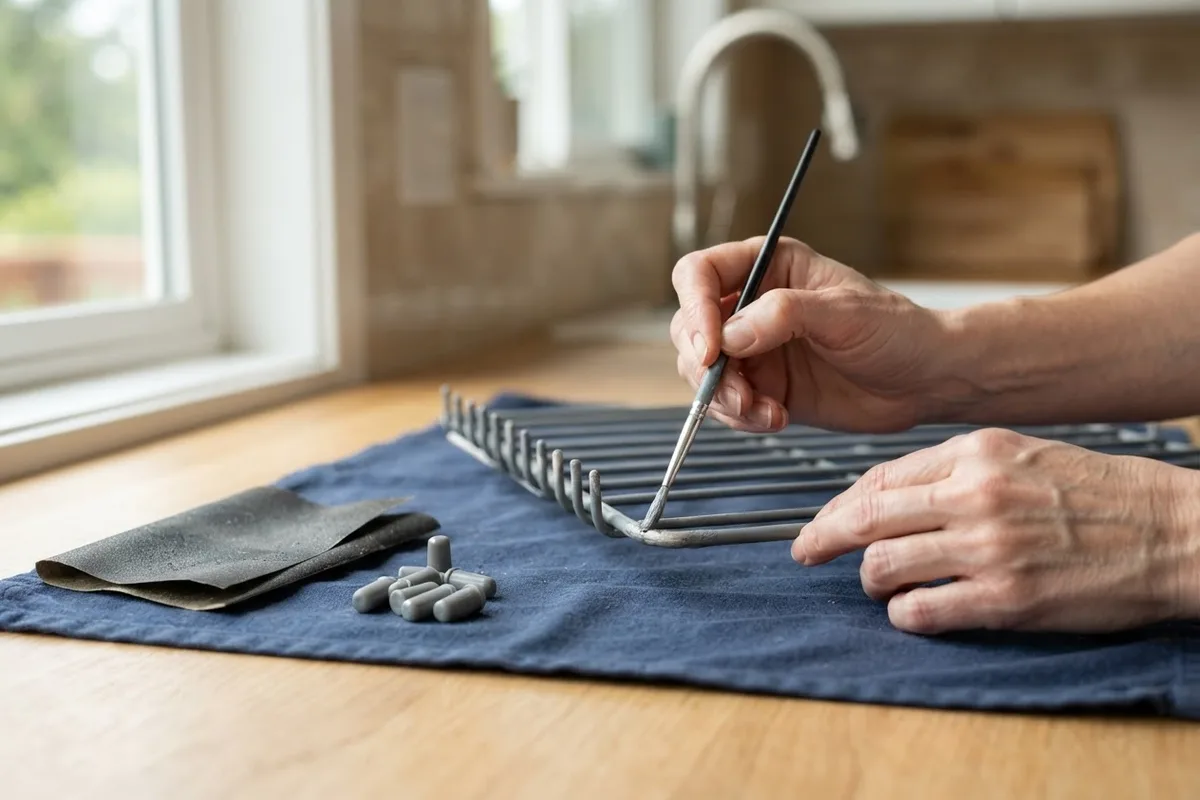
4. Cap Damaged Vertical Tines With Silicone Tips
Vertical tine tips take the heaviest daily abuse from ceramic mugs, stoneware plates, and glass rims. Even after touch-up paint dries, sharp tips benefit from extra cushioned armor that keeps water out and stops metal prongs from scratching your dishes.
- Measure the diameter of your rack wire or compare an undamaged tip against a universal tine-cap kit before buying—most US dishwashers use standard 3/16-inch or 1/4-inch vinyl or silicone caps.
- Dab a tiny drop of rack sealant adhesive or freshly brushed touch-up paint onto the prepared tine tip.
- Press a matching replacement cap firmly onto the wire until it seats all the way down over the intact coating.
- Wipe away any squeezed-out excess sealant with a cotton swab and allow the adhesive to cure overnight before loading the rack.
5. Change Loading Habits That Chip the Coating
Patching existing damage only buys time if everyday kitchen habits keep slicing open fresh nicks in the vinyl. Most premature rack rust starts from physical impacts rather than defective steel.
- Keep sharp chef's knives, steak knives, and serrated blades out of the dishwasher—hand-washing preserves blade edges and prevents tips from slicing through rack vinyl during water-jet movement.
- Wash heavy cast-iron cookware, stoneware roasting pans, and sharp-edged sheet pans by hand instead of wedging them tightly over coated tines.
- Leave small gaps between heavy ceramic plates so dishes do not rattle and hammer against the wire prongs during high-pressure spray bursts.
- Guide the lower rack smoothly over the door track rather than letting a fully loaded basket drop off the edge, which bends welded wire joints and cracks brittle nylon coatings.
6. Inspect Rollers, Track Clips, and Tub Seams
If rust keeps appearing along the outer perimeter rails of your basket, mechanical friction—not dishes—may be scraping the coating bare every time you roll the rack in and out.
- With power shut off at the breaker and the water valve closed, inspect the upper rack roller wheels and track-stop clips for cracks, worn edges, or missing bearings.
- Check whether the rack rubs against the door liner or side tub walls as you slide it; a tilted cabinet can make loaded baskets drift and grind against metal rails. Follow our guide on how to level a dishwasher if the unit sits unevenly.
- Examine the stainless-steel or porcelain-coated tub walls, door seam, and heating-element brackets with a flashlight for matching orange rust streaks.
- Replace worn plastic wheel assemblies promptly—most snap on without tools—so exposed frame rails stop grinding metal-on-metal.
Dishwasher Rack Rust: Repair vs. Replace Guide
Patching works best when the steel frame stays rigid and damage is limited to isolated prongs. Once corrosion eats through main support wires or spreads across half the basket, replacing the rack—or evaluating the whole machine—usually makes better financial sense. Prices below reflect broad typical US ranges and vary by area, brand, and model.
| Rust Severity | Best Next Step | Typical US Cost Range | DIY or Pro? |
|---|---|---|---|
| 1–10 chipped tine tips | Sand, paint, and add silicone tine caps | $10–$25 for repair kit | Easy DIY |
| Spreading rust on cross-wires | Trim loose vinyl, sand, apply 2–3 paint coats | $15–$30 for sealant & abrasives | Easy DIY |
| Snapped tines or weakened frame | Order an exact-model OEM replacement rack | $80–$250 per rack (varies by model) | DIY swap |
| Rust on tub seams or mounting studs | Stop using unit and schedule an inspection | $150–$350+ (varies by area/model) | Call a pro |
When to Call a Pro
DIY rack repair is safe and worthwhile when corrosion is limited strictly to the removable dish baskets. However, stop and bring in a technician if you notice rust blooming directly on the dishwasher's interior tub seams, around the heating element mounts, along the door hinges, or underneath the unit on the kitchen subfloor. Tub corrosion often signals a slow water leak, failing door seal, or stray electrical grounding problem—issues you should never troubleshoot around live wiring or your electrical panel.
Before paying $200 or more for two replacement racks on an older dishwasher, weigh that expense against overall machine health using our dishwasher repair cost guide. If you see tub rust, persistent leaks, or rack track damage connected to the cabinet frame, True Appliance Repair can match you with a local pro through our dishwasher repair service to diagnose the root cause safely.
FAQ
Is it safe to use a dishwasher with a rusty rack?
Small specks of surface rust on a couple of tine tips are mostly a nuisance, though iron oxide flakes can stain ceramic plates, silverware, and plastic containers. Still, you should patch exposed steel right away because rust weakens wires quickly and sharp broken prongs can cut your hands while unloading. If rusted wires are snapping off or flaking heavily onto tableware, repair or replace the rack before running another load.
How long does dishwasher rack touch-up paint last?
A carefully prepped patch—trimmed back to firm vinyl, sanded to bare steel, wiped with rubbing alcohol, and cured for a full 24 hours—typically holds up for one to three years depending on how often you run high-heat cycles. Adding silicone tine caps over freshly painted vertical prongs extends the repair even further by absorbing daily bumps from dishes.
Can I use silicone caulk or nail polish on rusty dishwasher tines?
Avoid nail polish and standard bathroom silicone caulk inside a dishwasher. Nail polish chips off rapidly in hot water, and general-purpose caulks are not formulated for constant food-adjacent steam and high-temperature wash cycles. Stick with dedicated appliance rack vinyl repair paint and heat-resistant tine caps made specifically for dishwashers.
Why do replacement dishwasher racks cost so much?
Manufacturer replacement racks often run $80 to $250 or more per basket—varying by brand and model—because they are custom-welded steel assemblies coated in heavy nylon or PVC and shipped in oversized boxes. If both upper and lower racks are severely corroded on a dishwasher that is already eight to ten years old, comparing rack prices against a newer machine is usually worth your time.