
Discovering a burning smell coming from your clothes dryer is an alarming experience for any homeowner. Whether it is a faint smoky odor, a distinct smell of burning plastic, or a heavy chemical scent, this is an issue you must address immediately. Operating a dryer that smells like it is burning is a serious fire hazard. Fortunately, identifying the root cause and fixing it is often something you can do yourself with a few basic tools and the right approach.
In this detailed guide, we will walk you through the most common reasons why your dryer might be smelling like it is burning and provide six safe, practical DIY fixes to resolve the problem. By following these steps, you can restore your appliance to safe working order and prevent potential hazards.
1. Clear the Lint Trap and Housing
The most frequent cause of a burning smell in a dryer is excessive lint accumulation. Lint is highly flammable, and when it builds up inside the lint trap, the housing, or beneath the screen, it can easily scorch from the heat of the dryer.
Safety First: Before doing any hands-on inspection or work on your appliance, always unplug the dryer from the electrical outlet and shut off the gas valve if you have a gas model.
DIY Steps:
- Remove the Lint Screen: Pull the lint screen out of your dryer. Scrape away any visible lint from the mesh and rinse it under warm water if it has a sticky residue from dryer sheets. Let it dry completely.
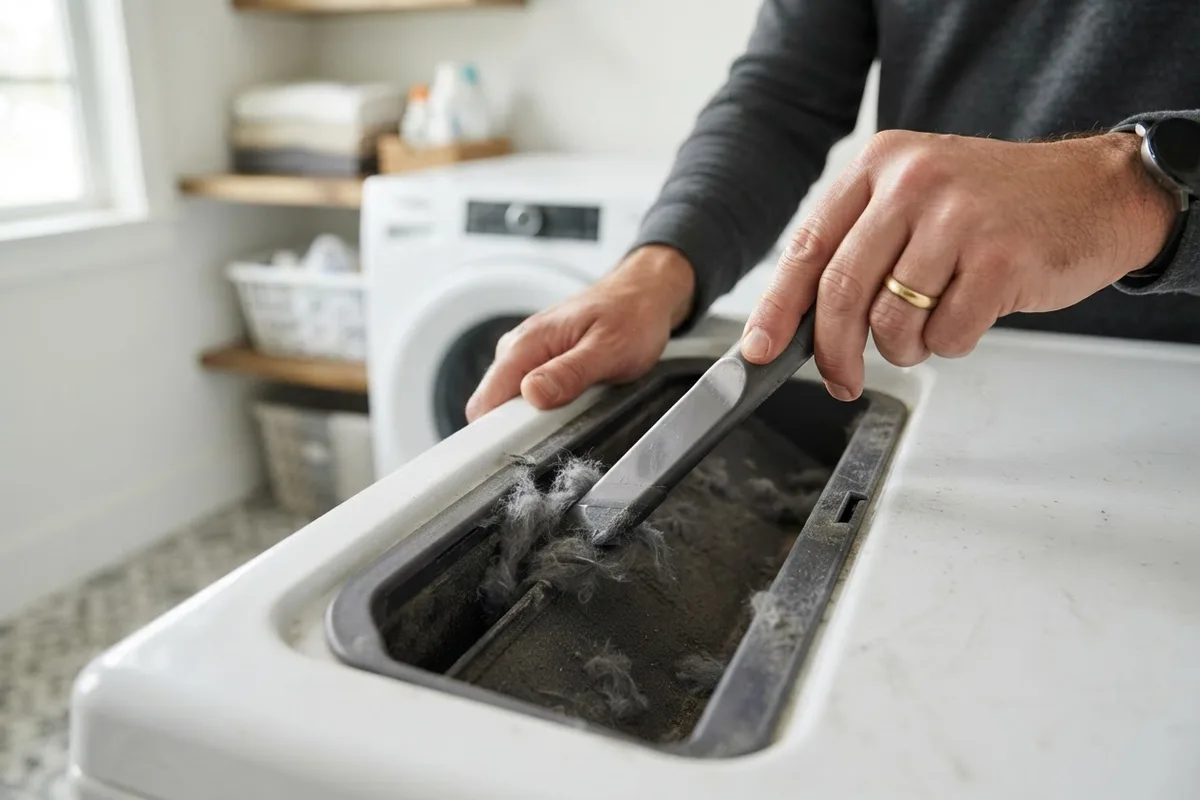
- Vacuum the Housing: Use a vacuum cleaner with a narrow crevice attachment to reach deep into the slot where the lint screen sits. Move the attachment around to suck out all accumulated lint, dust, and debris.
- Use a Lint Brush: If your vacuum cannot reach far enough, use a long, flexible dryer lint brush to scrape the interior walls of the housing and pull up clumps of lint.
- Clean the Area Beneath the Dryer: Gently tilt the dryer or use your vacuum to clean the floor directly underneath and behind the appliance, as lint often falls and gathers there.
Regularly cleaning these areas will prevent lint from overheating and creating a burning odor.
2. Inspect and Clean the Dryer Vent
If your dryer's external vent is clogged, hot air cannot escape properly. This causes the dryer to overheat, which can scorch any stray lint inside the vent pipe, producing a strong burning smell. A clogged vent also forces your dryer to work harder, which can lead to other components overheating. For a full breakdown of regular vent maintenance, see our guide on how to clean a dryer vent and lint trap.
DIY Steps:
- Disconnect the Vent Pipe: With the dryer unplugged, carefully pull the appliance away from the wall. Loosen the clamp holding the flexible vent hose to the back of the dryer and remove the hose.
- Vacuum the Hose and Wall Duct: Insert your vacuum hose with a crevice attachment into both the back of the dryer's exhaust port and the vent hose itself. Remove all loose lint.
- Use a Vent Cleaning Kit: For long vent lines that run through walls or to the roof, use a specialized dryer vent cleaning kit. This usually consists of a flexible rod with a round brush attachment that you rotate (often with a power drill) as you push it through the vent pipe to break up clogs.
- Check the Exterior Vent Hood: Go outside your home and locate the exterior dryer vent hood. Ensure the vent flap moves freely and is not blocked by bird nests, debris, or lint. Clean the exterior opening thoroughly.
3. Check for Trapped Clothing or Objects
Sometimes, the burning smell is not coming from inside the dryer's mechanical parts but from an object that has slipped between the drum and the dryer's front or rear housing. Small items like socks, underwear, or stray items left in pockets (like crayons, plastic wrappers, or coins) can fall into the gaps and get stuck against the hot drum or heating element.
DIY Steps:
- Inspect the Drum Seal: Open the dryer door and use a flashlight to carefully inspect the rubber or felt seal around the edge of the drum. Look for any small pieces of clothing, strings, or foreign objects wedged in the gap.
- Check the Drum Interior: Feel around the inside of the drum, checking the baffles (the raised ridges inside the drum) and the area where the drum meets the back wall.
- Remove Foreign Objects: If you find a trapped item, gently use a pair of needle-nose pliers or your fingers to pull it out. If a plastic object or crayon has melted onto the drum surface, wait for the dryer to cool completely. Then, apply a small amount of ice to the melted material to harden it, and gently scrape it off with a plastic putty knife.
- Clean the Drum: Wipe the area clean with a damp microfiber cloth and a mild detergent to remove any remaining residue.
4. Examine the Drum Belt for Wear
The drum belt is a long, rubber belt that wraps around the dryer drum, the motor pulley, and an idler pulley. Over time, this belt can wear out, crack, or become misaligned. If the belt is slipping or rubbing against other components, the friction can generate significant heat, causing a burning rubber smell. If you have noticed your dryer not spinning properly, a failing belt is a likely culprit.
DIY Steps:
- Access the Internal Components: Ensure the dryer is unplugged. Depending on your dryer model, you will need to remove either the top panel or the front panel. Refer to your owner's manual for specific instructions on how to take off these panels.
- Locate the Drum Belt: Look for the thin rubber belt wrapped around the middle of the large dryer drum.
- Inspect for Damage: Visually check the belt for signs of fraying, cracks, missing chunks, or burn marks. Feel the belt to see if it feels brittle or excessively loose.
- Check the Pulley System: Ensure the belt is properly seated on the idler pulley and the motor pulley. If the belt has slipped off or is damaged, it will need to be replaced. You can purchase a replacement belt specific to your dryer model online or at an appliance parts store and install it following the manufacturer's directions.
5. Look for Damaged Electrical Wiring
If the burning smell resembles burning plastic or has an acrid, electrical scent, the issue could be damaged, corroded, or loose electrical wiring inside the appliance. This is a serious issue that requires immediate attention, as faulty wiring can easily lead to an electrical fire.
DIY Steps:
- Disconnect Power: It cannot be overstated: always unplug the dryer before checking any electrical components.
- Remove the Access Panel: Remove the back panel or the main control panel cover of your dryer to expose the wiring and the terminal block (where the power cord connects to the dryer).
- Visual Inspection: Use a flashlight to inspect all visible wires, connectors, and terminals. Look for any wires that appear melted, scorched, blackened, or exposed. Check for any loose wire nuts or wire connectors.
- Check the Terminal Block: Pay special attention to the terminal block. Look for any signs of overheating, such as melted plastic, rust, or burn marks around the wire connections.
- Replace Damaged Wires: If you find a slightly loose connection, you may be able to tighten it. However, if you see any melted, frayed, or burned wires, do not attempt to patch them. Damaged wiring must be replaced entirely. If you are not experienced with electrical work, this is the time to stop and call a professional.
6. Clean the Interior Drum and Heating Element
In some cases, the burning smell is simply due to dust, pet hair, or small particles of debris that have bypassed the lint filter and settled directly on the dryer's heating element or inside the burner chamber (for gas dryers). When the heating element heats up, these particles burn away, creating a distinct odor.
DIY Steps:
- Locate the Heating Element: For electric dryers, the heating element is usually located in a metal housing at the back or bottom right of the appliance. For gas dryers, look for the burner assembly.
- Vacuum the Area: With the dryer unplugged and panels removed (as in Step 5), use your vacuum cleaner with a brush attachment to gently vacuum around the heating element housing, the burner chamber, and the surrounding internal cabinet. Be very careful not to bend the coils of an electric heating element.
- Wipe Down the Area: Use a slightly damp, clean cloth to wipe away any dust on the exterior of the heating element housing and adjacent components. Do not use any wet cloths on the coils themselves.
- Reassemble and Test: Once you have removed all visible dust and lint from the internal components, carefully reassemble the dryer panels. Plug the appliance back in and run a short, empty cycle. If the smell was just dust on the element, it should dissipate within a few minutes.
Dryer Burning Smell Quick-Reference Guide
To help you quickly identify and address the issue, here is a comparison table outlining the common causes of a burning smell in a dryer, the type of odor they produce, and the typical urgency of the fix.
| Cause of Smell | Type of Odor | DIY Difficulty | Urgency Level |
|---|---|---|---|
| Lint Buildup | Smoky, burning dust | Easy | High |
| Clogged Vent | Smoky, damp heat | Moderate | High |
| Trapped Objects | Burning plastic or sharp odor | Easy | Medium |
| Worn Drum Belt | Burning rubber | Moderate | Medium |
| Faulty Wiring | Acrid, electrical, or plastic | Hard | Critical |
| Dust on Element | Burning dust, short-lived | Easy | Low |
When to Call a Pro
While many causes of a dryer smelling like it is burning can be fixed with a little DIY effort, some situations require advanced troubleshooting and repair skills.
You should stop your DIY efforts and call a professional appliance repair service if:
- The burning smell persists after you have completed all six steps listed above.
- You discovered melted, scorched, or severely damaged electrical wiring.
- You smell gas (for gas dryers) or suspect a leak in the gas supply line.
- The issue involves the internal motor, a faulty thermostat, or the sealed heating system.
- You are uncomfortable or unfamiliar with handling electrical components or disassembling your appliance.
Handling gas lines, sealed systems, or complex electrical panel work requires specialized tools and expertise. If your appliance is reaching the end of its lifespan, it might be time to review the signs your dryer is dying before investing in major repairs. If you determine that the fix is beyond your DIY comfort level, True Appliance Repair can match you with a local appliance pro in your area to get your dryer safely back in working order. For complex repairs, expect a local pro to charge between $150 and $400, though this varies by area and model.
FAQ
Why does my dryer smell like burning after not using it for a while?
If you have not used your dryer for several weeks or months, it is common for a layer of dust to settle on the heating element or inside the internal cabinet. When you turn the dryer on, this dust quickly burns off, creating a temporary burning smell. This odor should dissipate within a few minutes of operation. If it persists, you should investigate further using the steps above.
Can I still use my dryer if it smells like it is burning?
No, you should never continue to use a dryer that smells like it is burning. A burning smell is a clear indicator of a potential fire hazard, whether from lint accumulation, a failing motor, or damaged electrical wiring. As soon as you notice a burning odor, you should immediately stop the cycle, unplug the appliance, and identify the source of the smell before running it again.
How often should I clean my dryer's vent to prevent burning smells?
To ensure safe and efficient operation, you should thoroughly clean your dryer's vent and exhaust duct at least once a year. However, if you have a large family and do several loads of laundry every day, or if you have pets that shed heavily, you should consider cleaning the vent every six months. Regularly clearing the lint trap after every single load is also essential.
What if my dryer smells like burning after I have cleaned the lint trap?
If you have already cleaned the lint trap and are still noticing a burning smell, the issue is likely deeper within the appliance. It could be a clogged external vent, a worn-out drum belt, trapped debris under the drum, or even faulty electrical wiring. Follow steps two through six in this guide to systematically check and fix these other common causes.