
Stepping into the kitchen in your socks only to land in a cold puddle in front of the fridge is a frustrating start to any morning. Most homeowners panic and assume a major mechanical part has failed, but a leaking freezer is almost always caused by a simple drainage bottleneck or a minor water line drip. By walking through these six straightforward checks, you can pinpoint why your freezer is leaking water and solve the problem before it damages your kitchen flooring.
Safety First: Before removing interior freezer panels, clearing drains, or inspecting rear valves, always unplug your appliance from the wall outlet and turn off the household water supply valve feeding the ice maker. Never use sharp metal knives or ice picks to chip away frost near refrigerant coils, and leave sealed-system or electrical board work to a professional.
1. Clear a Clogged Defrost Drain Tube
The number one culprit behind a freezer leaking water—often accompanied by a solid sheet of ice across the bottom of the freezer compartment—is a blocked defrost drain. Every frost-free freezer melts frost off its evaporator coils once or twice a day. That meltwater is supposed to flow down a small drain hole into a pan underneath the appliance. When food crumbs, ice crystals, or sludge block the hole, water overflows onto the freezer floor and seeps out the door.
- Unplug the refrigerator and remove all food, bins, and baskets from the freezer.
- Locate the defrost drain trough along the lower back wall of the freezer (on some models, you may need to unscrew the rear interior panel once the frost thaws).
- Melt any surface ice covering the drain hole using a hair dryer on a low setting—keep the dryer moving so you do not warp plastic liners.
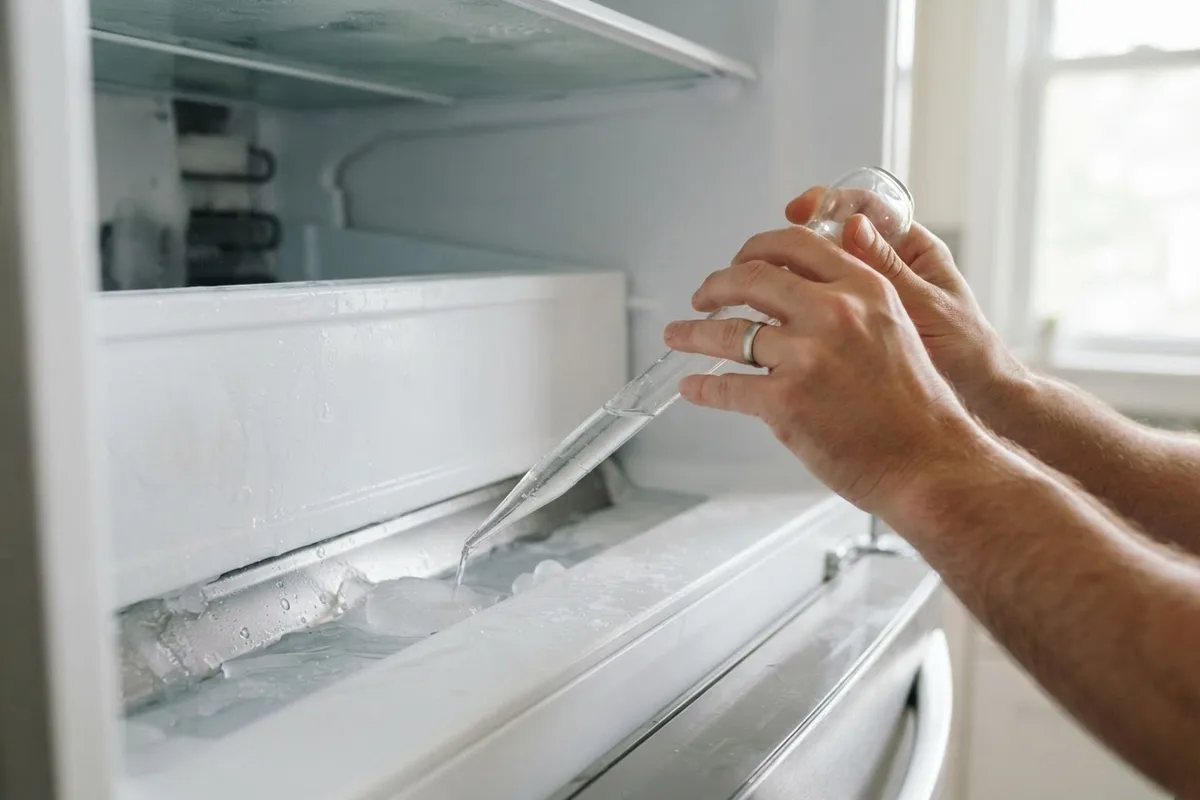
- Fill a turkey baster with hot water mixed with one teaspoon of baking soda and squirt it forcefully into the drain hole.
- Push a flexible plastic drain snake or a 24-inch piece of thick weed-trimmer line down the tube until water drains freely into the lower pan.
2. Inspect a Leaking Ice Maker Water Inlet Valve
If water puddles behind the appliance or drips steadily from the back of the freezer into the ice bucket, the water inlet valve may not be closing all the way. Over time, mineral deposits from hard water can prevent the valve's internal rubber diaphragm from sealing shut after filling the ice mold, sending a slow trickle of water up the fill tube where it freezes and overflows.
- Unplug the appliance, shut off the water supply valve behind the fridge, and slide the unit away from the wall.
- Unscrew the lower rear access panel to locate the water inlet valve where the household water line connects.
- Check the brass or plastic fittings for white crusty mineral buildup, wet drips, or hairline cracks in the plastic body.
- Tighten loose compression nuts a quarter-turn with an adjustable wrench, taking care not to overtighten.
- If the valve body itself is seeping water or letting water pass into the fill tube while off, replace the valve assembly.
3. Thaw a Frozen Ice Maker Fill Tube
When water pressure drops or a water filter goes too long without replacement, water enters the ice maker fill tube too slowly and freezes before reaching the tray. The next time the ice maker calls for water, the fresh stream hits that ice plug and splashes backward down the rear freezer wall or out onto the floor.
- Locate the small rubber or plastic fill spout poking through the ceiling or back wall directly above the ice maker mold.
- Pinch the rubber spout gently with your fingers to feel for a hard core of ice inside.
- Warm the spout with a hair dryer on low heat or hold a cloth soaked in hot water against it until the ice plug slides out.
- Replace your refrigerator water filter if it is more than six months old to restore full water pressure and prevent repeat freeze-ups.
4. Seal a Loose or Warped Freezer Door Gasket
A freezer door that does not seal 100% air-tight lets warm, humid kitchen air sneak inside day and night. That moisture condenses on the ceiling and walls, creating heavy frost that overwhelms the defrost drain and melts into puddles along the front threshold. Excess frost can also block airflow vents, which is a common reason why a refrigerator top shelf gets warm while the freezer struggles.
- Open the freezer door and wipe the entire rubber gasket and the metal cabinet frame with warm, soapy water to remove sticky spills.
- Check for gaps using the dollar-bill test: close the door on a bill and pull it out at several spots around the perimeter.
- If the bill slips out with zero tension, gently warm the rubber folds with a hair dryer on low to soften the vinyl and pull it slightly outward to meet the frame.
- Spread a thin coat of food-grade silicone grease or petroleum jelly along the hinge side of the gasket so it folds smoothly without binding.
5. Level the Appliance Toward the Back
Refrigerators and standalone freezers are designed to sit with a slight backward tilt—about a quarter-inch higher in the front than the back. If your kitchen floor slopes forward or the front leveling legs are screwed all the way up, gravity pulls defrost meltwater away from the rear drain trough and straight toward the front door seal.
- Place a carpenter's bubble level front-to-back on the top of the cabinet or on a flat interior shelf.
- Remove the lower front toe grille at the base of the appliance to expose the adjustable front leveling legs.
- Use an adjustable wrench or flathead screwdriver to turn the front legs clockwise to raise the front edge until the bubble sits just slightly toward the rear.
- Verify that both front doors or drawers swing shut on their own when released halfway open.
6. Replace a Cracked Bottom Drain Pan
After defrost water travels down the drain tube, it sits in a shallow plastic evaporation pan near the warm compressor until fan airflow evaporates it into the room. When you move the fridge to clean behind it, or as the plastic ages over a decade of heat cycles, that pan can crack and dump water directly onto your floor.
- Unplug the unit and shine a flashlight through the front base grille—or behind the rear access panel—to locate the evaporation pan.
- Soak up any standing water in the pan using an old towel or wet/dry shop vacuum.
- Slide the pan out (if removable on your model) and hold it up to the light to look for splits, warped corners, or pinholes.
- Seal minor hairline splits temporarily with waterproof epoxy, or order an exact replacement pan for your model number.
Freezer Water Leak Quick-Reference Guide
Note: Typical US repair ranges include parts and labor and vary by region, appliance brand, and freestanding vs. built-in design.
| Leak Location & Symptom | Most Likely Cause | Typical Repair Cost | DIY or Pro? |
|---|---|---|---|
| Ice sheet on freezer floor + front drips | Clogged defrost drain tube | $0 – $150 | Easy DIY |
| Water pooling behind the unit | Loose water line or faulty inlet valve | $100 – $220 | DIY / Pro |
| Icicles hanging from ice maker | Frozen fill tube or weeping valve | $0 – $200 | Easy DIY |
| Heavy frost around door + floor drips | Worn or dirty door gasket | $80 – $190 | Easy DIY |
| Puddle directly underneath center | Cracked evaporation drain pan | $40 – $140 | Easy DIY |
| Warm freezer + sudden massive puddle | Failed compressor or fan motor | $250 – $800+ | Pro Only |
When to Call a Pro
Flushing a blocked defrost drain, thawing an ice maker fill tube, and adjusting leveling legs are straightforward projects that most homeowners can wrap up in under an hour. However, you should stop and call a professional if the freezer is leaking because it has completely stopped cooling and all your food is thawing at once. A warm freezer combined with unusual sounds—such as the symptoms covered in our guide on why a freezer is making a clicking noise—often points to a failed evaporator fan, main control board, or compressor.
If you have cleared the drain and checked the water connections but puddles keep coming back, True Appliance Repair can connect you with an experienced local technician for dependable refrigerator repair. You can also reach out through our contact page to get matched with a pro in your area.
FAQ
Why is there a sheet of ice at the bottom of my freezer and water on the floor?
A solid sheet of ice on the bottom of the freezer almost always means the automatic defrost drain hole at the back is frozen shut or clogged with debris. Each time the defrost heater runs, the melted water has nowhere to go, so it pools on the freezer floor, freezes into a slab, and overflows out the door seal.
Can I pour boiling water down my freezer defrost drain?
Use hot tap water rather than boiling water when flushing a freezer drain with a turkey baster. Boiling water can soften or warp thin plastic drain funnels and vinyl drain tubing inside the cabinet walls.
Will turning off the ice maker stop my freezer from leaking?
If the leak is coming from a cracked water line, a weeping water inlet valve, or a frozen fill spout, flipping the ice maker arm to the off position and shutting off the rear water valve will stop the leak immediately. If water continues pooling after the water supply is off, the leak is coming from the defrost drain system.
How often should I check my freezer drain and gaskets?
Wiping down the rubber door gaskets every three months and flushing the defrost drain with warm water and baking soda once a year during a deep clean will prevent almost all common freezer water leaks.