
Most homeowners wipe down kitchen countertops and empty the dryer lint screen daily, but several critical upkeep steps stay completely out of sight. Over time, overlooked dust, mineral scale, and trapped debris force your household equipment to work twice as hard, spiking utility costs and causing sudden mechanical failures.
Performing simple, proactive maintenance across your home prevents unnecessary strain on delicate motors, heating elements, and pumps. Follow this straightforward guide to tackling the seven most commonly forgotten maintenance steps to keep your equipment running quietly and efficiently year-round.
Before undertaking any hands-on care, always prioritize safety: unplug the unit from the wall outlet or switch off its dedicated circuit breaker at your main electrical panel. For appliances tied to plumbing or fuel connections, shut off the water supply valve or gas line completely before beginning work.
Clear Heavy Dust off Refrigerator Condenser Coils
Refrigerator condenser coils release the heat removed from inside your fresh food and freezer compartments. Located behind the lower toe kick plate or along the bottom rear panel, these coils easily accumulate thick coats of pet hair, ambient dust, and household dander.
When coils become blanketed in grime, the compressor must run almost continuously to maintain safe food temperatures. This extra strain significantly increases monthly electricity bills and dramatically shortens the working life of the compressor.
- Unplug the refrigerator and gently pull it forward away from the wall.
- Snap off the front lower grille or remove the rear access panel screws using a screwdriver.
- Attach a narrow crevice tool to your vacuum cleaner and carefully remove heavy dust mats between the coil loops.
- Use a long, flexible condenser coil brush to gently scrape away remaining stubborn debris.
- Vacuum up fallen dust from the floor, replace the panel, and push the unit back into position.
Taking fifteen minutes twice a year to clean your coils ensures reliable cooling performance. For more extensive cooling issues, reviewing our guide on late-summer appliance maintenance steps will help keep your kitchen prepared for seasonal temperature shifts.
Vacuum Built-Up Lint Deep Inside the Dryer Duct
Clearing the removable lint mesh after every laundry load is standard practice, but fine fibers continuously slip past the screen. Over several months, lint collects in the internal blower housing, exhaust transition hose, and outdoor wall vent cap.
Restricted airflow forces your dryer to run longer cycles to dry clothes, wasting electricity or gas while creating a major fire hazard inside your laundry room.
- Disconnect the electrical cord and pull the dryer away from the wall. Turn off the gas supply valve if applicable.
- Loosen the metal worm-drive clamp securing the flexible duct to the back of the dryer.
- Insert a specialized rotary dryer vent brush attached to a cordless drill into the wall duct, feeding it through while rotating to knock loose stubborn lint.
- Vacuum out the loosened debris from the pipe and the rear exhaust chute on the appliance.
- Reattach the duct securely with metal clamps—never use duct tape, which deteriorates under high heat.
De-Scale and Sanitize Your Garbage Disposal Assembly
Garbage disposals frequently gather decaying food particles, grease films, and hard water mineral deposits underneath the flexible rubber splash guard and along the grinding chamber walls. This buildup causes unpleasant kitchen odors and slows down grinding efficiency.
- Unplug the disposal under the sink or shut off its breaker.
- Scrub the underside of the rubber splash guard using an old toothbrush dipped in a mixture of warm water and liquid dish soap.
- Reconnect power, turn on cold running water, and drop two cups of ice cubes along with one cup of coarse rock salt into the hopper.
- Run the disposal for thirty seconds; the grinding action of the hard ice knocks sludge off the internal impellers.
- Finish by grinding halved lemon peels to eliminate residual odors and leave a fresh citrus scent.
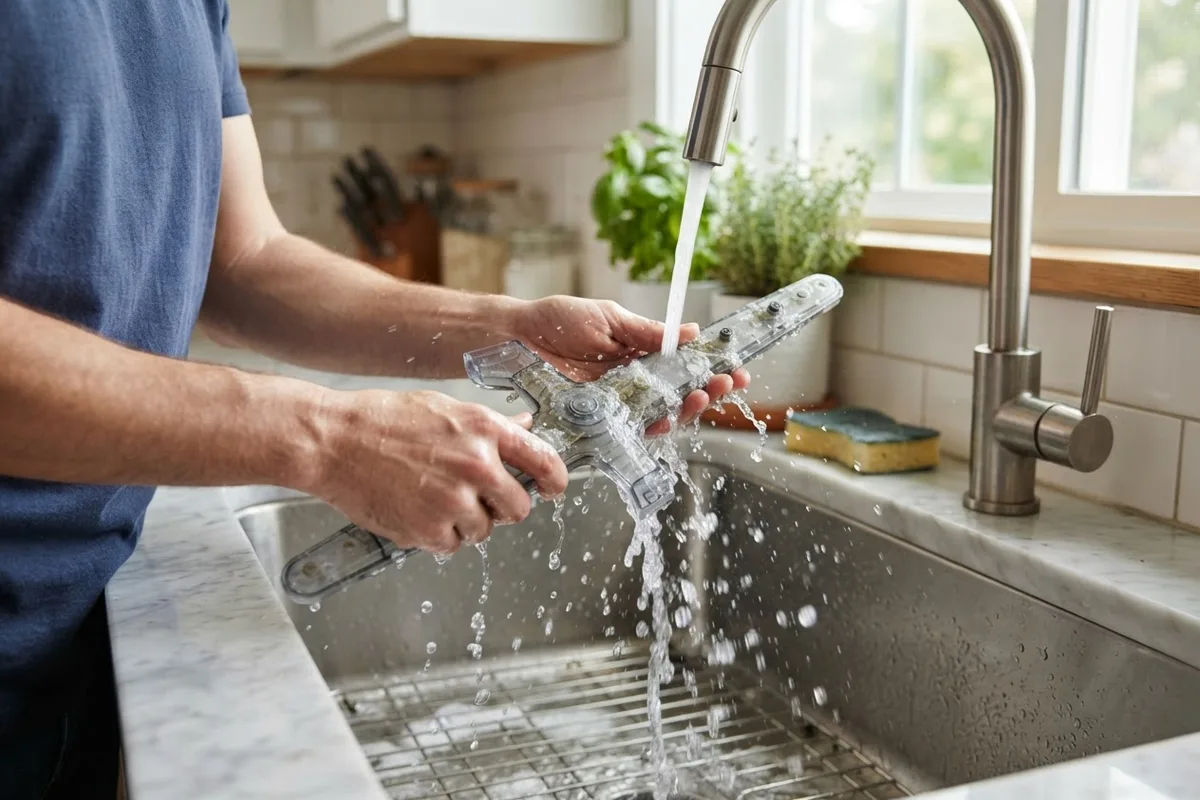
Clean Hard Water Deposits from Dishwasher Spray Arms
Hard water minerals like calcium and magnesium gradually clog the tiny spray nozzles located along the upper and lower dishwasher wash arms. Blocked spray openings drop water pressure drastically, leaving cloudy film and stuck-on food on your dinnerware.
- Ensure the dishwasher power is off and pull out the bottom rack.
- Unthread the retaining nut or release the locking tab securing the lower and upper spray arms.
- Rinse the arms under warm tap water and inspect each nozzle opening.
- Poke a wooden toothpick or bent paperclip through each clogged hole to clear away mineral crust and debris.
- Soak the spray arms in a basin of warm white vinegar for one hour to dissolve remaining limescale before reinstalling.
If your dishware still comes out dirty after clearing the nozzles, check out our troubleshooting steps for a dishwasher soap dispenser not opening to resolve chemical detergent delivery problems.
Flush Laundry Washer Inlet Screens and Supply Hoses
Most modern washing machines feature small mesh filter screens embedded inside the water inlet valve couplings where the supply hoses attach to the back of the machine. Sediment, rust particles, and municipal line debris gather against these screens over time, leading to slow tub filling cycles or error codes.
- Turn off the hot and cold water shut-off valves behind the washing machine.
- Unplug the unit for absolute safety.
- Unscrew the water supply hoses from the brass inlet connectors on the back of the washer, holding a small bucket beneath to catch residual water.
- Use needle-nose pliers to gently pull the small plastic wire mesh screens out from the inlet valves.
- Rinse the screens under a faucet, clean off sediment with a soft toothbrush, and reinsert them carefully before reconnecting hoses tightly.
Degrease Cooktop Range Hood Filters and Exhaust Vents
Range hood exhaust fans draw airborne grease, smoke, and moisture away from your cooktop. When the aluminum mesh filters become saturated with grease, airflow drops to near zero, allowing aerosolized oil to coat nearby cabinets and walls.
- Slide or unhook the aluminum mesh grease filters from the underside of the range hood canopy.
- Fill your kitchen sink with boiling water, half a cup of baking soda, and a generous squirt of degreasing dish soap.
- Submerge the filters completely and let them soak for twenty minutes.
- Scrub gently with a non-abrasive scrub brush to lift dissolved grease without bending the aluminum mesh.
- Rinse thoroughly with hot water, allow them to air dry completely, and snap them back into place.
Inspect and Clean Door Gaskets Across Major Units
Flexible vinyl door seals (gaskets) on your refrigerator, freezer, front-load washer, and dishwasher keep cold air or water contained. Crumbs, spilled juice, and detergent residues degrade the vinyl material, causing micro-tears that leak air or water.
- Wipe around the full perimeter of each door gasket using a soft microfiber cloth dipped in warm, soapy water.
- Clean deep inside the flexible folds where debris accumulates.
- Inspect the seal for cracks, rigidity, or tears.
- Test the seal strength on refrigerators by closing the door on a dollar bill; if it slides out without resistance, cold air is escaping and the seal requires replacement.
- Apply a micro-thin layer of petroleum jelly along refrigerator door gaskets to keep the vinyl pliable and prevent sticking.
| Appliance Task | Target Frequency | Estimated DIY Time | Primary Benefit |
|---|---|---|---|
| Refrigerator Coil Cleaning | Every 6 Months | 15–20 Mins | Reduces energy bills & protects compressor |
| Dryer Vent Duct Vacuuming | Annually | 30–45 Mins | Prevents fire hazards & speeds up drying |
| Disposal Ice & Salt Scrub | Monthly | 10 Mins | Eliminates foul odors & sharpens impellers |
| Dishwasher Nozzle De-scaling | Every 3 Months | 20 Mins | Restores wash pressure & cleaning quality |
| Washer Inlet Screen Flush | Every 12 Months | 15 Mins | Prevents slow fill cycles & valve damage |
| Range Hood Filter Soaking | Every 1–2 Months | 25 Mins | Captures kitchen grease & protects cabinetry |
When to Call a Pro
While cleaning filters, wiping gaskets, and vacuuming lint are safe DIY projects, complex mechanical and electrical problems require expert care. If you discover leaking plumbing lines, damaged electrical wiring, failing motor bearings, or sealed refrigeration system failures, stop immediately.
Any work involving internal gas connections, high-voltage wiring, or sealed refrigerant systems should always be left to experienced technicians. Attempting advanced repairs without appropriate test equipment can compromise home safety and lead to costlier damage.
When basic routine maintenance reveals deeper operational issues, True Appliance Repair can match you with a local appliance pro to diagnose and repair your home equipment quickly and safely.
FAQ
How often should I perform routine home appliance maintenance?
Most general maintenance tasks—like cleaning range hood filters, wiping gaskets, and flushing disposal chambers—should be done monthly or quarterly. Deep-cleaning tasks such as vacuuming refrigerator condenser coils and clearing the main dryer duct should be performed once or twice a year.
Can regular cleaning really extend the lifespan of major appliances?
Yes. Keeping internal components free of dust, lint, grease, and mineral scale dramatically reduces mechanical friction and thermal stress. Appliances that run at peak efficiency experience far less wear on motors, pumps, and heating elements, often extending operational life by several years.
What basic supplies do I need for DIY appliance maintenance?
A basic home maintenance kit requires simple household items: a vacuum cleaner with a crevice tool, a flexible condenser coil brush, needle-nose pliers, white vinegar, baking soda, liquid dish soap, microfiber cloths, and an adjustable wrench.
What should I do if my dryer still takes two cycles after cleaning the vent?
If your dryer continues to dry poorly after clearing the internal lint chute and external vent pipe, the issue may involve a failing heating element, thermal fuse, or drum roller assembly. In such cases, professional diagnostic testing is recommended.