
As temperatures begin to drop and fall approaches, household appliances gear up for their heaviest workload of the year. From roasting autumn meals to handling endless loads of heavy blankets and jackets, your kitchen and laundry room work overtime. Taking time for proactive autumn appliance care steps now prevents frustrating mid-season breakdowns when repair schedules are packed.
1. Clean Refrigerator Coils and Gaskets
Your refrigerator works continuously, but accumulated dust on condenser coils forces the compressor to run hotter and longer. Before heavy holiday food storage begins, perform a thorough cleaning to ensure optimal cooling efficiency.
- Safety first: Always unplug the refrigerator or switch off its circuit breaker before servicing.
- Gently pull the refrigerator forward away from the wall.
- Locate the condenser coils behind the bottom access grille or on the back panel.
- Use a narrow vacuum attachment and coil brush to pull away lint, dust, and pet hair.
- Wipe the rubber door gaskets with warm water and mild dish soap to remove sticky residue.
- Inspect the gasket seal by closing a dollar bill in the door. If it slides out easily, cold air is escaping and the seal may need adjustment or replacement.
Taking 15 minutes to clear dust prevents thermal overload on the compressor and lowers monthly electric bills.
2. Deep Clean and Deodorize the Garbage Disposal
Fall cooking brings heavy meal prep, making your garbage disposal a critical kitchen worker. Food debris and organic buildup cause foul odors and slow drainage if ignored.
- Disconnect power by unplugging the unit under the sink or turning off the wall switch.
- Look into the drain with a flashlight and use pliers—never your fingers—to remove trapped bones or fibrous debris.
- Restore power, pour 1/2 cup of baking soda into the drain, and follow with 1 cup of white vinegar.
- Allow the mixture to fizz for 10 minutes to dissolve buildup along the splash guard.
- Flush with hot tap water for 60 seconds.
- Drop 6 to 8 ice cubes and a few citrus peels into the chamber, then run cold water and turn on the disposal to scrub the internal impellers.
Never pour liquid chemical drain openers into a disposal, as harsh chemicals erode rubber seals and internal housing.
3. Inspect Washing Machine Hoses for Wear
Laundry loads spike in autumn with sweaters, jackets, and extra bedding. A burst washing machine supply hose can discharge hundreds of gallons of water in hours, causing severe home damage.
- Pull the washer away from the wall to access the hot and cold inlet hoses.
- Turn off the water supply shut-off valves behind the unit.
- Examine rubber hoses closely for cracks, bulges, soft spots, or rusting at the metal connections.
- Tighten loose fittings gently using adjustable pliers.
- If your hoses are standard rubber and older than 3 to 5 years, replace them with flexible braided stainless steel hoses.
Reviewing hose integrity is one of the top recommendations in our guide on 7 Home Appliance Safety Checks Every Homeowner Should Do to protect your laundry space.
4. Clear the Dryer Exhaust Vent Line
Lint accumulation in dryer exhaust lines reduces airflow, drastically increases drying times, and creates a significant domestic fire hazard during peak laundry seasons.
- Unplug the electric dryer or turn off the gas supply valve.
- Slide the dryer away from the wall and loosen the duct clamp on the exhaust port.
- Disconnect the flexible or rigid ductwork.
- Insert a dryer vent vacuum attachment or flexible cleaning brush deep into the duct pipe to pull out packed lint.
- Go outside and inspect the exterior wall vent hood, clearing away leaves, bird nests, or lint clogging the damper flapper.
- Reattach ducting with metal tape rather than screws, which trap lint inside the pipe.
Clearing ductwork restores heating performance and cuts drying cycle times significantly.
5. Clean Dishwasher Spray Arms and Filter
Autumn entertaining places high demands on your dishwasher. Trapped food particles inside the filter basket or spray arm nozzles prevent clean water circulation, leaving grit on glassware.
- Pull out the lower rack and remove the main mesh filter assembly at the tub bottom.
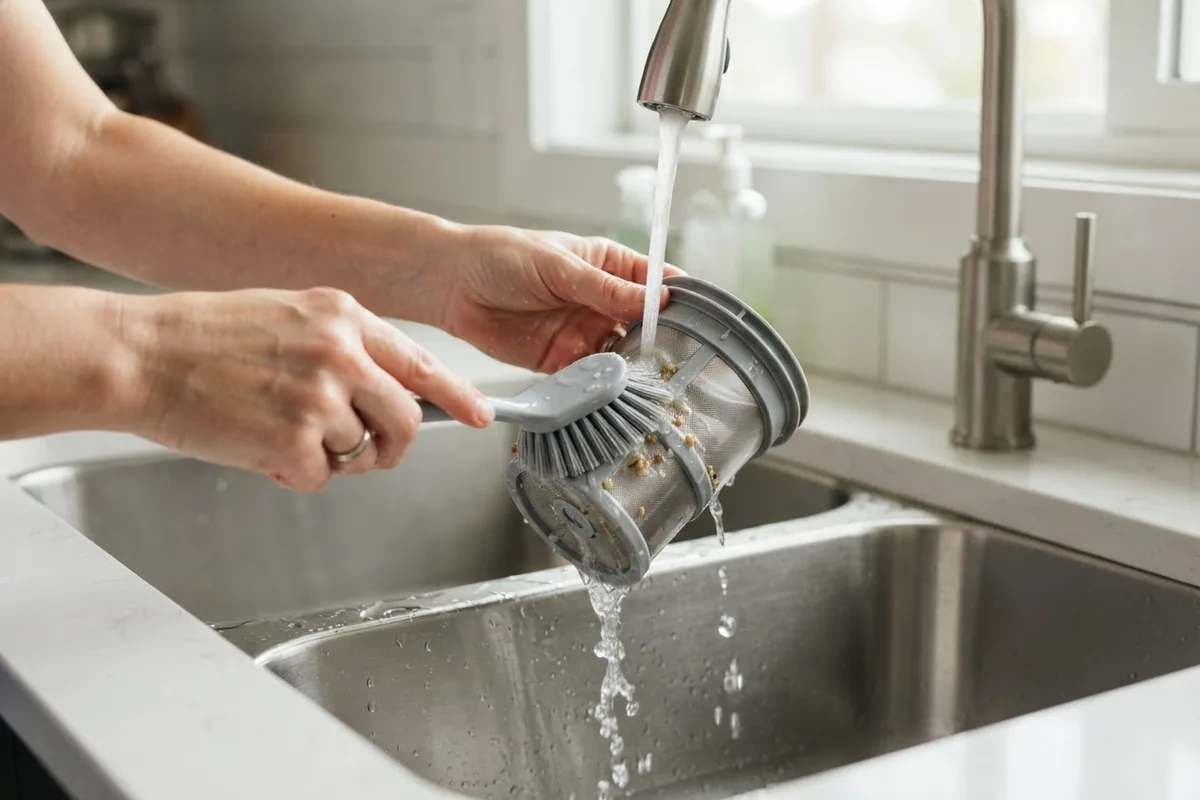
- Rinse the filter under warm running water and scrub gently with a soft nylon brush.
- Unsnap or unscrew the upper and lower spray arms.
- Use a wooden toothpick to poke through clogged spray holes and flush water through the arms to clear mineral scale.
- Reassemble the components securely.
- Run a short hot-water cycle with a bowl containing 1 cup of distilled white vinegar on the top rack.
Regular maintenance ensures sparkling dishes without requiring repeat wash cycles. Check out our detailed guide on DIY Appliance Maintenance: 8 Steps to Prevent Repairs for additional kitchen care habits.
6. Inspect and Calibrate Oven Door Seals
An oven with a compromised door gasket wastes energy and bakes food unevenly due to constant heat loss. Catching seal issues before holiday baking saves time and fuel.
- Ensure the oven is completely cool and unplugged or switched off at the breaker.
- Open the oven door and inspect the woven fiberglass or rubber gasket around the door frame.
- Check for tears, stiff brittle sections, or loose mounting clips.
- Wipe away grease using a sponge dampened with warm water and mild dish soap.
- Close the door and look along the edges for visible light gaps.
- Clean the bake and broil heating elements gently with a damp cloth, checking visually for blistered metal or dark spots indicating element fatigue.
Keeping heat trapped inside the cavity guarantees consistent cooking temperatures and prevents scorched cabinet surfaces.
7. Clean Range Hood Vents and Grease Filters
Heavy fall cooking produces airborne grease and steam. When range hood filters saturate, oil drips back onto cooktops and fumes linger in living spaces.
- Turn off the range hood fan and light fixture.
- Slide or unlatch the aluminum mesh grease filters from the underside of the hood canopy.
- Fill a sink with boiling water, 1/4 cup baking soda, and 2 tablespoons of degreasing dish soap.
- Submerge filters completely for 15 minutes to loosen baked-on oil.
- Scrub gently with a non-abrasive brush, rinse with hot water, and air-dry thoroughly.
- Wipe down the interior metal housing under the hood with a soapy microfiber cloth before reinstalling clean filters.
Autumn Appliance Care Schedule & Cost Reference
| Appliance Task | DIY Difficulty | Average DIY Materials | Typical Pro Service Cost |
|---|---|---|---|
| Refrigerator Coil Vacuuming | Easy | $0 - $15 | $100 - $200 (varies by area/model) |
| Garbage Disposal Refresh | Easy | $2 - $5 | $120 - $220 (varies by area/model) |
| Washer Hose Replacement | Moderate | $15 - $35 | $110 - $190 (varies by area/model) |
| Dryer Vent Cleaning | Moderate | $10 - $25 | $125 - $225 (varies by area/model) |
| Dishwasher Filter Wash | Easy | $0 - $10 | $100 - $180 (varies by area/model) |
| Oven Seal & Element Check | Easy | $0 - $20 | $110 - $200 (varies by area/model) |
When to Call a Pro
While basic cleaning, filter washing, and hose inspections are manageable DIY tasks for most homeowners, complex mechanical or electrical malfunctions require professional expertise. Working on high-voltage components, gas connections, or sealed refrigeration loops without proper training poses serious safety hazards.
If you discover burning odors from motor housings, persistent electrical panel trips, leaking gas valves, or sealed system refrigerant leaks during your maintenance checks, stop immediately. Disconnect power or gas supplies to the unit.
When specialized hands-on help is required, True Appliance Repair can match you with a local appliance pro to diagnose and resolve structural, gas, or electrical issues safely.
FAQ
How often should I perform whole-home appliance maintenance?
Performing a comprehensive appliance check twice a year—once in early fall and once in spring—keeps major systems operating reliably. Monthly tasks like cleaning dishwasher filters and wiping down door gaskets prevent minor grime from turning into major performance bottlenecks.
Can routine autumn maintenance lower my utility bills?
Yes. Vacuuming refrigerator coils, removing dryer lint, and descaling dishwasher spray arms allow motors and heating elements to operate at peak efficiency. Efficient cycles require less electricity, gas, and water, which lowers monthly utility costs throughout the cold season.
What safety precautions should I take before cleaning appliances?
Always disconnect the electrical power supply by unplugging the unit or switching off the main breaker. Shut off main water or gas supply valves when inspecting plumbing lines or fuel connections. Never insert hands or metal tools into garbage disposals or motor housings while power is connected.
How do I know if my appliance needs a repair versus a replacement?
If an appliance is near the end of its typical lifespan (usually 8 to 12 years) and the cost of a single repair exceeds 50% of buying a new unit, replacement is often the practical choice. However, if the unit is relatively new and the issue involves a minor component like a valve or belt, repair is typically far more economical.