
Most household appliances are built to perform reliably for a decade or longer, but everyday operational habits often shorten their working lifespan without homeowners realizing it. Small oversights like ignoring hidden filters, overloading washer drums, or letting debris accumulate around cooling parts force internal motors to work twice as hard. By identifying these frequent appliance care mistakes early, you can keep your kitchen and laundry equipment running smoothly while preventing unexpected energy spikes and early replacements.
Ignoring Dust Build-Up on Condenser Coils
Refrigerators and freezers rely on condenser coils to release heat removed from their internal compartments. When dust, pet hair, and airborne grease coat these exterior coils, the compressor cannot shed heat efficiently. This forces the motor to run almost continuously to maintain food-safe temperatures, driving up monthly power bills and accelerating mechanical wear on sensitive cooling components.
- Always unplug the refrigerator or switch off its dedicated circuit breaker at the main electrical panel before cleaning coils.
- Locate the coil grid behind the bottom front toe kick plate or on the lower rear exterior panel.
- Use a long, flexible condenser coil brush to gently scrape trapped dust and cobwebs out from between the thin metal fins.
- Vacuum up the loosened debris using a narrow crevice tool attachment.
- Reattach the protective panel cover securely and restore power to the unit.
Performing this quick maintenance task twice a year ensures proper heat transfer, protects the compressor from overheating, and keeps cooling performance consistent.
Overloading Laundry Machines Beyond Capacity
Stuffing heavy blankets, excessive towels, or dense denim loads into a washing machine or dryer is one of the fastest ways to cause mechanical failure. Overfilled washer drums place intense structural strain on drive belts, crack central drive pulleys, and destroy tub bearings prematurely. In clothes dryers, packed drum loads stop warm air from circulating freely, causing heating elements to overheat and thermal safety fuses to blow.
- Fill washing machine tubs loosely without pressing clothes down, leaving at least four to six inches of open space at the top.
- Wash heavy items like plush bath sheets and thick comforters in smaller, balanced loads to maintain drum stability.
- Avoid wrapping long garments around a central agitator post, which can unbalance the basket during high-speed spin cycles.
- If your laundry comes out soaking wet after a cycle, check load balance before assuming a severe part failure; you can learn more by reading about why your washer is leaving clothes wet.
- Keep clothes dryer loads within standard weight limits so tumbling fabrics can expand in the warm airflow.
Running the Dishwasher with Hard Water Scale
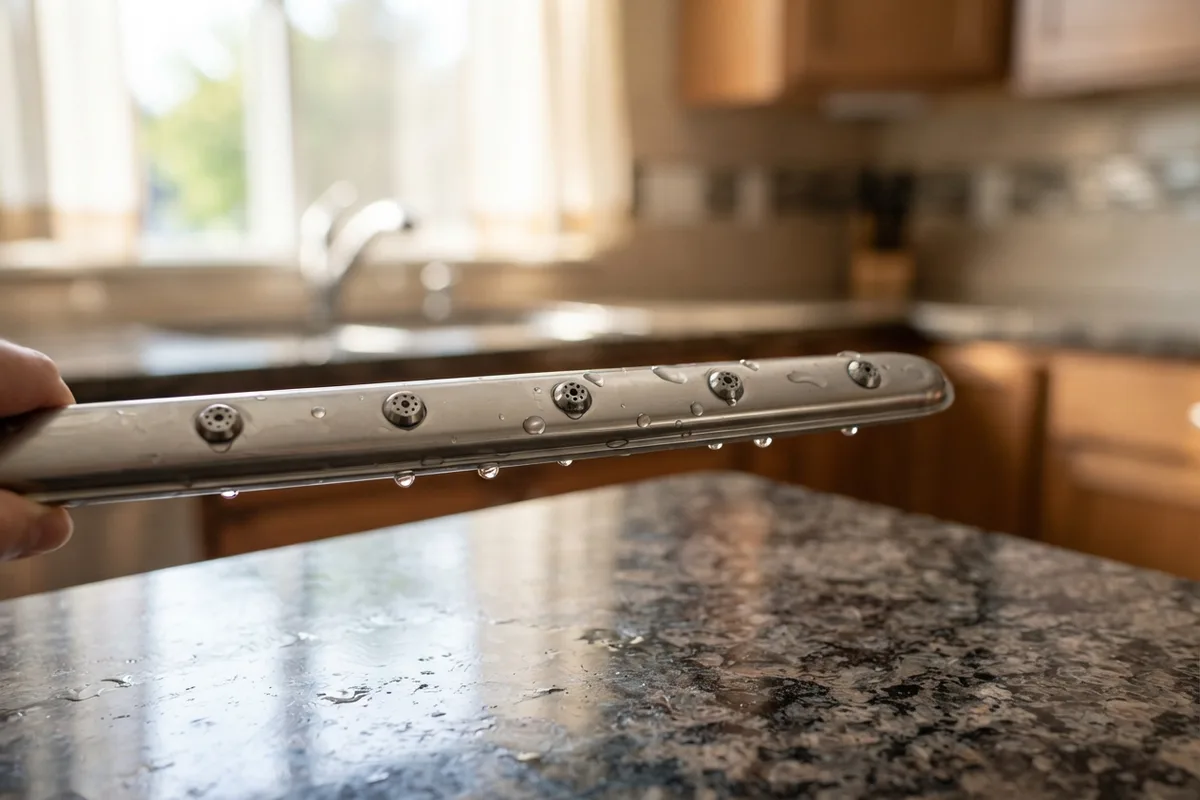
Hard water mineral buildup is a silent killer for modern dishwashers. Dissolved calcium and magnesium settle inside spray arm nozzles, water inlet valves, and heating elements over time. Left untreated, crusty white lime scale restricts water flow, reduces wash pressure, and prevents heating elements from reaching temperatures necessary for thorough sanitization.
- Unscrew the lower and upper spray arms according to your unit's manual and inspect nozzle jet holes for mineral blockages.
- Clear trapped debris or white crust from tiny spray holes using a wooden toothpick or soft-bristled brush.
- Pour two cups of plain white distilled vinegar into an upright glass bowl placed on the top rack of an empty dishwasher.
- Run a complete hot water wash cycle to dissolve internal mineral buildup along internal wash arms and sump basin walls.
- Sprinkle a half-cup of baking soda across the tub floor and run a short rinse cycle to neutralize lingering food odors.
Skipping Dryer Vent Exhaust Hose Cleanings
A clogged dryer exhaust duct is a major efficiency bottleneck and a primary home safety hazard. Fine lint fibers regularly pass through the internal lint screen, settling inside the flexible transition duct and exterior wall vent hood. Restricted airflow traps hot, humid air inside the drum, extending drying times from thirty minutes to multiple cycles while creating a serious fire hazard.
- Unplug the dryer from the wall outlet (and turn off the gas supply shutoff valve if servicing a gas dryer model).
- Carefully slide the dryer forward and loosen the metal duct clamp attaching the flexible vent hose to the rear port.
- Insert a flexible rotary duct cleaning brush attached to a cordless drill rod into the wall exhaust pipe.
- Rotate the brush while feeding it through the full pipe length to dislodge packed lint clusters.
- Vacuum out the duct entry, reattach the hose clamp tightly, and confirm that the exterior wall vent flap opens freely during operation.
Pouring Grease and Fibrous Food Down Garbage Disposals
Garbage disposals are engineered to grind soft, soluble food scraps into tiny particles, not process heavy fats, fibrous vegetable peels, or hard waste. Pouring warm cooking grease down the drain allows liquid fat to cool, solidify, and coat the grinding chamber and home drain lines. Similarly, celery strands, corn husks, and potato skins wrap around rotating impellers, jamming the motor and causing thermal overload shutoffs.
- Always run a steady stream of cold tap water for five to ten seconds before, during, and after running the disposal.
- Pour melted cooking fats and pan drippings into disposable cans or glass jars to solidify for garbage disposal rather than drain disposal.
- Feed small quantities of soft food waste into the sink flange slowly rather than packing full plates of food in all at once.
- Never insert bones, seafood shells, coffee grounds, or high-starch foods like rice into the grinding chamber.
- If the motor hums without spinning, turn off the wall switch immediately to protect the electrical motor windings from burning out.
Leaving Damaged Rubber Door Seals Unchecked
Flexible rubber gaskets create air and water seals around refrigerator doors, front-load washer drums, and dishwasher openings. When spilled food, detergent residue, or mold accumulate along these flexible folds, the rubber hardens, cracks, or loses magnetic attraction. Compromised door seals force cooling compressors and water heaters to run constantly to compensate for lost temperatures or cause hidden water leaks onto subflooring.
- Inspect perimeter gaskets monthly for visible tears, mold spots, or brittle, hardened sections.
- Clean gasket surfaces using a microfiber cloth dampened with warm water and mild dish soap; avoid harsh chemical sprays that degrade natural rubber.
- Test refrigerator seal magnetic tension by closing the door on a piece of paper; if the paper pulls out easily without drag, the gasket needs adjustment or replacement.
- Wipe down front-load washing machine door bellows after your final load of the day to eliminate standing water and prevent mold rot.
- Spotting subtle equipment issues early prevents structural home damage; review our checklist of household appliance warning signs for additional diagnostic cues.
Neglecting Filter Rinses Across Major Units
Modern home appliances incorporate dedicated filtration screens to capture food bits, clothing fibers, and water sediment before they enter sensitive pump impellers. When homeowners neglect accessible filter screens, pump motors overheat, drainage stalls, and cycle times double. Cleaning these filters is one of the easiest preventive tasks you can perform.
- Dishwasher Micro-Filters: Remove the lower rack, twist the cylindrical filter assembly counterclockwise out of the tub floor, and wash it under warm running water with a soft nylon brush once a month.
- Front-Load Washer Drain Filters: Open the small access door at the bottom front of the machine every three months, place a shallow pan underneath, and unscrew the filter plug to clear coins, button debris, and lint trap residue.
- Microwave Grease Filters: Slide out the metal mesh grease filters beneath over-the-range microwaves every few months and soak them in hot water mixed with grease-cutting dish detergent.
- Refrigerator Water Line Filters: Replace internal water filter cartridges every six months to keep sediment from clogging delicate ice maker fill valves.
DIY Maintenance vs. Professional Repair Quick Reference
| Appliance Maintenance Task | Recommended DIY Frequency | Typical DIY Cost Range | Risk Level of Neglect |
|---|---|---|---|
| Refrigerator Coil Cleaning | Every 6 Months | $0 - $15 | High (Compressor Burnout) |
| Dryer Exhaust Vent Cleaning | Annually | $15 - $30 | Severe (Fire Hazard & Element Failure) |
| Dishwasher Filter Washing | Monthly | $0 | Medium (Drain Blockages & Poor Cleaning) |
| Washing Machine Hose Check | Every 3 Months | $0 - $25 | High (Burst Hose Flooding) |
| Garbage Disposal De-scaling | Monthly | $5 - $10 | Medium (Motor Jamming & Drain Clogs) |
Note: DIY repair and supply costs are estimated average US ranges and vary by area, appliance brand, and specific model design.
When to Call a Pro
While routine cleaning, filter swaps, and basic exterior maintenance are ideal DIY projects, complex mechanical or electrical issues require specialized diagnostic tools and professional expertise. If an appliance repeatedly trips your home circuit breaker, produces persistent burning electrical smells, or suffers from internal sealed-system refrigerant leaks, stop troubleshooting immediately. Always disconnect electrical plugs and shut off gas or water supply valves before inspecting internal components. Never attempt DIY repairs on natural gas supply lines or main breaker panel connections.
When facing complex mechanical failures or internal electronic faults, True Appliance Repair can soft-match you with an independent local appliance pro to diagnose and repair your unit safely. Partnering with a qualified technician prevents minor component issues from turning into premature equipment failures.
FAQ
How often should I perform routine appliance maintenance?
Most accessible care tasks—such as washing dishwasher filters, wiping rubber door gaskets, and clearing washer drain plugs—should be completed every one to three months. Bi-annual tasks like vacuuming refrigerator coils and clearing dryer exhaust ducts ensure maximum operational efficiency throughout the year.
What is the average lifespan of major home appliances?
Most major household appliances perform reliably for 8 to 15 years, depending on usage habits and maintenance consistency. Refrigerators and gas ranges typically last 10 to 13 years, while dishwashers and washing machines average 8 to 12 years. Consistent preventive maintenance significantly extends these working years.
How do I know if an appliance repair is worth the cost?
A helpful guideline is the 50% rule: if a professional repair estimate exceeds half the cost of buying a brand-new replacement unit and the machine is past half its expected service lifespan, replacement is generally the wiser choice. Typical minor professional repairs range between $150 and $350, though exact pricing varies by area, brand, and model.
Can minor appliance maintenance really lower monthly energy bills?
Yes. Dusty refrigerator coils, clogged dryer vents, and scale-covered dishwasher heating elements force internal motors and heating components to draw significantly more electricity or gas to complete standard operational cycles. Keeping these areas clean ensures your equipment operates at peak energy efficiency.