
When you are preparing dinner and turn on your stove, finding a completely cold element brings cooking to an immediate halt. An electric stove burner not working is one of the most frequent kitchen disruptions homeowners face, whether you have a classic coil-element range or a smooth glass cooktop. Fortunately, many burner failures stem from simple loose connections, burnt terminal blocks, or worn heating coils that you can troubleshoot and fix yourself without specialized technical experience.
In this guide, you will learn step-by-step diagnostic methods to pinpoint why your electric stove burner is not heating up. By following simple safety procedures and checking a few key components, you can restore your cooking range to full working order quickly and safely.
Inspect the Burner Coil for Visible Damage
- Always turn off the breaker supplying power to your electric range at the main circuit breaker panel or unplug the unit completely before performing any visual inspection.
- Allow the stovetop to cool down entirely so there is no risk of accidental thermal burns.
- Lift the coil element gently from its drip pan and examine the metal sheath along the entire loop. Look closely for blisters, cracks, flaking metal, or dark burn marks.
When an electric heating element ages or experiences a sudden voltage spike, the internal resistive wire can break through its insulating ceramic coating. If you notice visible pitting, white spots, or broken metal on the coil surface, the internal heating circuit is permanently severed. A damaged coil cannot be repaired and must be replaced with a matching element designed for your range model. Replacement surface coils generally cost between $15 and $40, making this one of the most budget-friendly kitchen repairs you can perform.
Re-seat and Tighten the Burner Socket Connection
- Confirm that power to the range remains disconnected at the breaker panel before touching electrical contacts.
- Grasp the cool burner coil near its base where two prongs insert into the receptacle block under the stovetop.
- Firmly push the prongs into the socket opening, making sure the burner sits flat and parallel to the drip pan.
Over time, daily cooking vibration and movement from stirring heavy pots can cause the burner prongs to back out of the receptacle socket slightly. When prongs lose full contact with internal spring terminals, electricity cannot flow to heat the element, or it may create an intermittent connection that works only sporadically. If the coil feels loose or slants upward, pull it out completely, inspect the two metal prongs for corrosion or bending, clean off any food debris with a dry cloth, and slide it firmly back into place until it seats snugly.
Swap Burners to Isolate a Faulty Coil Element
- Ensure the power switch on the breaker panel is off and all burners are cool to the touch.
- Remove the non-working coil burner from its socket by tilting it up slightly and pulling outward.
- Remove a working burner coil of the same physical size from another position on your stovetop.
- Plug the working burner into the socket of the non-working burner and turn electrical power back on temporarily to test functionality.
Swapping elements is the fastest way to determine whether the problem lies within the coil itself or within the stovetop's internal wiring and switches. If the known-good burner heats up in the suspect socket, your original coil is defective and needs replacement. However, if the known-good burner also fails to heat in that socket, the issue is located further down the line—either in the terminal block socket, the infinite burner switch, or internal range wiring. Remember to shut off power again before swapping elements back to their original positions.
Check and Clean the Terminal Block Sockets
- Cut all electrical power to the range at the main circuit breaker.
- Remove the burner coil and drip pan to expose the terminal block assembly, which holds the electrical socket contacts.
- Inspect the inside of the slot openings for charring, blackened plastic, heavy grease accumulation, or melted terminal wire insulation.
The terminal block contains metal spring contacts that clamp onto the burner prongs. Spills from boiling pots can seep into these slots, causing corrosion, electrical arcing, or severe heat buildup that corrodes the metal contacts over time. If you observe charring or burnt wires, the terminal block assembly must be replaced. Universal terminal block kit replacements are widely available for $10 to $30. Unbolt the old block from the stove frame, disconnect the internal wire leads (noting their placement), and attach the new terminal block wires tightly using wire nuts or spade connectors.
Test the Infinite Switch Controls with a Multimeter
- Shut off power at the main breaker panel and verify the stove control panel is entirely dead before removing access panels.
- Remove the control knob and access screws on the console panel to expose the infinite switch connected to the faulty burner.
- Carefully disconnect the wires attached to the switch, labeling or photographing each terminal for accurate reassembly.
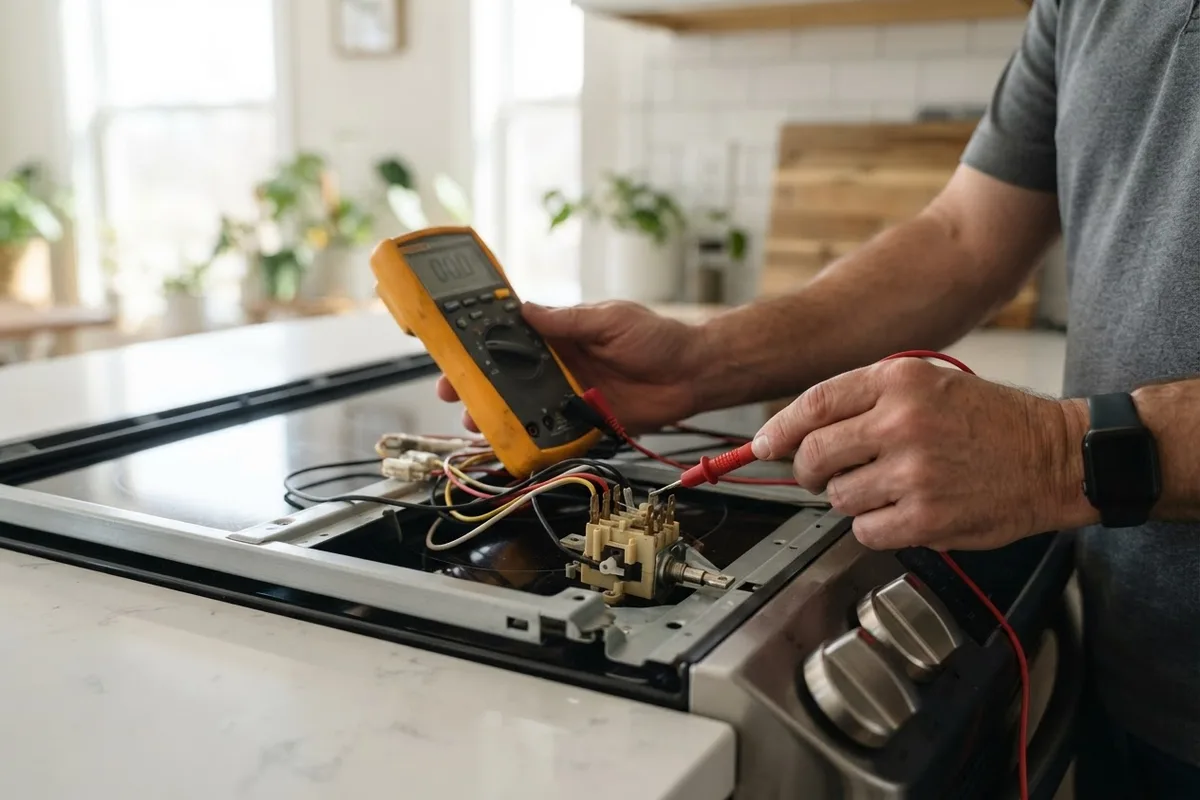
- Set a digital multimeter to measure continuity (ohms setting). Touch the meter probes across the switch terminals labeled L1 and H1 while turning the control knob to an active heating position.
An infinite switch controls the flow of voltage sent to the burner coil based on your temperature selection. If your multimeter displays no continuity (an open circuit or infinite resistance) when the switch is turned on, internal contact points inside the switch have worn out or fused. Replacing an infinite switch costs between $30 and $90 for parts. Swapping the switch involves transferring the wire connectors one by one to the new switch terminal posts and securing the assembly back into the console frame.
Compare Burner Repair vs Cooktop Replacement Costs
When dealing with an electric stove burner not working, understanding the financial breakdown helps you decide whether a quick DIY repair makes practical sense compared to replacing the whole appliance. Standard coil element repairs are among the most economical home fixes.
| Component or Service | Typical Parts Cost | DIY Difficulty Level | Replacement Time |
|---|---|---|---|
| Surface Heating Coil | $15 – $40 | Easy | 5 Minutes |
| Receptacle Socket Block | $10 – $30 | Easy to Moderate | 20 Minutes |
| Radiant Glass Element | $60 – $140 | Moderate | 45 Minutes |
| Infinite Control Switch | $30 – $90 | Moderate | 30 Minutes |
| Pro Repair Service Call | $150 – $300 (varies by area/model) | Professional | 1 Hour |
If your range is less than 10 years old and in good overall physical shape, replacing individual coils, sockets, or switches is extremely cost-effective. However, if multiple burners fail simultaneously or the glass cooktop surface is cracked, appliance replacement might be more practical. You can review our guide on 10 home appliance care habits to cut energy bills for additional long-term savings strategies.
When to Call a Pro
While swapping out a damaged surface coil or tightening a loose receptacle block is straightforward for most homeowners, certain stove repairs require expert technical evaluation. If you suspect damaged main wiring harnesses, blown main control boards, or experience persistent breaker trips whenever you turn on a burner, stop work immediately. Working on internal electrical panels and high-voltage wiring without proper training carries safety risks.
Additionally, if you own a smooth glass-top cooktop requiring complete disassembly of the ceramic glass deck to reach radiant heating elements, professional handling ensures fragile glass is not damaged during repairs. Typical professional repair fees range between $150 and $350 depending on part availability and labor complexity (varies by area/model). When complex electrical issues arise or you prefer hands-off assistance, True Appliance Repair can match you with a local appliance pro to diagnose and restore your stovetop quickly.
FAQ
Why does my electric stove burner stay on high heat regardless of setting?
This problem is almost always caused by a failed infinite control switch. Inside the switch, internal bi-metal contacts can fuse together from high electrical heat. When fused, current flows continuously to the element regardless of where you set the knob, forcing the burner to run at maximum output until power is shut off. Replacing the faulty infinite switch restores normal temperature regulation.
Can I clean burnt stove sockets with liquid cleaners?
Never spray liquid cleaners, degreasers, or water directly into the terminal block electrical slots. Liquid trapped inside electrical connections can cause short circuits, arcing, or severe shocks when power is restored. Instead, ensure the range is completely powered off at the breaker, and use a dry nylon brush or fine sandpaper to gently clean light surface oxidation off electrical contacts.
How do I know if my glass stove top heating element is burned out?
Radiant elements beneath smooth glass cooktops are enclosed in ceramic trays. To check them, turn off circuit breaker power, remove the cooktop surface glass according to your manufacturer manual, and inspect the coiled ribbon wire inside the element dish for visible gaps or dark burns. You can also test for electrical continuity across the element terminals using a digital multimeter.
Is it safe to use an electric stove with only three working burners?
Using three functioning burners while one burner is disconnected or turned off is generally safe, provided the inactive burner socket is not shorting out or producing sparks. However, if the broken burner tripped your home circuit breaker or left exposed charred wiring, leave the entire stove powered off at the circuit breaker until the damaged component is safely repaired or replaced. If uneven cooking performance persists across other burners, check out our guide on why is my oven baking unevenly for further range troubleshooting tips.