
As autumn approaches and holiday hosting season nears, major home appliances work harder than at any other time of the year. Preparing your household units before heavy seasonal usage prevents sudden breakdowns, improves operating efficiency, and keeps energy bills under control. Follow this comprehensive fall appliance maintenance checklist to keep your kitchen and laundry room running smoothly all season long.
Fall Appliance Maintenance Quick Reference
| Appliance | Primary Maintenance Task | Recommended Frequency | Estimated DIY Time |
|---|---|---|---|
| Refrigerator | Vacuum condenser coils & clean door gaskets | Every 6 months | 15–20 mins |
| Dishwasher | Remove filter debris & clear spray arm nozzles | Monthly | 10–15 mins |
| Clothes Dryer | Clean lint trap housing & rigid vent pipe | Every 6–12 months | 30–45 mins |
| Garbage Disposal | Grind ice cubes, baking soda, and citrus peels | Monthly | 5–10 mins |
| Washing Machine | Inspect fill hoses for cracks & clean pump filter | Every 6 months | 15–20 mins |
| Oven & Range | Clean hood filters & inspect oven door gaskets | Every 3–6 months | 20–30 mins |
| Water Heater | Flush sediment from tank drain valve | Annually | 30–45 mins |
Clear Dust from Refrigerator Condenser Coils
Refrigerator condenser coils release heat from inside the cabinet into the surrounding kitchen air. When dust, pet hair, and lint coat these coils, the compressor must work significantly harder and run longer cycles to maintain safe food storage temperatures. Cleaning these coils twice a year—especially before heavy fall cooking—boosts cooling efficiency and extends compressor life.
- Safety first: Unplug the refrigerator from the wall outlet or switch off its circuit breaker at the main panel.
- Locate the coils, which are typically found behind a bottom front grille or attached to the back of the appliance.
- Remove the retaining screws or gently pop off the plastic toe grille to expose the coil assembly.
- Attach a long narrow crevice tool or coil brush to your vacuum cleaner and carefully pull away loose dust buildup.
- Wipe the surrounding area clean, reinstall the grille cover, restore power, and push the cabinet back into place leaving at least two inches of rear clearance.
For additional step-by-step guidance on this specific project, read our complete guide on how to clean refrigerator coils.
Flush and Clean the Dishwasher Filter
Heavy autumn meals mean dishwashers process extra grease, food scraps, and starch. Modern energy-efficient dishwashers rely on manual-clean filter assemblies located in the tub floor to trap food particles. A clogged filter restricts water circulation, leaves gritty residue on clean dishes, and generates sour odors.
- Disconnect power to the dishwasher at the wall switch or circuit breaker.
- Open the door, pull out the lower rack, and locate the cylindrical filter assembly beneath the lower spray arm.
- Turn the filter counterclockwise a quarter-turn and pull it straight up to release it from the sump floor.
- Rinse the mesh filter assembly under hot running water, using a soft-bristled brush and mild dish soap to scrub away oily residue.
- Inspect the spray arms for blocked water jets; clear trapped mineral deposits using a wooden toothpick or straightened paper clip.
- Lock the filter assembly back into place until it clicks firmly, reinstall the dish rack, and restore power.
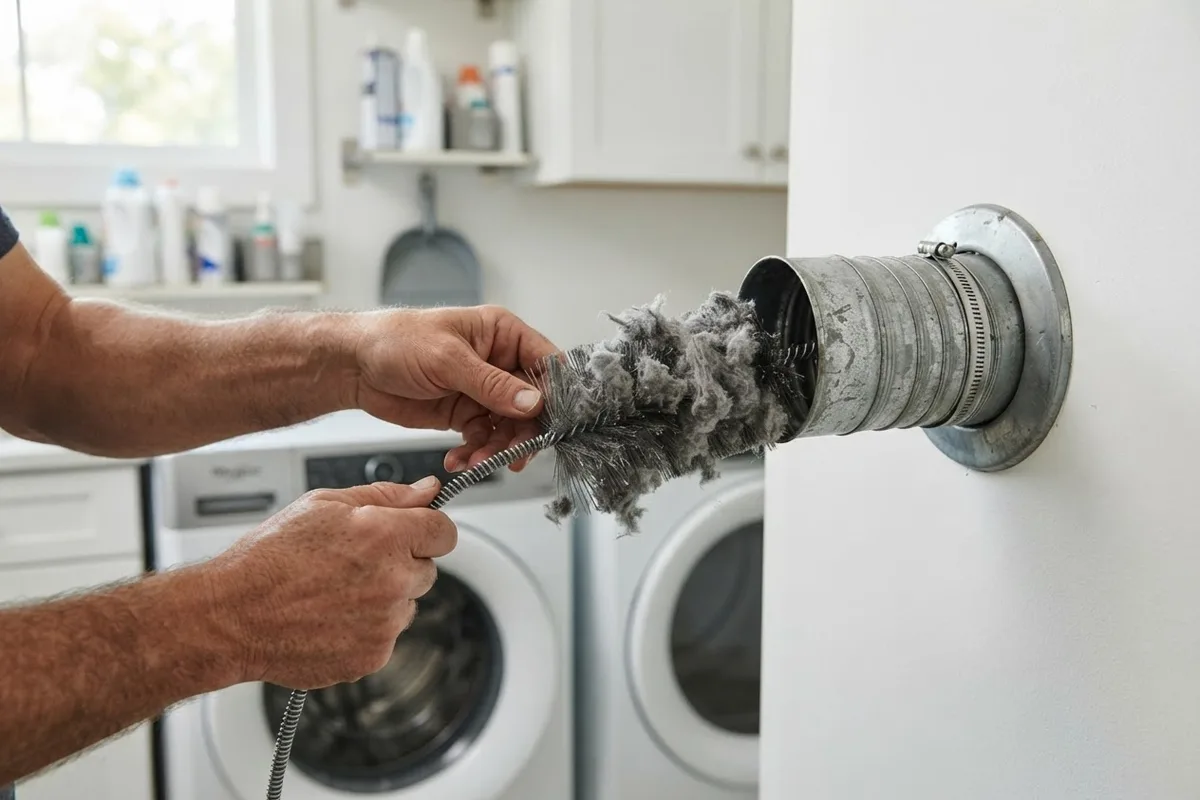
Deep Clean the Clothes Dryer Vent Line
As temperatures drop and laundry loads feature heavier autumn sweaters, towels, and blankets, dryer lint accumulates rapidly inside ductwork. Restricted airflow increases drying times, consumes extra electricity or gas, and poses a serious safety hazard inside the home. Cleaning the exhaust line from the back of the machine to the exterior vent hood ensures maximum airflow.
- Unplug electric dryers from the wall outlet. For gas dryers, switch off power and turn the manual gas supply valve to the off position before moving the unit.
- Pull the dryer away from the wall to access the rear connection.
- Loosen the screw clamp securing the flexible duct to the dryer exhaust transition duct and pull the duct free.
- Insert a flexible rotary dryer vent brush attached to a cordless drill into the wall pipe, spinning and advancing the brush to dislodge trapped lint.
- Vacuum out dislodged debris from inside the pipe and behind the lower lint screen cabinet cavity.
- Reattach the ductwork using rigid metal or semi-rigid aluminum piping rather than thin foil or plastic accordion hoses, which trap lint easily.
Freshen and Inspect the Garbage Disposal
Fall meal preparation often increases food waste in the sink. Maintaining your garbage disposal prevents stubborn drain clogs, preserves blade performance, and removes trapped food decay that attracts fruit flies and smells bad.
- Ensure the disposal switch is turned off, and unplug the unit underneath the sink cabinet before doing any visual inspection.
- Shine a flashlight down into the grind chamber to check for trapped bones, fruit pits, or cutlery; extract items using long pliers or tongs—never insert hands into the hopper.
- Reconnect power, turn on the cold water faucet to a steady stream, and switch on the disposal.
- Drop two cups of solid ice cubes along with a cup of coarse rock salt into the running unit to scour mechanical components clean.
- Follow with fresh lemon or orange peels to sanitize the grinding chamber and leave a clean citrus scent.
Inspect Washing Machine Water Supply Hoses
Seasonal temperature shifts and continuous pressure make washing machine water hoses vulnerable to stress failures. Standard rubber inlet hoses weaken over time, leading to micro-cracks, unexpected bulges, or severe indoor water damage.
- Disconnect power to the washing machine and turn off both the hot and cold water supply valves behind the washer.
- Pull the machine forward slightly to visually inspect the flexible rubber or braided steel lines connected to the water inlet valve.
- Look for signs of stress, including soft spots, localized bulging, cracking rubber, or rusty fittings near the connection threads.
- Replace standard rubber hoses every three to five years with burst-resistant stainless steel braided lines fitted with rubber sealing washers.
- Unscrew the inlet connections to check the tiny wire mesh screens inside the appliance inlet valve; clean out trapped sediment using needle-nose pliers and water.
Clean and Recalibrate Your Cooking Appliances
Preparing your range, cooktop, and oven before autumn ensures reliable temperature control for roasting and baking. Airborne grease buildup on range hood filters also creates potential smoke conditions and reduces ventilation performance.
- Disconnect power or shut off gas valves prior to deep cleaning range surfaces.
- Remove aluminum mesh range hood filters and submerge them in a sink filled with boiling water, baking soda, and degreasing dish soap for 20 minutes before scrubbing gently.
- Clean around oven door gaskets with warm water and a soft cloth, checking for cracks or compressed sections that let heat escape.
- Hang an oven-safe thermometer in the center of the middle rack and preheat the oven to 350°F (177°C) to test actual temperatures against digital displays.
- If the reading differs by more than 15 degrees after three test cycles, consult your owner's manual to adjust the display calibration offset or clean the internal temperature sensor probe.
Adopt Smart Energy-Saving Maintenance Habits
Integrating simple efficiency habits into your overall routine protects components from unnecessary wear and keeps monthly utility expenses low as heating demands rise.
- Run dishwashers and clothes washers only with full loads to optimize water and electricity consumption.
- Keep your refrigerator two-thirds full; solid items retain cold better than open air, reducing compressor workload after doors open.
- Lower home water heater settings to 120°F (49°C) to slow mineral scaling inside tank units while preventing scalding injuries.
- Avoid placing heat-generating appliances like toaster ovens directly adjacent to your refrigerator, which forces cooling systems to work extra hard.
For additional practical tips on optimizing appliance performance, read our guide on appliance care habits to cut energy bills.
When to Call a Pro
While routine seasonal cleaning, hose inspections, and filter washings are straightforward DIY tasks, complex appliance issues require specialized tools and expert training.
Stop work immediately and call a professional if you encounter:
- The smell of natural gas or propane near ranges or clothes dryers.
- Refrigeration units that fail to cool despite clean condenser coils and clear fan vents.
- Blown main circuit breakers, burnt electrical wiring, or sparking outlets.
- Continuous water leaks originating from internal pumps, valves, or sealed tub bearings.
- Unusual grinding, squealing, or metal-on-metal noises during operation.
When troubleshooting reveals an internal component failure or gas line concern, True Appliance Repair can match you with a local appliance pro to diagnose and resolve the issue quickly.
FAQ
How often should fall appliance maintenance be performed?
Fall maintenance tasks should be completed once a year, ideally in late summer or early autumn before heavy holiday cooking and heating demands begin. Routine tasks like washing dishwasher filters or cleaning dryer lint screens should still occur monthly throughout the year.
Can regular appliance cleaning really cut energy bills?
Yes. Removing dust from refrigerator coils, clearing lint from dryer vents, and descaling heating elements allows appliances to operate at peak efficiency. Clean appliances transfer heat and circulate air far more effectively, which shortens run times and lowers electrical and gas consumption.
What tools do I need for standard appliance maintenance?
Most basic maintenance requires standard household tools, including a screwdriver set, a long flexible coil brush, a vacuum cleaner with attachments, a flash light, dynamic channel-lock pliers, and warm soapy water. Stainless steel cleaner and baking soda are also helpful for surface care.
How much does professional appliance repair typically cost?
Minor appliance repairs usually range between $150 and $350 depending on the specific appliance, required replacement parts, and local labor rates. Major repairs involving compressors or control boards may cost more, making regular preventive maintenance a smart way to minimize unexpected expenses.