
Major household machines work continuously behind the scenes, but without regular maintenance, minor wear quickly turns into complete system failure. Taking time to inspect and clean your equipment keeps internal components running efficiently and helps head off unexpected repairs.
Executing a routine maintenance pass across your home protects your daily schedule and reduces overall household energy consumption. These 10 practical home appliance tune-up steps will keep your essential units operating smoothly through every season.
1. Clean Condenser Coils and Air Intakes
Dust, pet hair, and floor lint accumulate rapidly on refrigerator coils and appliance air intakes, forcing internal compressors to work twice as hard. When heat cannot escape, the system runs longer cycles, raising your utility bill and increasing heat stress on electrical components.
To service refrigerator coils or intake vents, first pull the appliance away from the wall and shut off power at the outlet or circuit breaker. Locate the coils behind the lower front kickplate or across the lower rear panel. Use a narrow vacuum hose attachment to lift heavy dust, followed by a flexible coil brush to gently strip stubborn debris from the wire grids. Reconnect power once clean.
2. Clear All Appliance Drainage and Air Filters
Clogged filters restrict airflow in dryers and impede water circulation in dishwashers and washing machines. When water or air cannot move freely, pumps overheat, cycles stall, and internal sensors trigger error shutdowns.
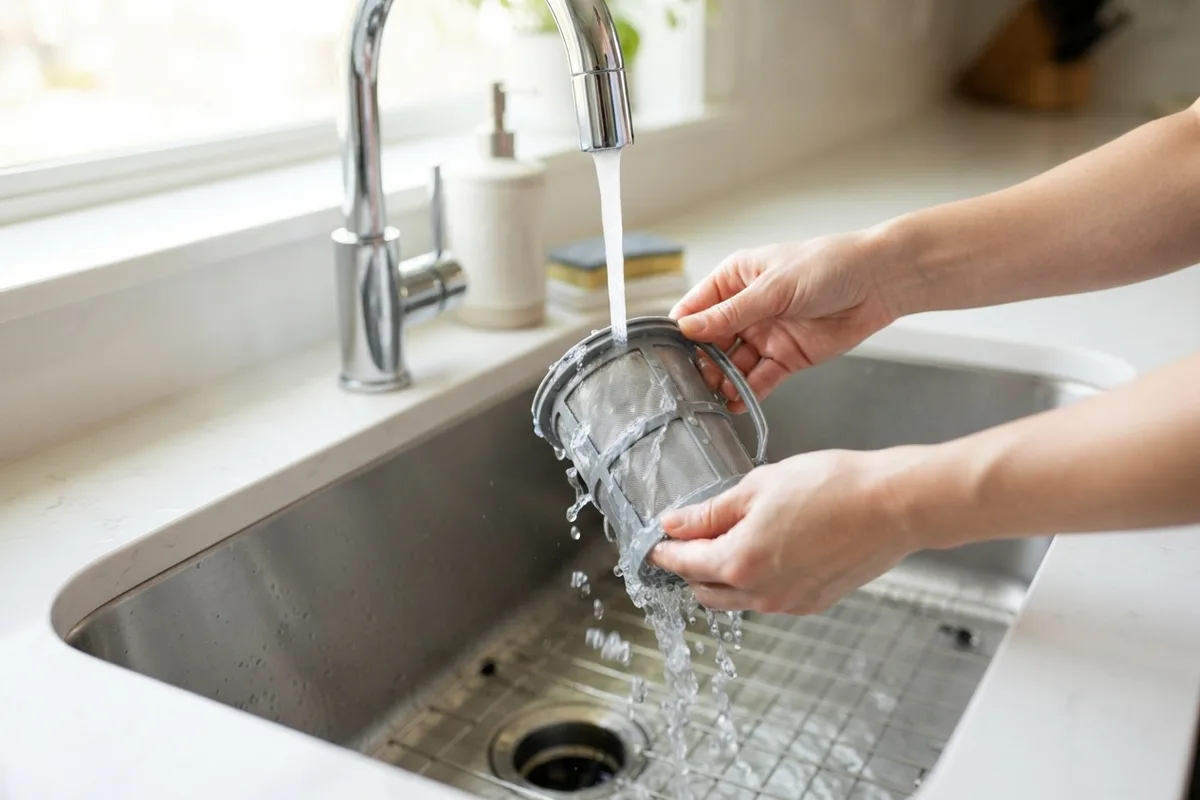
Pull the dishwasher filter assembly from the bottom of the tub, rinse it under hot running water, and scrub away grease using soft nylon bristles and mild dish soap. For washing machines, open the lower access panel to unscrew and clean the drain pump filter, keeping a shallow tray nearby to catch residual water. Clean your dryer’s lint screen after every single load, and wash the mesh monthly with warm water to clear invisible fabric softener residue.
3. Inspect and Revitalize Rubber Door Gaskets
Flexible rubber seals along refrigerator doors, front-load washers, and dishwashers retain air temperatures and prevent water leaks. Over time, trapped food particles, mold, and detergent residue cause the rubber to stiffen, crack, or lose its suction seal.
Wipe down gaskets using a damp microfiber cloth soaked in warm water and mild liquid soap. Avoid harsh chemicals or bleach, which dry out elastomeric compounds. For stubborn grime inside front-load washer door folds, scrub gently with a soft toothbrush. Inspect the seal for rips or hardening; an airtight seal prevents moisture buildup and stops temperature fluctuations.
4. Flush Fresh Water Lines and Replace Filters
Refrigerators with ice makers and water dispensers rely on small copper or plastic supply lines that build up mineral scale and sediment over time. A restricted water line leads to undersized ice cubes, slow pouring, and strained water inlet valves.
Shut off the dedicated water shut-off valve behind the refrigerator before servicing the filter housing. Replace inline water filters every six months, or sooner if water flow slows down noticeably. Run two gallons of fresh water through the system after installing a new cartridge to purge air pockets and loose carbon fines from the supply line.
5. Scrub Wash Tubs and Drums to Remove Scale
Hard water minerals and unevaporated laundry detergent form a dull film on washing machine tubs and dishwasher walls. This residue corrodes heating elements, clogs spray nozzles, and harbors odor-causing bacteria.
Run an empty high-temperature wash cycle on your dishwasher using a cup of white distilled vinegar placed in an upright container on the top rack. For clothes washers, run a dedicated tub-clean cycle using a specialized washer cleaner tablet or two cups of vinegar. This breaks down lime deposits and restores heating efficiency across major water-using units. For extra seasonal prep tips, consult our guide on late-summer appliance maintenance steps.
6. Sharpen and Deodorize Your Garbage Disposal
Garbage disposals frequently accumulate food sludge beneath the rubber splash guard and along the lower grind chamber. This build-up causes persistent odors and strains the drive motor during heavy kitchen cleanup.
Shut off electrical power to the unit at the wall switch or main panel before inspecting the grind chamber. Pour two cups of ice cubes followed by one cup of rock salt down the drain, then turn on cold water and run the disposal for 30 seconds to scrub foreign debris off the impeller blades. Finish by grinding halved lemon peels to neutralize lingering odors and clean the internal shredder ring.
7. Inspect Dryer Vents and External Exhaust Hoods
Trapped lint inside rigid or flexible dryer ductwork creates a dangerous fire hazard and drastically slows drying performance. Restrictive venting forces heat back into the drum, wearing out thermal fuses and drive belts.
Disconnect the dryer power cord and pull the unit forward to access the rear connection. Loosen the vent clamp and detach the metal ducting. Insert a long-handled dryer vent brush into the wall ducting while running a vacuum to collect loosened lint. Walk outside to check the exterior vent hood flap, ensuring it opens freely and is clear of bird nests or overgrown lawn debris.
8. Check Water Supply Hoses for Swelling and Leaks
Burst washing machine and dishwasher inlet hoses are among the leading causes of severe residential indoor flooding. Standard rubber hoses degrade internally over three to five years, often showing minimal exterior warning signs before failing.
Turn off the water supply valves behind the washer or under the sink. Inspect every flexible hose for bulging sections, fine cracks, rust on threaded couplings, or wet spots near crimped ends. Replace old rubber lines with braided stainless steel hoses, which resist high pressure spikes and mechanical wear. Align this check with your annual fall appliance maintenance checklist to safeguard your home.
9. Calibrate Cooking Temps and Clean Burner Ports
Uneven baking and weak stove burner flames often stem from clogged gas ports or miscalibrated internal oven thermostats. Spillover grease blocks gas outlets, resulting in yellow, lazy flames rather than sharp blue cones.
Unplug electric ranges or disconnect gas supply lines before cleaning cooktop surfaces. Lift off burner caps and clear port holes using a wooden toothpick or small sewing needle—never use metal wire that might widen the opening. Wipe down spark igniters gently with a dry microfiber cloth to prevent continuous clicking issues.
10. Level Major Appliances to Stop Excess Vibration
An unlevel washing machine, dryer, or refrigerator puts uneven mechanical stress on drive shafts, suspension springs, and leveling legs. Excessive shaking damages internal balance systems and creates distracting home noise.
Place a bubble level across the top edge of the machine from front to back and side to side. Adjust the threaded leveling feet under each corner using an adjustable wrench until the bubble sits dead center. Lock the jam nuts tightly against the appliance frame to prevent the feet from backing out during high-speed spin cycles.
| Appliance | Core Tune-Up Task | Recommended Frequency | Primary Benefit |
|---|---|---|---|
| Refrigerator | Clean Condenser Coils & Gaskets | Every 6 Months | Prevents compressor burnout & |
| lowers energy bills | |||
| Washing Machine | Inspect Hoses & Descale Drum | Every 3 to 6 Months | Prevents home flooding & stops laundry odors |
| Clothes Dryer | Deep Clean Vent Ducting | Annually | Eliminates fire risks & speeds up drying times |
| Dishwasher | Scrub Filter & Spray Arms | Monthly | Stops water leaks & improves wash performance |
| Oven / Cooktop | Clear Burner Ports & Recalibrate | Every 6 Months | Ensures safe ignition & |
| even baking temperatures |
When to Call a Pro
While routine surface cleaning, leveling, and simple filter swaps are straightforward DIY projects, complex structural and mechanical issues require qualified technical intervention.
Always shut off utility connections immediately if you encounter severe warning signs:
- Gas Appliances: If you smell gas, shut off the gas supply line valve instantly, evacuate the building, and contact your gas utility provider before attempting any inspection.
- Sealed Refrigeration Systems: Refrigerant leaks, failed sealed compressors, and internal copper soldering require specialized recovery equipment and expert tools.
- Electrical Panels & Controls: Burned wiring harnesses, sparks from control boards, or tripping main breakers indicate dangerous electrical shorts that demand professional diagnostic meters.
When maintenance uncovers major mechanical failure or deep system faults, True Appliance Repair can match you with a local appliance pro who can evaluate your equipment and restore safe, reliable operation.
FAQ
How often should I complete a full home appliance tune-up?
Most major appliances benefit from quick monthly filter inspections, but a comprehensive whole-house tune-up should be completed twice a year—ideally in spring and late summer. Staggering these tasks prevents heavy maintenance backlogs and keeps energy consumption steady year-round.
What are the signs that my appliance needs a professional tune-up rather than basic DIY care?
Continuous burning smells, loud grinding metallic noises during operation, visible water pooling underneath cabinet frames, or repeated electrical circuit breaker trips indicate deeper mechanical failure. If basic filter cleaning and leveling do not resolve performance issues, professional diagnostics are recommended.
Can simple tune-up steps actually extend appliance lifespan?
Yes. Routine maintenance directly reduces heat build-up, motor strain, and physical friction across moving components. Clearing dust from coils, removing scale from water pumps, and replacing worn intake filters can add several years of functional operational life to major household units.
How much does professional appliance service typically cost if DIY steps don't solve the issue?
Standard diagnostic service visits across the United States typically range between $80 and $150. Total repair costs usually fall between $150 and $450 depending on the specific replacement parts and labor involved, though exact pricing varies by area and appliance model. When complex repairs arise, True Appliance Repair can connect you with an experienced local technician.