
Cloudy ice cubes, slow ice production, and a stale smell in your cold drinks are clear signs that mineral scale and hidden grime have built up inside your freezer. Learning how to clean a refrigerator ice maker takes less than an hour with simple pantry staples like white vinegar and baking soda. Follow these six safe, step-by-step methods to sanitize the bin, descale the mold, and get crisp, fresh-tasting ice just in time for holiday hosting.
Safety First: Always unplug your refrigerator from the wall outlet (or flip the kitchen circuit breaker) and turn off the household water supply valve before reaching near moving ice maker arms, auger motors, or electrical connections. Never use sharp metal tools to chip away stuck ice, as puncturing a cooling line causes permanent sealed-system damage.
1. Power Down and Empty the Ice Bin
Before you touch any internal components, shut off the ice-making cycle so the ejector blades do not move while your hands are inside the compartment. Work quickly so your frozen groceries stay solid, or move temperature-sensitive items to a cooler filled with ice packs.
- Locate the ice maker power switch and flip it to the OFF position, or lift the metal wire shutoff arm until it clicks into the raised, locked position.
- Unplug the refrigerator or turn off its dedicated circuit breaker for complete electrical safety.
- Lift the removable plastic ice storage bin straight up and pull it forward to release it from the freezer track.
- Dump all old, clumped, or stale-smelling ice into the kitchen sink.
- Let the empty plastic bin sit on the counter for 10 to 15 minutes so the plastic warms to room temperature before washing—pouring hot water directly into a freezing-cold bin can crack the plastic.
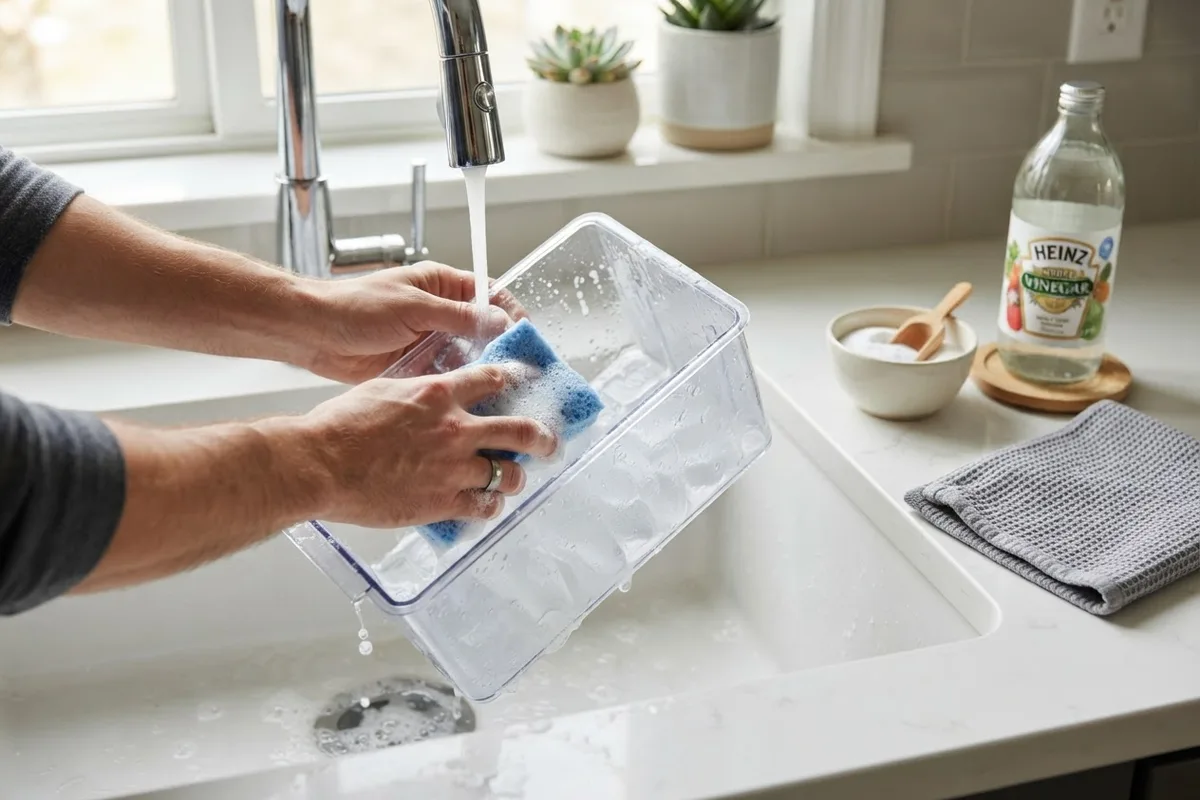
2. Wash the Removable Ice Bin With Mild Soap
The removable storage bin catches spills, freezer odors, and flaking hard-water minerals every time the auger turns. Giving it a thorough soak removes the invisible biofilm that makes fresh ice taste like last week's leftovers.
- Fill your kitchen sink with warm water and add two teaspoons of mild, unscented liquid dish soap.
- Submerge the room-temperature ice bin and scrub the interior walls, corners, and bottom metal or plastic auger using a soft sponge.
- Avoid abrasive scouring pads or harsh bleach cleaners, which scratch the plastic and leave chemical odors that transfer directly to new ice.
- For stubborn food smells, dissolve two tablespoons of baking soda in warm water and wipe down the inside of the bin.
- Rinse the bin thoroughly under cool running tap water until all soap residue is gone.
- Dry every surface completely with a clean, lint-free microfiber towel so leftover water droplets do not freeze the auger solid when reinstalled.
3. Wipe the Ice Mold With White Vinegar
Hard water minerals like calcium and magnesium coat the upper ice mold over time, causing cubes to stick, freeze hollow, or jam the ejector gears. If your unit has started clicking or grinding during harvest cycles, check out our guide on why a refrigerator ice maker is making noise after you finish descaling the tray.
- Mix equal parts distilled white vinegar and warm water in a small bowl.
- Dip a clean microfiber cloth into the vinegar solution and wring it out until it is damp, not dripping—you never want liquid running into the electrical motor housing at the front of the unit.
- Reach carefully into the ice maker assembly and wipe the top edges, outer housing, and accessible troughs of the ice mold to dissolve chalky white mineral scale.
- Wrap the damp cloth around a wooden popsicle stick or cotton swab to reach tight crevices along the fill cup where water enters the tray.
- Wipe the entire area a second time with a cloth dampened only with plain warm water to remove the vinegar smell, then pat dry.
4. Scrub the Dispenser Chute and Flap
If you have an in-door ice dispenser, the chute between the freezer bin and your drinking glass is the most common hiding spot for mold and mildew. Warm kitchen air meets cold condensation right at the rubber door flap, creating dark buildup if left unwiped. While you have the vinegar solution out, it is also smart to follow our steps on how to clean a refrigerator water dispenser so both lines stay sanitary.
- Hold a small bowl or folded towel underneath the exterior door dispenser opening to catch any drips.
- Dip a long-handled bottle brush or a toothbrush into your 50/50 white vinegar and warm water mixture.
- Push the dispenser flap open carefully with one hand and scrub the inside walls of the plastic chute from both the bottom exterior opening and the top interior freezer opening.
- Wipe the rubber sealing flap thoroughly to remove sticky soda splashes or dark mildew spots.
- Wrap a clean, damp microfiber cloth around the bottle brush to rinse the chute walls, then dry the tunnel completely with paper towels.
5. Replace the Water Filter and Flush the Line
Cleaning the bin and mold will not fix bad-tasting ice if the incoming water supply is passing through a clogged carbon filter. Most manufacturers recommend swapping the refrigerator water filter every six months, or sooner if your home has hard tap water.
- Locate your fridge's water filter—usually in the upper right corner of the fresh food ceiling, inside the bottom grille, or next to the crisper drawers.
- Twist the old filter counterclockwise a quarter-turn (or press the release button) and pull it straight out, keeping a towel handy for minor drips.
- Remove the protective cap from the new filter and push or twist it firmly into the housing until it locks flush.
- Restore power to the refrigerator and make sure the water supply valve is open.
- Run two to three gallons of water through the door dispenser to purge trapped air and loose carbon dust from the new filter before turning the ice maker back on.
6. Reassemble and Dump the First Two Batches
Once every plastic surface is bone-dry and the water line is flushed, you are ready to put the system back together and run a final rinse cycle through the ice mold itself.
- Slide the dry ice storage bin back onto its freezer tracks until it clicks securely into place; if it does not slide easily, rotate the metal drive coupling on the back of the bin a quarter-turn so it aligns with the freezer motor socket.
- Flip the ice maker power switch to ON or lower the wire shutoff arm down into its operating position.
- Allow the refrigerator to run for 6 to 12 hours until it produces two full batches of ice.
- Dump those first two batches of ice into the sink and discard them—they wash away any remaining vinegar traces, loosened mineral flakes, or harmless carbon particles from the new filter.
- Enjoy clear, odor-free ice from the third batch onward, and place a fresh box of baking soda in the freezer to keep odors away.
Quick-Reference Ice Maker Cleaning Schedule
| Ice Maker Component | Cleaning Solution | Recommended Frequency | Signs It Is Overdue |
|---|---|---|---|
| Removable Ice Bin | Warm water + mild dish soap | Every 3 months | Clumped ice, stale freezer odor |
| Dispenser Chute & Flap | 50/50 white vinegar & water | Monthly | Dark spots on flap, slow dispensing |
| Upper Ice Mold & Fill Cup | Damp vinegar cloth (unplugged) | Every 6 months | Cloudy or hollow cubes, scale flakes |
| Refrigerator Water Filter | Replace cartridge + flush 2–3 gal | Every 6 months | Metallic taste, small cubes, slow water |
When to Call a Pro
Routine cleaning solves bad odors, scale flakes, and minor clumping, but some ice maker problems point to failing mechanical or electrical parts. Stop your DIY work and call a professional technician if you notice water leaking onto your kitchen floor from the back supply line, a frozen fill tube that keeps refilling and overflowing, an auger motor that hums without turning, or an ice mold whose protective coating is peeling or flaking off into the ice.
Replacing an ice maker assembly or water inlet valve typically ranges from $150 to $350 across the US, though final costs vary by area, refrigerator brand, and model. If your unit needs a replacement part or deeper diagnostic work, True Appliance Repair can connect you with a local pro for reliable refrigerator repair.
FAQ
How often should you clean a refrigerator ice maker?
You should empty and wash the removable ice storage bin every three months and do a full deep clean of the ice mold and dispenser chute every six months—ideally at the same time you change your refrigerator water filter. If your home has hard water or you use the dispenser daily, wiping the chute monthly prevents mildew buildup.
Can I pour vinegar through my refrigerator water line to clean the ice maker?
No, never pour vinegar into the water filter housing or attempt to pump vinegar through the refrigerator's internal water lines unless your specific owner's manual gives instructions for a built-in cleaning port. Vinegar can sit trapped inside internal valves and plastic tubing, leaving a permanent sour taste and degrading rubber seals over time.
Why does my ice still taste bad after cleaning the ice maker?
If your ice still tastes stale after scrubbing the bin and changing the filter, odors from the fresh food compartment are likely circulating into the freezer through the shared air damper. Wrap strong-smelling foods in airtight containers, wipe down refrigerator shelves, and place an open box of baking soda in both the fridge and freezer sections.
What should I do if the ice maker mold coating is flaking off?
Some older cast-aluminum ice molds have a non-stick coating that can blister and peel due to mineral corrosion. Do not eat ice containing dark or metallic flakes, as the coating cannot be repaired or recoated safely; turn off the ice maker and have the entire modular ice maker unit replaced.