
You probably change your fridge filter on schedule, yet almost nobody looks directly up into the tiny nozzle where the water actually exits. Because that spout stays damp and dark, it quickly collects hard water scale, airborne kitchen grease, and slimy biofilm that can taint every glass you pour. Follow these six simple steps on how to clean a refrigerator water dispenser using pantry staples so your family's drinking water stays crisp and hygienic.
Safety First: Before performing any hands-on maintenance or deep cleaning around electrical switches and dispenser paddles, unplug your refrigerator from the wall outlet (or flip its dedicated circuit breaker) and turn off the water supply shut-off valve behind the unit or under the sink. Only restore power and water when a specific flushing step calls for it.
1. Prep Supplies and Inspect the Spout
Before you start scrubbing, take a quick look upward under the dispenser recess with a bright flashlight. If you see crusty white deposits, reddish-pink slime, or dark specks around the tip of the water tube, your nozzle is overdue for a deep clean. Gathering everything ahead of time keeps the refrigerator doors closed and prevents warm kitchen air from spoiling your food.
- Unplug the refrigerator and shut off the water supply valve.
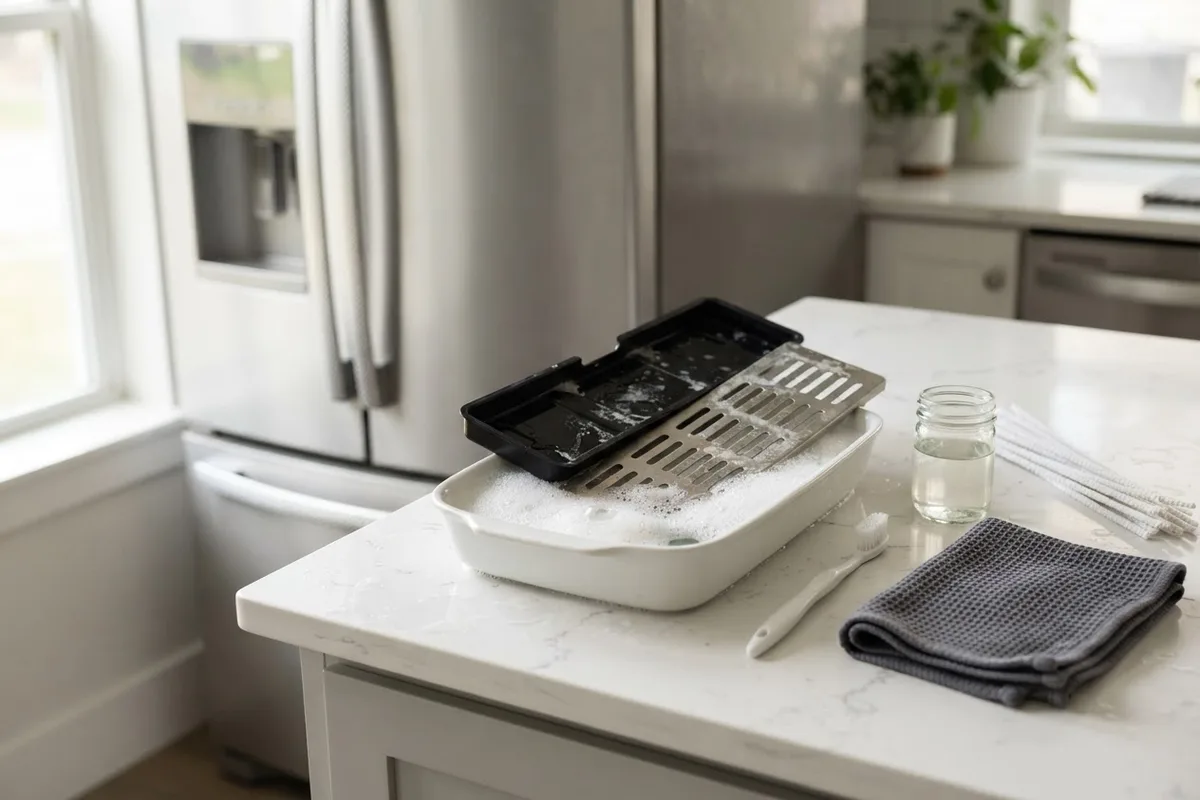
- Pull out the removable drip tray grille at the bottom of the dispenser recess and set it by the kitchen sink.
- Mix one cup of distilled white vinegar with one cup of warm water in a small bowl.
- Gather a soft microfiber cloth, a clean soft-bristled toothbrush, two cotton swabs, a narrow food-grade straw brush or chenille pipe cleaner, and a dry towel.
- Lay the dry towel across the floor in front of the fridge to catch any accidental drips.
2. Soak the Dispenser Nozzle with Vinegar
Hard water minerals like calcium and magnesium dry on the tip of the dispenser spout after every pour, creating a rough, chalky surface where bacteria love to hide. Scrubbing dry scale right away can scratch the plastic tubing. Giving the nozzle a short vinegar soak dissolves the mineral crust gently so it wipes away without damaging the spout.
- Dip the corner of a clean microfiber cloth or a thick paper towel into your warm vinegar-and-water solution.
- Wrap the soaked cloth tightly around the tip of the water dispenser nozzle.
- Secure the cloth in place using a small piece of painter's tape or a rubber band so it stays pressed against the spout opening.
- Let the vinegar compress sit for 10 to 15 minutes to break down stubborn lime scale and surface grime.
- Remove the cloth and wipe away the softened residue with a fresh, damp paper towel.
3. Scrub Inside the Nozzle with a Pipe Cleaner
Wiping the outside of the tip only solves half the problem. Water lingers inside the last half-inch of the dispenser tube, which is why dark mold specks or pink Serratia marcescens bacteria often form just inside the rim. If you have already been troubleshooting why your refrigerator water tastes bad, scrubbing inside this narrow opening is often the missing piece of the puzzle.
- Dip a narrow, food-safe straw brush or a clean chenille pipe cleaner into the bowl of white vinegar.
- Gently insert the brush about half an inch into the water dispenser spout—do not force it deep into the line, or you could damage the internal check valve.
- Twist and move the brush in and out four or five times to loosen any hidden slime or black residue.
- Rinse the brush in clean water, dip it in fresh vinegar, and repeat until the bristles come out completely clean.
- Swab the outer lip of the nozzle and the surrounding plastic housing with a vinegar-dipped cotton swab.
4. Clean the Ice Chute and Paddle Area
While your hands are in the dispenser alcove, look right next to the water spout at the ice chute flap. Splashed water, sugary drink drips, and airborne cooking oils coat the paddle lever and the rubber flapper door, creating musty odors that transfer to your drinking glass. Keep your hands clear of the sharp metal auger blades higher up inside the chute.
- Dampen a clean microfiber cloth with your warm vinegar solution (wring it out well so liquid does not drip into the control board switches).
- Wipe down the entire recessed wall, the water and ice actuator paddles, and the underside of the dispenser canopy.
- Push the spring-loaded ice chute door open gently with two fingers and hold it securely.
- Wipe the rubber seal around the chute flapper using a vinegar-dampened cloth or toothbrush to remove sticky buildup or mildew.
- Dry the entire alcove and paddle area thoroughly with a clean towel. If your ice mechanism has been acting up alongside a dirty chute, check out our guide on fixing a noisy refrigerator ice maker.
5. Deep Clean the Removable Drip Tray
The shallow catch basin at the bottom of the dispenser catches every stray drop of water and melted ice cube, turning into a breeding ground for algae, rust stains, and crusty hard water rings. Because most drip trays lift right out, you can sanitize them at the kitchen sink in just a few minutes.
- Take the removable plastic or metal grille and tray to the sink and rinse off loose crumbs with warm water.
- Submerge the tray and grate in a basin of warm, soapy water mixed with a splash of white vinegar for 10 minutes.
- Sprinkle a teaspoon of baking soda onto a soft toothbrush and scrub between the narrow grate slots and along the corners of the tray.
- If your dispenser has a non-removable recessed well, lay a vinegar-soaked sponge in the well for 10 minutes, scrub the corners with a toothbrush, and sponge up the liquid.
- Rinse the removable parts with clean water, dry them completely with a dish towel, and snap them back into place.
6. Flush the Water Line to Clear Residue
Now that the exterior nozzle, internal tip, and alcove are spotless, you need to rinse out any loosened specks or lingering vinegar inside the spout tip. For refrigerators equipped with an accessible copper or braided plastic supply tube at the back, advanced DIYers sometimes flush the entire internal reservoir with vinegar, though a thorough fresh-water flush from the front is all most homeowners need for monthly upkeep.
- Turn the water supply shut-off valve back on and plug the refrigerator back into the wall outlet.
- Inspect the connection behind the fridge briefly to make sure no drips appear when pressure returns.
- Hold a large pitcher under the dispenser nozzle and press the paddle to dispense 4 to 6 cups of water.
- Check the first glass of water for any dislodged sediment flakes or cloudiness; keep flushing until the stream runs crystal clear and has no vinegar scent.
- Wipe the nozzle tip one final time with a dry microfiber cloth.
Refrigerator Water Dispenser Cleaning Schedule
| Dispenser Component | Cleaning Frequency | Best Cleaning Solution | Primary Target |
|---|---|---|---|
| Water Nozzle Tip (Inside & Out) | Monthly | 1:1 White vinegar & warm water | Pink biofilm, black mold specks, mineral crust |
| Drip Tray & Grille | Weekly | Warm dish soap, baking soda & vinegar | Stagnant water slime, hard water rings, crumbs |
| Actuator Paddles & Recess Walls | Weekly | Damp microfiber cloth & mild soap | Fingerprints, soda splatters, kitchen grease |
| Ice Chute Flapper Seal | Every 2–3 Months | Diluted white vinegar on a cloth | Mildew odors, condensation buildup |
| Refrigerator Water Filter | Every 6 Months | Replace with manufacturer filter | Chlorine taste, sediment, slow water flow |
When to Call a Pro
Cleaning the dispenser nozzle and flushing the spout solves most foul tastes, floating black specks, and slow streams caused by mineral crust. However, some dispenser issues point to deeper mechanical or plumbing faults inside the refrigerator door. Stop your DIY work and call an appliance professional if you notice any of these symptoms:
- Persistent leaks: Water continuously drips from the nozzle hours after cleaning, which usually indicates a failing water inlet valve at the back of the fridge.
- Frozen or cracked water lines: No water comes out even with a brand-new filter and an unclogged nozzle, or water leaks out from the bottom hinge of the freezer door.
- Electrical or actuator failures: Pressing the dispenser paddle produces no clicking sound, the control panel flickers, or the ice chute door refuses to snap shut (causing frost buildup inside the chute).
Replacing a water inlet valve, snaking a new polyethylene tube through an insulated refrigerator door, or swapping a dispenser control board typically costs between $150 and $380 for parts and labor, though exact pricing varies by area and refrigerator model. If your dispenser needs more than a deep clean, True Appliance Repair can connect you with an experienced local technician for professional refrigerator repair, or you can contact our team to get matched with a pro near you.
FAQ
Why are there black specks coming out of my refrigerator water dispenser?
Black specks in dispensed water usually come from two sources: harmless carbon granules from a newly installed water filter that was not flushed long enough, or mildew and biofilm growing inside the damp tip of the dispenser nozzle. Scrubbing the inside of the spout with a vinegar-dipped straw brush and flushing two gallons of water through the line almost always clears the specks.
Can I use bleach to clean my fridge water dispenser nozzle?
Avoid using bleach on your refrigerator water dispenser nozzle. Bleach can degrade the rubber check valves and plastic tubing inside the spout, and any trapped droplets will leave a harsh chemical taste in your drinking water. Distilled white vinegar is non-toxic, food-safe, and far more effective at dissolving alkaline hard water deposits.
How often should I clean my refrigerator water dispenser?
Wipe down the exterior paddles and wash the removable drip tray once a week during your normal kitchen cleanup. Deep clean the inside and outside of the water dispenser nozzle with white vinegar and a small brush once a month, and always give the spout a thorough scrub every six months when you install a new water filter.
What is the pink slime around my refrigerator water spout?
That pinkish-orange residue is a common airborne bacterium called Serratia marcescens, which thrives in damp environments and feeds on mineral deposits and fatty residues. While unsightly, it wipes away easily with a 50/50 solution of white vinegar and warm water followed by a thorough scrub with a clean pipe cleaner or toothbrush.