
Grease, pet hair, and dryer lint quietly build up behind heavy kitchen and laundry machines every month, forcing motors to run hotter and hiding slow leaks until floors warp. Learning how to clean behind home appliances safely takes less than an afternoon and protects your floors, hoses, and utility bills. Follow these six practical steps to move, clean, and inspect behind your major appliances without causing damage.
1. Protect Floors and Shut Off Utilities First
Before sliding any heavy unit, prep the area so you do not scratch hardwood, tear vinyl, or yank a live cord. Five minutes of setup prevents the most common moving mistakes.
- Gather floor protection and tools: Keep felt appliance sliders, thin Masonite boards, or flattened cardboard ready to lay in front of the machine. Set out a flashlight, vacuum with a crevice tool, microfiber cloths, and mild dish soap.
- Cut electrical power: Unplug each appliance as soon as you can reach the cord, or switch off its circuit breaker before touching rear panels.
- Close water valves: Turn off the wall shutoff valves for refrigerator ice makers and for both hot and cold washer supply hoses.
- Respect gas lines: Never tug on a gas stove or dryer to test slack. Inspect the connector with a flashlight first, and stop if you see rigid pipe or rust.
2. Pull Out the Refrigerator and Clear Rear Dust
Refrigerators draw room air across their rear condenser coils and fan nonstop, turning the wall behind them into a magnet for dust and pet hair. Heavy grime traps heat and makes the compressor run longer.
- Unlock front leveling feet: Pop off the lower toe grille and turn the front leveling screws counterclockwise just enough so the refrigerator rests evenly on its rollers.
- Roll straight forward: Pull gently from both sides onto your floor protector, stopping once you have about two feet of clearance and plenty of slack on the water tubing.
- Vacuum coils and trim: Use a soft brush attachment on the rear access grille, condenser coils, baseboard, and floor. Keep metal tools away from sealed refrigerant tubing.
- Wipe away sticky spills: Wash the floor with warm water and a few drops of dish soap, then dry the surface thoroughly before moving on.
3. Degrease Behind and Under the Stove Safely
Cooking vapors drift down the gap between your range and counters, gluing crumbs and dust to the floor and side panels. Clearing this zone reduces lingering kitchen odors and removes flammable grease buildup.
- Slide out carefully: Grip the sides of the range—never pull by the oven door handle, which can bend hinges or crack glass. Watch the power cord or flexible gas connector as you pull.
- Remove dry debris first: Vacuum or sweep loose crumbs and dust before adding water so you do not create a gritty paste.
- Dissolve stubborn grease: Mist the floor, wall, and range side panels with warm soapy water. For baked-on spots, apply a baking soda and water paste, wait five minutes, and wipe clean.
- Spot the anti-tip bracket: Note the metal floor or wall bracket at the rear corner so you guide the back leveling leg squarely into it later.
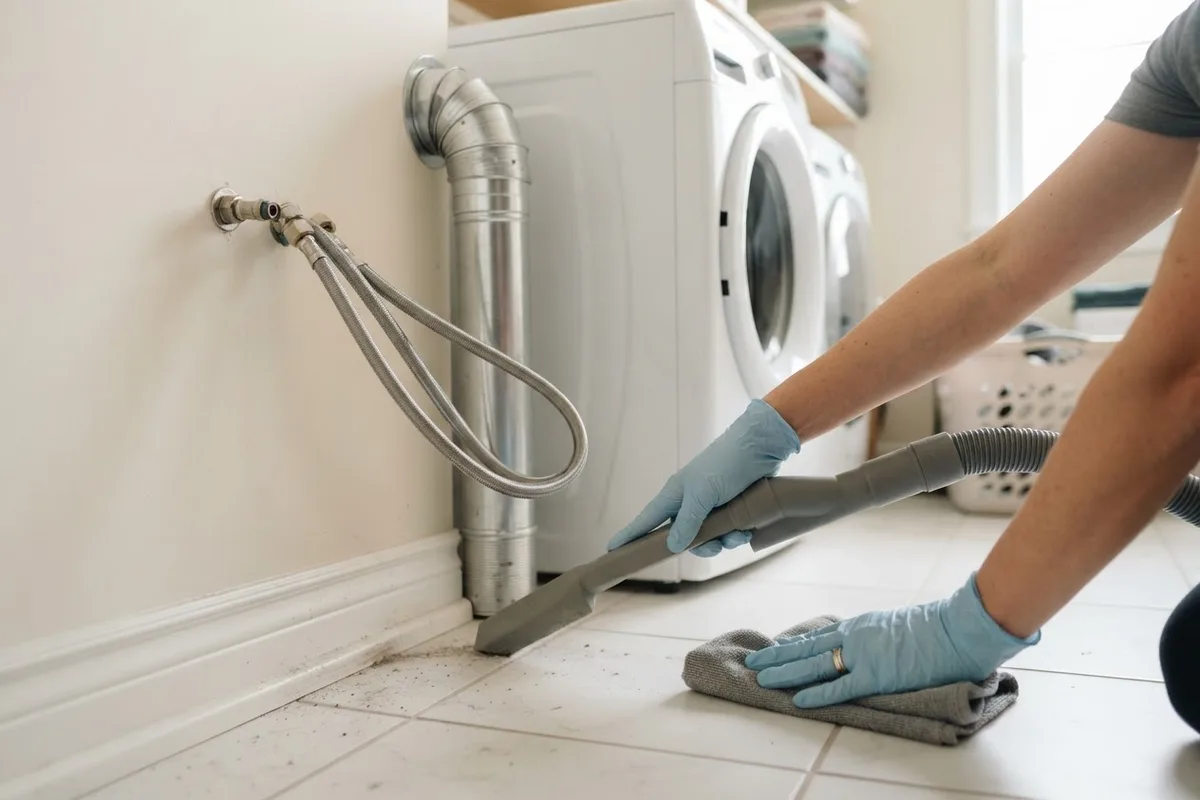
4. Vacuum Behind Your Washer and Dryer
Laundry rooms trap damp lint, stray socks, and detergent drips that can corrode metal cabinets and create fire hazards near exhaust vents. Pairing this chore with your winter appliance maintenance checklist keeps heavy laundry loads running smoothly.
- Move machines one at a time: Slide the washer and dryer forward on floor sliders, watching the washer drain hose hooked into the standpipe so it does not slip loose.
- Clear around the dryer duct: Vacuum loose lint off the floor, wall, and vent exterior without crushing the duct. If the hose looks packed with lint, loosen the clamps and vacuum both ends.
- Wipe damp dust: Use a slightly damp microfiber cloth and mild soap on wall trim, floors, and cabinet backs.
- Check for hidden moisture: Press a dry paper towel along the floor beneath the water valves and standpipe to spot slow drips early.
5. Check Hoses, Vents, and Cords for Wear
While each machine is pulled out, spend two minutes inspecting the hidden connections that cause most sudden water and electrical failures. Spotting wear now protects subfloors and walls.
- Inspect water hoses: Squeeze rubber washing machine hoses and examine plastic fridge tubing. Replace any line showing bulges, cracks, brittle bends, or mineral crust at the fittings—braided stainless steel hoses offer stronger durability.
- Evaluate the dryer exhaust duct: Look for crushed bends, loose clamps, or lint escaping through seams. Swap flimsy foil accordion ducts for rigid or semi-rigid metal ducting.
- Check cords and outlets: Confirm power cords have no frayed jackets, flattened pinches, or heat marks. Make sure wall receptacles sit firmly with no scorching.
- Test water valves: Turn shutoff handles gently to verify they move cleanly without weeping water around the valve stem.
6. Reset Leveling Feet and Airflow Gaps
Shoving an appliance tight against the wall can pinch water lines, crush dryer ducts, and block cooling airflow. Reset each unit slowly so every connection stays safe.
- Verify dry floors: Make sure washed areas are completely dry so trapped moisture cannot warp wood or invite mildew.
- Guide cords and hoses: Watch behind the unit with a flashlight—or ask a helper to spot—while rolling it back so lines fold smoothly without kinking.
- Keep proper clearance: Leave a 1-to-2-inch gap behind refrigerators for condenser airflow and 4 to 6 inches behind dryers unless you use a recessed vent box.
- Re-level and test: Confirm the range leg locks into its anti-tip bracket, level washers and fridges so they do not rock, restore power and water, and check for leaks. Polish exteriors afterward using our tips to clean stainless steel exteriors.
Quick-Reference Rear Appliance Cleaning Schedule
| Appliance | Cleaning Frequency | Typical Rear Gap | Shutoff Needed Before Moving | Top Hidden Check |
|---|---|---|---|---|
| Refrigerator | Every 6 months | 1–2 inches | Unplug + ice maker water valve | Coils, drain pan, water tubing |
| Electric or Gas Range | Every 3–6 months | Per outlet and bracket | Unplug/breaker; do not tug gas line | Anti-tip bracket, grease buildup |
| Washing Machine | Every 6 months | 3–4 inches | Unplug + hot/cold water valves | Hose bulges, standpipe drips |
| Clothes Dryer | Every 6 months | 4–6 inches (unless recessed) | Unplug/breaker; never strain gas line | Exhaust duct kinks, lint leaks |
When to Call a Pro
Vacuuming dust and wiping floors are solid DIY tasks, but stop immediately if moving a machine reveals a utility or mechanical hazard. Never attempt hands-on repairs on gas piping, sealed refrigeration lines, or your home electrical panel.
Bring in a technician right away if you smell rotten eggs or gas, find a corroded or rigid gas connection, see scorch marks or sparking at an outlet, or spot oily residue near refrigerator compressor tubing. Professional help is also smart for oversized built-in refrigerators, stacked laundry towers in narrow closets, or shutoff valves that drip when turned.
For routine service—such as replacing worn water valves, securing gas flex lines, or clearing deeply obstructed dryer vents—typical US costs range from $100 to $300, though pricing varies by area and model. If cleaning uncovers a damaged cord, persistent leak, or vent problem, True Appliance Repair can match you with a local appliance repair pro to resolve it safely.
FAQ
How often should you clean behind kitchen and laundry appliances?
Plan to clean behind your refrigerator, washer, and dryer every six months, and behind your stove every three to six months if you cook daily. Homes with shedding pets or frequent laundry loads benefit from checking behind dryers and fridge coils every three months to maintain steady airflow.
How do I move a heavy fridge or stove without scratching hardwood floors?
Place thin Masonite panels, smooth corrugated cardboard, or felt-bottomed appliance sliders under the front feet before rolling the machine out. Pull straight forward instead of twisting side to side, and raise front leveling legs slightly so bare metal never drags across wood or vinyl.
Can I pull out a gas stove by myself to clean behind it?
You can slide a freestanding gas range out a few inches only if it connects to a modern flexible metal gas line with visible slack and moves without resistance. Never tug a tight connector, never move a range tied to rigid pipe, and leave the house to call your gas utility if you smell gas.
Should I pull out my built-in dishwasher to clean behind it?
Most homeowners do not need to pull out a built-in dishwasher during routine cleaning because it is fastened to cabinets or countertops and tied tightly to plumbing and wiring. Instead, vacuum along the bottom kickplate, wipe the door gasket, and check under the adjacent kitchen sink for supply or drain hose drips.