
Baked-on grease and dark carbonized drips turn shiny oven racks into smoky, sticky grates that ruin holiday roasts and everyday weeknight dinners. Instead of spending an hour scrubbing with harsh chemical sprays, you can soak away stubborn buildup overnight using safe household staples. These six no-scrub methods leave your racks spotless without damaging the metal plating or scratching your oven cavity.
Safely Cool, Unplug, and Remove Your Oven Racks
Before touching any metal inside your oven, give both the racks and the cavity walls at least two hours to cool completely. Follow these safety steps first:
- Turn all oven and stove dials to the off position.
- Unplug your range from the wall outlet or switch off its dedicated breaker at the electrical panel before reaching deep inside the cavity.
- For gas ranges, turn the gas shutoff valve behind the appliance to the off position if you plan to wipe near the lower burner ports or igniter area.
- Pull each rack gently toward you, tilt the front edge slightly upward when it hits the stop notch, and lift it clear without scraping the enamel walls.
Never leave standard chrome racks inside during a self-clean cycle. Extreme self-cleaning temperatures warp the steel, dull the protective finish, and make racks bind tightly against the side glides.
1. Soak Racks With Dishwasher Pods in the Tub
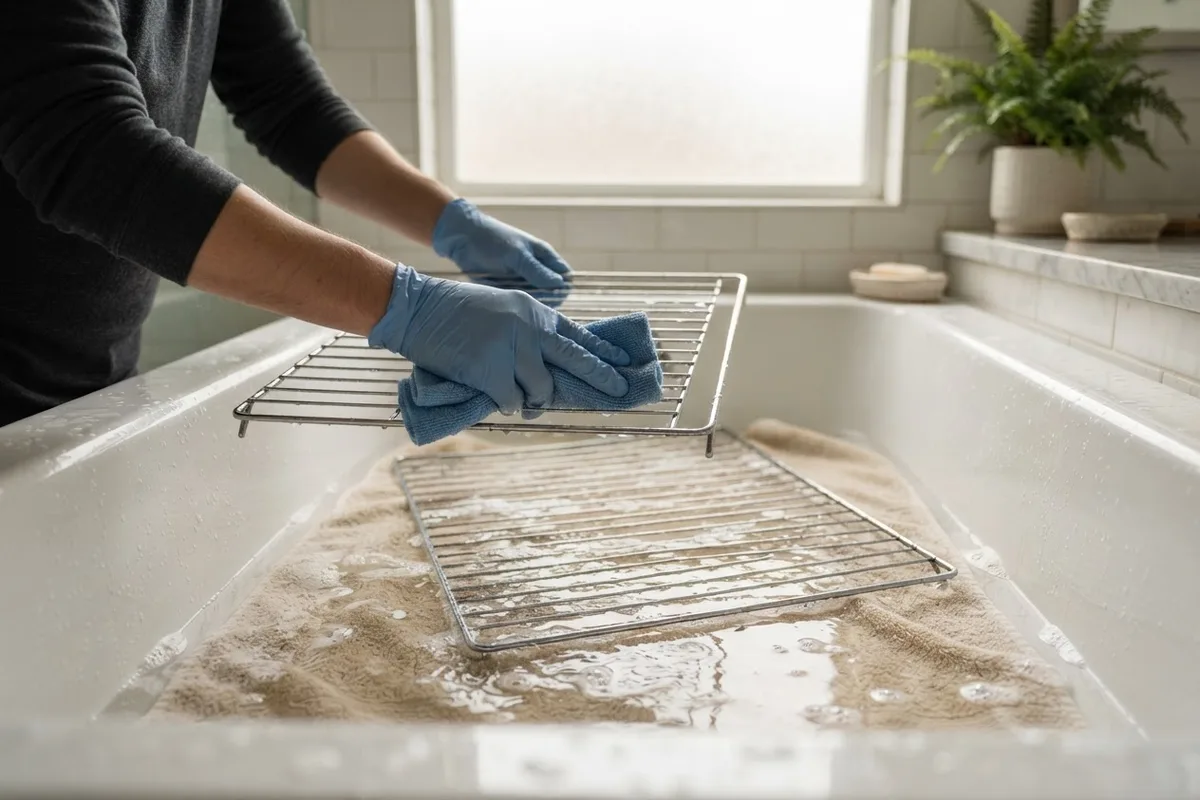
Dishwasher pods contain concentrated enzymes designed to break down cooked-on protein and fat without abrasive scrubbing. Because bathtubs give standard racks room to lie flat, this overnight soak handles months of baked-on spills in one round.
- Spread two thick, old bath towels across the bottom of your empty bathtub so heavy metal edges cannot scratch the porcelain or acrylic finish.
- Lay the cool oven racks flat on top of the towels.
- Fill the tub with hot tap water until every wire and weld joint sits completely underwater.
- Drop in two to three dishwasher tablets or pods, stir gently with a wooden spoon until dissolved, and let the racks soak for four to six hours or overnight.
- Drain the dark water, wipe loosened residue away with a non-scratch nylon sponge, rinse thoroughly with warm water, and dry immediately.
2. Lift Grease With Dryer Sheets and Dish Soap
Unused dryer sheets hold mild surfactants and softening agents that slip between hardened fat and slick chrome plating. Pairing them with grease-cutting liquid dish soap turns a messy chore into an easy morning rinse.
- Line a bathtub or large laundry sink with old towels, then lay four to six unused dryer sheets across the fabric.
- Set your oven racks flat over the sheets and squirt two tablespoons of liquid dish soap directly onto the thickest dark spots.
- Run hot water until the racks are fully submerged, pressing gently so the soap disperses evenly.
- Leave the setup undisturbed for six to eight hours while the softening agents loosen carbonized drips.
- Put on rubber gloves and use the wet dryer sheets as gentle scrub pads to wipe softened grime from every wire, then rinse thoroughly so no soapy film remains.
3. Fizz Away Grime With Baking Soda and Vinegar
If you prefer a fragrance-free option or do not have a bathtub, baking soda and white vinegar work well outdoors or inside a deep utility sink. The mild fizzing action helps lift sticky grease so it rinses clean with light brushing.
- Lay a heavy-duty plastic drop cloth or open a thick lawn-and-leaf trash bag on a flat porch, garage floor, or driveway.
- Place the racks inside and sprinkle a generous coat of baking soda over both sides of the wires.
- Mist the baking soda lightly with plain white vinegar from a spray bottle until it foams into a damp paste.
- Fold the bag closed or cover the racks with damp paper towels for two to three hours so the paste stays wet.
- Rinse with a garden hose or kitchen sprayer, using a soft-bristle brush around corner welds.
4. Melt Baked-On Spills With Washing Soda
When holiday pie boil-overs or sugary glazes bake onto the steel like hard glass, standard dish soap sometimes falls short. Washing soda—sodium carbonate, found in the laundry aisle—creates a stronger alkaline bath that softens tough sugar and fat deposits fast.
- Put on thick rubber kitchen gloves to protect your skin from the strong alkaline solution.
- Fill a large plastic storage tote or lined tub with hot water, then stir in one-half cup of washing soda and two tablespoons of liquid dish soap until dissolved.
- Submerge your chrome or stainless steel racks completely and soak them for three to four hours.
- Wipe away the softened buildup with a folded microfiber cloth and rinse under clear running water.
Keep washing soda strictly for steel and chrome racks; never soak bare aluminum baking pans or aluminum oven trim in it, as it causes dark pitting.
5. Spot-Treat Corners With Baking Soda and Peroxide
Even after a long soak, tight corners and thick support bars sometimes hold onto stubborn black specks. Instead of reaching for steel wool—which leaves microscopic scratches that trap future grease and invite rust—use an oxygen-powered paste.
- Mix three parts baking soda with one part household hydrogen peroxide in a small ceramic bowl until you get a spreadable, toothpaste-like paste.
- Dab the paste directly onto remaining dark spots around corner welds and front grip bars.
- Wait 30 to 45 minutes while the gentle bubbling action loosens the leftover carbon bond.
- Rub the spots lightly with a crumpled ball of aluminum foil dipped in water or a soft nylon brush, keeping rough edges away from delicate trim.
- Rinse the racks well with clean water so no chalky white powder stays behind.
6. Dry Thoroughly and Oil Side Rails for Smooth Gliding
Leaving damp racks inside a closed oven traps moisture inside weld seams and causes rust spots within weeks. Finishing the job properly protects the plating and keeps racks gliding smoothly.
- Wipe every wire and joint completely dry with a clean cotton towel right after rinsing.
- Pour three drops of high-heat cooking oil, such as canola or avocado oil, onto a folded paper towel.
- Lightly buff only the outer left and right sliding edges—never the center wires—if your racks squeak or bind against the side ledges.
- Slide the racks back in, restore power or gas, and add rack care to your monthly appliance maintenance checklist.
| Method | Best For | Soak Time | Key Supplies |
|---|---|---|---|
| Dishwasher Pods | Heavy, months-old grease | 4–8 hours | 2–3 pods, towels, hot water |
| Dryer Sheets | Sticky splatters & odor | 6–8 hours | 4–6 sheets, dish soap |
| Baking Soda & Vinegar | Fragrance-free outdoor clean | 2–3 hours | Baking soda, white vinegar |
| Washing Soda | Sugary boil-overs | 3–4 hours | 1/2 cup washing soda, gloves |
| Peroxide Paste | Tight weld corners | 30–45 min | Baking soda, 3% peroxide |
When to Call a Pro
Most rack-cleaning issues stay firmly in DIY territory, including replacing warped or rusted racks on your own—replacement oven racks typically cost $40 to $120 each, depending on the model and whether they have telescoping glides. However, stop immediately and call a trained technician if you run into appliance damage beyond surface grime.
Never attempt DIY repairs involving gas supply lines, burner valves, electrical panel wiring, or sealed internal components. You should also bring in a pro if running a past self-clean cycle with racks inside locked the door shut, blew a thermal fuse, or warped the oven cavity walls so new racks still jam. Typical oven service visits run around $120 to $300, though exact pricing varies by area and model.
When you need reliable diagnostics, True Appliance Repair can connect you with a local oven and stove repair pro in your neighborhood. If your unit is over 12 years old and facing costly latch or control board repairs, review these rules for deciding whether to repair or replace an aging oven.
FAQ
Can I leave oven racks inside during the self-clean cycle?
No, you should always remove standard chrome-plated oven racks before starting a self-clean cycle. Extreme heat around 800°F to 900°F strips the shiny coating, turns the metal dull gray, and often warps the frame so racks stick. Only leave racks inside if your owner's manual explicitly labels them porcelain-coated and safe for self-cleaning.
Why shouldn't I use ammonia in a trash bag indoors?
While ammonia fumes cut grease, sealing ammonia in a bag creates harsh, irritating vapors that can burn your eyes, throat, and lungs if the bag tears or vents indoors. Enzyme dishwasher pods, washing soda, and baking soda pastes lift the same baked-on grime safely without toxic fumes. Always prioritize gentle household soaks when cleaning inside your home.
How often should I clean my oven racks?
For typical family cooking, deep-cleaning your oven racks every three to six months prevents stubborn carbon layers from smoking during high-heat roasting. If you bake messy casseroles or fruit pies regularly, wipe fresh drips off cool racks once a month with warm soapy water. Catching spills early eliminates the need for overnight soaking later.
Can lining an oven rack with aluminum foil cause damage?
Wrapping an entire rack in aluminum foil blocks proper airflow and traps uneven heat, which can bake food unevenly or damage oven enamel if foil touches the walls. Instead, place a rimmed baking sheet lined with foil on the rack below your dish to catch drips safely. That simple step keeps both your racks and oven floor clean.