
Most surprise kitchen and laundry breakdowns start as small, ignored buildup—grease on a hood filter, lint packed behind a dryer trap, or food residue stuck inside a dishwasher drain. A simple monthly appliance maintenance routine takes about 20 minutes from start to finish and stops minor grime from turning into leaks, odors, or worn-out motors.
Safety first: Before touching any internal part, unplug the appliance or switch off its breaker, and turn off the nearby water or gas valve if you are checking supply lines. Never open sealed refrigerant tubing, gas manifolds, or electrical panels.
1. Scrub the Dishwasher Filter and Spray Arms
Grease, eggshells, and soap film quickly coat a dishwasher's bottom mesh filter, forcing the pump to work harder and leaving gritty film on plates. Once a month, give the drain zone a five-minute reset:
- Turn off the dishwasher and unplug it or flip its wall switch before reaching inside.
- Pull out the bottom rack and twist the cylindrical filter counterclockwise to lift it free.
- Rinse the filter under warm running water and scrub away trapped food with a soft toothbrush and mild dish soap.
- Inspect the spinning spray arm nozzles for toothpicks or mineral bits, clearing blocked holes gently with a wooden toothpick.
- Lock the clean filter back into place, slide the rack in, and run a hot rinse cycle with one cup of white vinegar in a top-rack bowl.
2. Wipe Washer Door Seals and Run a Hot Rinse
Trapped moisture and detergent residue turn washing machine rubber boots into breeding grounds for musty smells and stiff seals that eventually drip. Keeping the drum fresh protects both clothes and door hinges:
- Unplug the washer before checking around the door latch or drainage grooves.
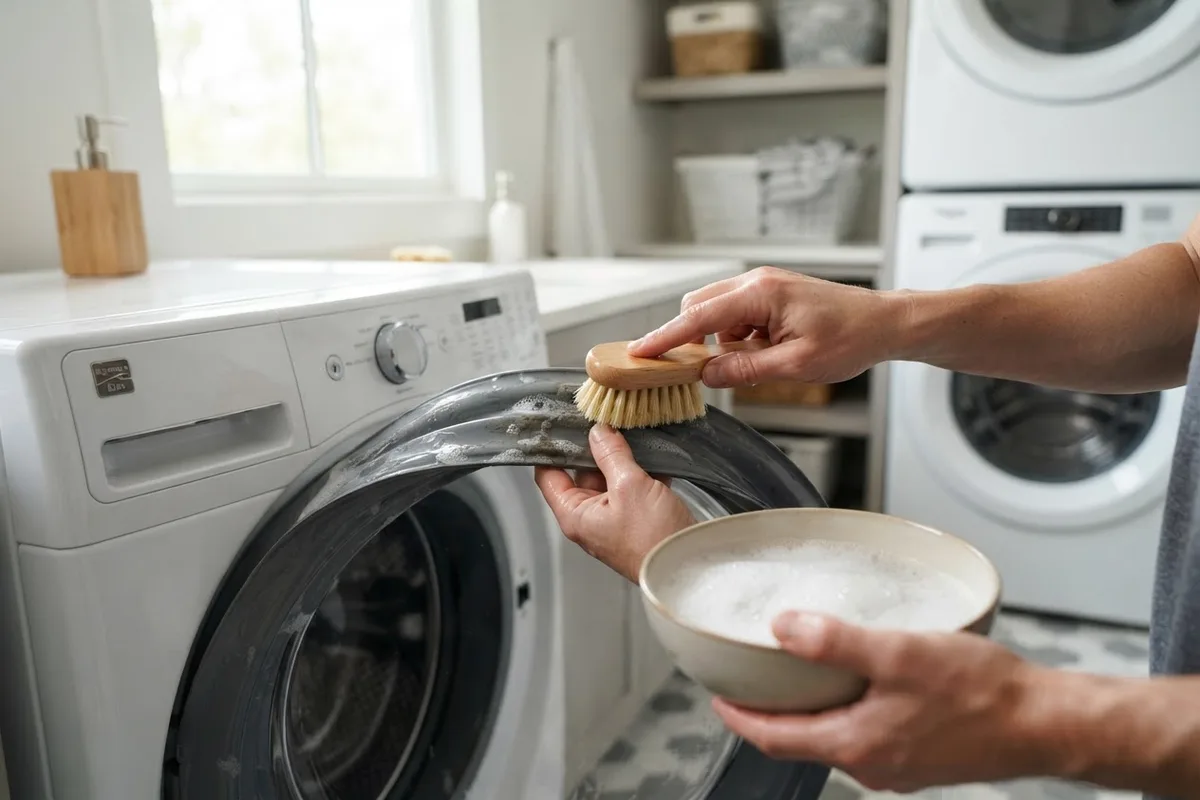
- Pull back the folds of the rubber door gasket on front-loaders—or lift the lid rim on top-loaders—and wipe away hair, coins, and lint with a damp microfiber cloth.
- Scrub stubborn dark spots using a paste of baking soda and warm water, then wipe clean and dry thoroughly.
- Pull out the detergent drawer, soak it in warm soapy water for five minutes, and rinse the dispenser housing with a damp cloth.
- Plug the unit back in and run the hottest empty cycle with two cups of white vinegar. If you still notice drips, check these washing machine door leak fixes.
3. Clear the Dryer Lint Housing and Vent Hood
Cleaning the lint screen after every load is essential, yet fine lint still slips past the mesh into the housing slot and exterior vent flap. Over weeks, that buildup traps heat and stretches drying times:
- Unplug your electric dryer—or unplug and shut off the gas valve on a gas dryer—before cleaning inside the slot.
- Remove the lint screen, wash it gently with warm soapy water to strip off fabric-softener film, and let it air-dry completely.
- Use a long vacuum crevice tool or flexible lint brush to pull packed fuzz from the bottom of the lint trap chute.
- Walk outside to the exterior exhaust hood, clear away leaves or lint around the damper flap, and confirm the flap opens freely when the dryer runs on air-fluff.
- Check behind the machine to verify the metal exhaust duct is not crushed or kinked against the wall.
4. Flush and Deodorize the Garbage Disposal
Even when you scrape plates carefully, grease and fibrous scraps cling to the rubber splash guard and inner chamber of a garbage disposal. Monthly flushing keeps drain lines clear without harsh chemical drain openers:
- Flip the disposal wall switch off and unplug the unit under the sink before looking inside or wiping near the throat.
- Lift the underside flaps of the rubber splash guard and scrub away black slime using a soapy bottle brush.
- Reconnect power, drop five or six ice cubes and a tablespoon of coarse kosher salt into the chamber, and run cold water while grinding for 15 seconds to scour the grinding ring.
- Follow with a couple of lemon or orange peel halves and cold running water for a fresh scent.
- For deeper odor or buildup issues, walk through our guide on how to clean a garbage disposal.
5. Degrease Range Hood Filters and Stovetop Knobs
Airborne cooking oil settles onto range hood mesh filters and creeps behind stove control knobs, choking airflow and making dials stick. A quick soak every four weeks keeps your kitchen air cleaner:
- Confirm all oven and stove burners are completely cool, and turn off the hood fan switch and breaker if needed.
- Slide or unclip the aluminum or stainless grease filters from the range hood.
- Submerge the filters in a sink filled with very hot water, two tablespoons of dish soap, and a quarter-cup of baking soda for 15 minutes.
- Scrub lightly with a non-scratch brush, rinse clean, and stand the filters upright to dry completely before reinstalling.
- Pull off removable stovetop knobs, wash them in warm soapy water, and wipe the control panel with a barely damp cloth so moisture never drips inside the stems.
6. Vacuum Fridge Seals and Check Water Lines
Dirty refrigerator door gaskets fail to seal tightly, letting warm kitchen air sneak in and forcing the compressor to run overtime. Pair a quick seal wipe with a leak check around water connections:
- Unplug the refrigerator or turn its temperature dial to off if you are pulling the unit out from the wall.
- Wipe all around the fridge and freezer door gaskets with warm soapy water, paying close attention to bottom corners where crumbs gather, then dry with a towel.
- Test the seal by closing a dollar bill in the door; if it slides out easily with zero drag, the gasket needs cleaning or replacement.
- Shine a flashlight behind the fridge—and behind your washing machine and dishwasher—to spot dampness, green corrosion, or bulges on supply hoses.
- Vacuum dust from the toe-kick grille and check that food containers are not blocking interior cold-air vents.
Monthly Appliance Checklist at a Glance
Use this quick-reference chart to keep your 20-minute routine on track and catch early trouble before parts wear out:
| Appliance | Monthly Task | Time Needed | Early Warning Sign |
|---|---|---|---|
| Dishwasher | Scrub drain filter and spray arms | 4 minutes | Gritty dishes or standing water |
| Washing machine | Wipe door gasket and run hot rinse | 4 minutes | Musty odor or damp floor edge |
| Dryer | Vacuum lint chute and check exterior flap | 4 minutes | Clothes still damp after one cycle |
| Garbage disposal | Scrub splash guard and flush with ice | 3 minutes | Slow sink drain or sour smell |
| Range hood & stove | Soak grease filters and clean knobs | 3 minutes | Lingering smoke or sticky dials |
| Refrigerator | Wipe door gaskets and inspect water line | 3 minutes | Condensation inside or warm walls |
When to Call a Pro
Routine cleaning handles everyday buildup, but some symptoms point to failing internal components that should not be tackled DIY. Stop immediately and shut off power or fuel if you smell gas near a stove or dryer, notice scorched outlets or tripped breakers, or hear loud metal-on-metal grinding from a motor or compressor. Sealed-system refrigerator repairs, gas valve adjustments, and internal control board testing require specialized diagnostic tools and safety training. Typical US appliance service visits and minor part replacements generally run $120 to $350, though final pricing varies by area and model. If your monthly check uncovers a worn door latch, cracked supply valve, or failing heating element, True Appliance Repair can match you with a local appliance pro who works on your machine's brand.
FAQ
How long should monthly appliance maintenance take?
Once you gather a microfiber cloth, toothbrush, vacuum attachment, and white vinegar, the entire six-step checklist takes 15 to 25 minutes. Doing these quick checks every month prevents heavy buildup so you spend far less time deep-cleaning later.
Is white vinegar safe for all home appliances?
White vinegar works well for mineral buildup in dishwashers and washing machine drums, but use it sparingly and never mix it with bleach. Avoid soaking rubber door gaskets in straight vinegar—mild dish soap and warm water clean rubber safely without drying it out.
When is the best day to run through this checklist?
Pick a consistent anchor day, such as the first Saturday morning of the month or the day you change your HVAC air filter. Grouping household tasks together makes the habit automatic and keeps maintenance schedules easy to remember.
Should I clean refrigerator coils every month too?
Most households only need to vacuum refrigerator condenser coils every six to twelve months, unless you have shedding pets or place the fridge in a dusty garage. Each month, simply clearing dust off the front toe-kick grille is enough to protect airflow.