
Sticky spills, forgotten leftovers, and dust buildup can ruin fresh food and force your appliance to work twice as hard to maintain safe temperatures. A thorough deep cleaning restores proper hygiene, eliminates embarrassing odors, and improves your unit's overall cooling efficiency. Follow this step-by-step guide to sanitize your refrigerator safely inside and out using common household supplies.
1. Unplug the Unit and Clear Out All Food
Safety comes first whenever you perform hands-on maintenance on any major home appliance. Unplug the refrigerator power cord from the wall outlet or switch off the dedicated breaker in your electrical panel. If your model features an integrated ice maker or liquid dispenser, shut off the water supply valve connected to the wall.
Next, completely clear out every shelf, door bin, and crisper drawer. Place perishable dairy, meats, and produce into an insulated cooler filled with ice packs to keep them safe while you work. Sort through glass jars, condiment bottles, and containers. Throw away expired food, moldy produce, or items with damaged seals. Emptying the compartment completely gives you full access to interior surfaces and prevents room heat from straining the cooling system while doors remain open.
2. Wash Shelves and Drawers with Warm Soapy Water
Carefully slide out all removable glass shelves, plastic bins, and crisper drawers. Allow cold glass panels to reach room temperature before washing them. Running cold glass under hot water causes thermal shock, which can instantly crack or shatter the panel.
Fill your kitchen sink or a washbasin with warm water and a few drops of mild dish soap. Scrub each component thoroughly using a soft microfiber sponge to remove dried drips and sticky residue. For hardened, stubborn spills, soak a washcloth in warm water and lay it directly over the spot for five minutes before wiping. Rinse each bin and shelf with clean water, then dry completely with a clean towel before setting them aside on a flat surface.
3. Sanitize the Interior Walls and Shelving Rails
Avoid using harsh chemical sprays, bleach, or abrasive scouring pads inside your appliance. Strong chemical fumes can absorb into food, and harsh powders can permanently scratch smooth plastic interior liners. Instead, mix two tablespoons of baking soda with one quart of warm water in a spray bottle or cleaning bucket.
Baking soda is a natural deodorizer and mild abrasive that cuts through grime without damaging surfaces. Spray or wipe the solution across the ceiling, side walls, back wall, and shelf tracks inside the fresh food and freezer sections. Use a soft-bristled toothbrush to scrub tight corners, drawer tracks, and peg holes where crumbs collect. Wipe away residue with a damp cloth, then dry all surfaces thoroughly. If you notice excessive moisture pooling along the back wall during this process, review our guide on why your refrigerator is sweating inside to fix potential airflow or seal issues.
4. Clear and Unclog the Defrost Drain Hole
A blocked defrost drain is a primary cause of water pooling beneath crisper drawers or leaking onto the kitchen floor. Locate the drain opening, which is typically found along the lower portion of the interior back wall inside the fresh food compartment or behind the freezer back panel.
Inspect the opening for ice buildup, stray food particles, or mold growth. Fill a bulb syringe or turkey baster with warm water mixed with a teaspoon of baking soda or white vinegar. Flush the mixture directly into the drain hole until you hear water running down into the drain pan below the cabinet. If water backs up immediately, gently insert a flexible nylon drain tube brush or plastic zip tie into the hole to dislodge caught debris.
5. Clean the Condenser Coils and Lower Vacuum Area
Dust, lint, and pet hair accumulate on condenser coils over time, restricting heat release and causing the compressor to overheat or run constantly. Pull the appliance away from the wall carefully, or remove the lower front toe kick plate using a screwdriver.
Use a long, flexible condenser coil brush to gently scrape dust away from the metal coils. Follow up with a vacuum cleaner fitted with a narrow crevice attachment to suction away loose debris from the coils, surrounding wire harness, and floor area. Keeping these coils dust-free is a crucial step in routine DIY appliance maintenance that extends unit lifespan and lowers monthly power bills.
6. Wipe Down Door Gaskets and Reassemble
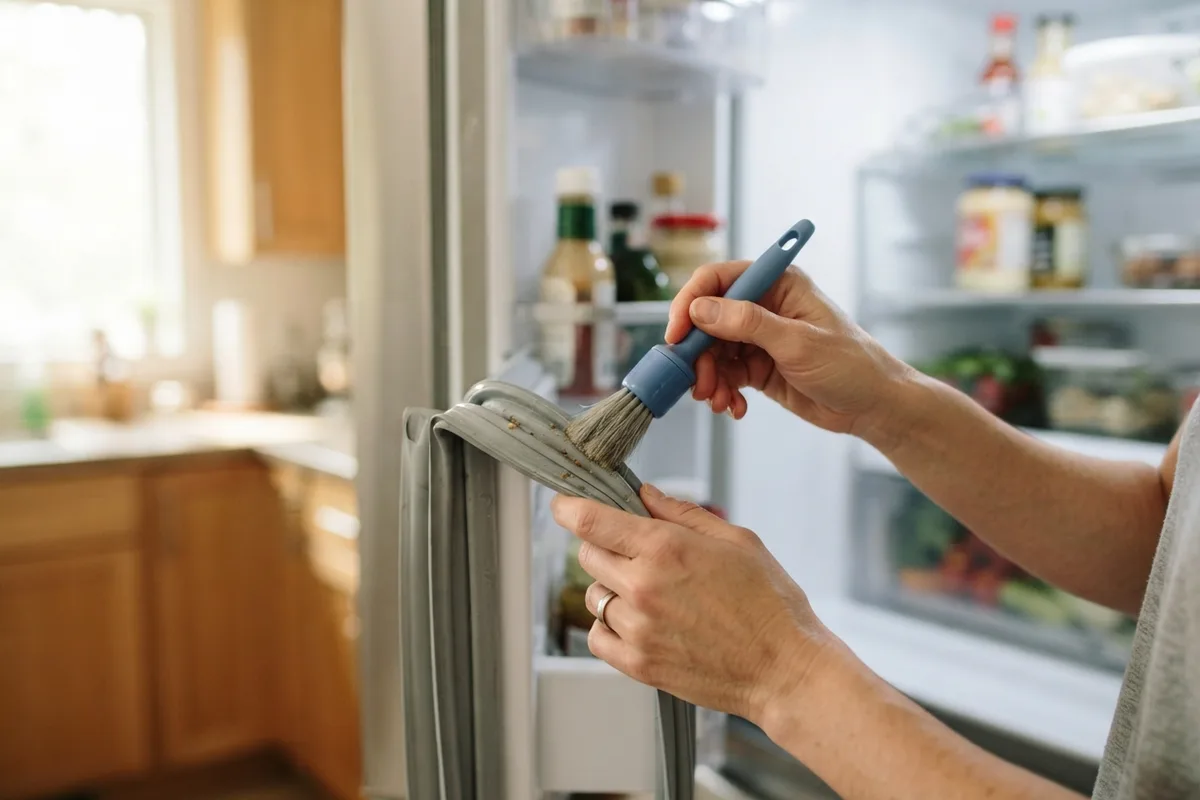
Rubber door gaskets seal cold air inside, but food crumbs and moisture hide inside their accordion folds, promoting mold growth. Mix warm water and mild dish soap, then use a soft cloth or toothbrush to scrub clean the rubber folds around both doors.
Avoid petroleum-based cleaners, which dry out rubber and cause premature cracking. Inspect the seal for tears, gaps, or hard spots. A compromised gasket allows warm, humid air to enter, causing frost accumulation and temperature swings. Dry the gaskets thoroughly, plug the power cord back into the wall, restore the water supply, and reinstall all clean, dry drawers and shelves. Allow the unit to cool for 30 minutes before reloading your food.
| Cleaning Area | Recommended Cleaner | Tool to Use | Frequency |
|---|---|---|---|
| Removable Shelves | Warm water & mild dish soap | Microfiber sponge | Every 3-6 months |
| Interior Walls | Baking soda & warm water solution | Soft cloth & toothbrush | Every 3-6 months |
| Condenser Coils | Dry brushing / Vacuum | Coil brush & hose attachment | Every 6 months |
| Door Gaskets | Warm soapy water | Soft toothbrush | Monthly |
| Defrost Drain Hole | Warm water & vinegar flush | Bulb syringe or tube brush | Every 6 months |
When to Call a Pro
While deep cleaning, clearing drain lines, and dusting coils are easy weekend tasks, internal mechanical or electrical problems require expert attention. If your appliance fails to reach target temperatures after cleaning, makes loud grinding noises, or shows signs of a chemical refrigerant leak, stop troubleshooting.
Do not attempt hands-on work on gas lines, sealed refrigerant tubing, or internal control panels yourself. True Appliance Repair can match you with a local appliance pro to diagnose complex cooling failures safely. Professional diagnostic and component repair fees typically range between $150 and $350 depending on your location and appliance brand.
FAQ
How often should you deep clean a refrigerator?
You should deep clean the interior compartment every three to six months. Vacuuming condenser coils and inspecting rubber door gaskets should happen at least twice a year to maintain peak energy efficiency.
Can I use vinegar to clean the inside of my fridge?
Yes, a mixture of equal parts warm water and distilled white vinegar works well to sanitize glass shelves and plastic walls. However, avoid using vinegar frequently on rubber door gaskets, as acid can gradually degrade flexible rubber compounds over time.
Why does my refrigerator still smell bad after cleaning?
Lingering smells are often absorbed into plastic walls or stem from a dirty drain pan beneath the unit. Place an open box of baking soda or active charcoal on a middle shelf for 24 to 48 hours to absorb stubborn odors.
How do I remove mold from refrigerator door gaskets?
Spray a solution of warm water and white vinegar directly into the rubber gasket folds. Let it sit for 10 minutes, scrub gently with a soft toothbrush, and wipe completely dry with a microfiber towel.