
Running your range's high-heat self-clean cycle right before holiday baking season can fill your kitchen with acrid smoke, trip thermal fuses, or lock the door right when you need to roast a turkey. Knowing how to deep clean an oven manually gives you a sparkling interior without stressing sensitive electronic control boards or heating elements. With basic pantry staples like baking soda, dish soap, and white vinegar, you can dissolve baked-on grease and carbonized spills safely over an afternoon.
Before starting any hands-on cleaning, turn the oven off completely, make sure the interior is cool to the touch, and unplug the range or switch off its circuit breaker. If you have a gas range, leave the gas supply valve undisturbed and take special care not to bump or saturate the fragile glow igniter.
1. Remove and Soak the Oven Racks
Attempting to scrub around metal grates leaves hidden grease in the corners of the oven cavity and on the side glides. Removing the racks first opens up the entire interior and lets hot water do the heavy lifting on the wire grates while you focus on the oven walls.
- Confirm the oven is cool and disconnected from power at the outlet or breaker panel.
- Slide out all flat and roller racks, plus any freestanding oven thermometers or Pizza stones.
- Lay an old bath towel across the bottom of your bathtub to prevent metal corners from scratching the tub finish.
- Place the racks on the towel and fill the tub with enough hot water to submerge them completely.
- Stir in a half-cup of dish soap or two crushed dishwasher detergent tablets and let the racks soak for at least 2 hours.
- Scrub softened grease away with a non-scratch scouring pad, rinse thoroughly with warm water, and towel dry before putting them back.
2. Guard Heating Elements and Igniters
Baking soda paste is mildly abrasive and conducts electricity when wet, and excess moisture can damage gas igniters, temperature probes, and fan assemblies. Taking two minutes to locate and protect these vulnerable parts prevents frustrating heating problems after your cleanup is finished. If your burner or bake igniter was already acting up before cleaning, check out our guide on why a gas oven takes forever to preheat.
- Locate the bake element at the bottom of an electric oven (if exposed), the broil element at the top, the metal temperature sensor rod in the upper back corner, and the convection fan intake on the rear wall.
- In a gas oven, find the floor vents and the fragile silicon-carbide igniter tucked beneath the bottom heat shield.
- Brush away loose, dry crumbs around these openings using a dry paintbrush or vacuum crevice tool.
- Loosely wrap a small piece of aluminum foil over the exposed tip of the temperature sensor probe and over gas floor vents so paste cannot fall inside.
- Remember to remove every piece of protective foil before restoring power to the range.
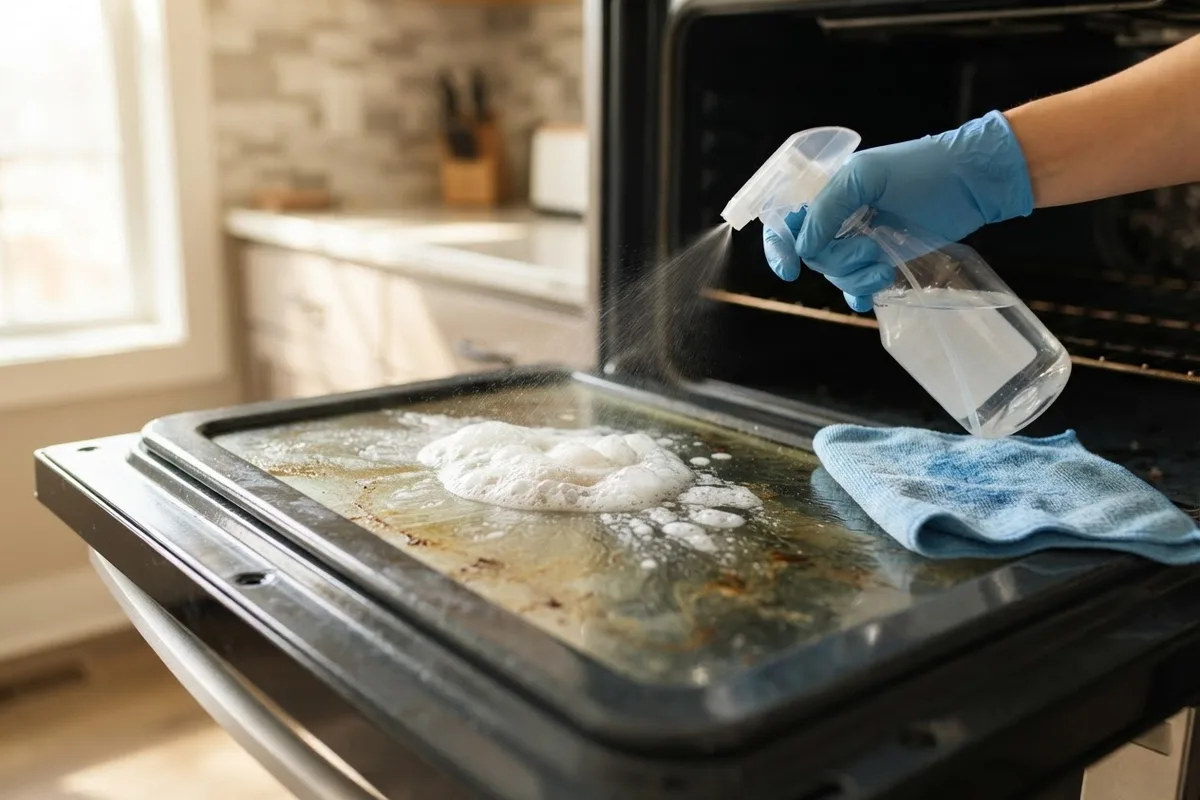
3. Coat the Interior with Baking Soda Paste
Commercial oven sprays often release strong chemical fumes that linger in your kitchen for days. A thick paste made of baking soda and water acts as an alkaline cleanser that breaks down acidic, polymerized food grease naturally without irritating your lungs or damaging porcelain enamel.
- Mix 1 cup of baking soda with 3 to 4 tablespoons of warm water and 1 teaspoon of liquid dish soap in a small bowl until it forms a spreadable, icing-like consistency.
- Put on rubber cleaning gloves to keep the alkaline mixture from drying out your skin.
- Starting at the back wall and working forward, spread the paste across the porcelain enamel floor, side walls, and ceiling using a silicone spatula or soft sponge.
- Apply a slightly thicker layer over dark, carbonized sugar or grease spots on the oven floor.
- Keep the paste completely off bare heating elements, gas ports, the convection fan grate, and the fiberglass or braided rubber door gasket.
- Leave the oven door closed and let the paste sit for 8 to 12 hours (or overnight) so it can penetrate baked-on buildup.
4. Spritz with Vinegar and Wipe Clean
Once the baking soda paste has dried and absorbed the grease, adding household white vinegar triggers a mild foaming reaction that lifts stubborn residue off the enamel surface. Following up with warm water and a plastic scraper clears away the slurry without gouging the finish.
- Fill a clean spray bottle with distilled white vinegar and lightly mist the dried baking soda across the oven walls and floor.
- Let the foaming mixture bubble for 5 minutes to loosen the remaining crust.
- Hold a plastic pan scraper or old plastic gift card at a 45-degree angle and gently push softened carbon spots off the oven floor.
- Wipe out the bulk of the paste using a damp microfiber cloth or heavy-duty sponge, rinsing and wringing it out frequently in a bucket of warm water.
- Do a second and third pass with a clean, damp cloth until no chalky white streaks remain on the dark enamel.
- Remove the temporary foil covers you placed over the sensor probe or vents in Step 2.
5. Degrease the Inside Oven Door Glass
Oven door glass is made of tempered glass that can shatter if scratched by metal razor blades or abrasive steel wool. Treating the inner glass window as its own step keeps visibility clear so you can check on baking dishes without opening the door and losing heat.
- Open the oven door fully so it rests flat and level; do not lean your body weight on the open door, which can bend the hinges.
- Spread a fresh batch of baking soda, warm water, and dish soap paste across the glass pane.
- Let the paste rest for 20 to 30 minutes to soften brown, polymerized oil splatters.
- Scrub the glass in gentle circular motions using a damp non-scratch cellulose sponge or melamine foam pad.
- Wipe the paste away with a damp microfiber towel, taking care not to push dirty water into the vent slots along the top or bottom edge of the door.
- Buff the glass dry with a lint-free cloth and a spray of diluted vinegar for a streak-free window.
6. Wipe the Door Gasket and Vent Openings
The flexible perimeter seal around the oven opening traps heat inside, while the upper range vent releases moisture and combustion air. Grease buildup on the gasket makes it brittle and prone to tearing, while a clogged vent can cause smoke or strange odors during baking.
- Inspect the braided fiberglass or silicone gasket framing the oven opening for burnt food crumbs or sticky spills.
- Dip a soft cloth in warm, mildly soapy water and gently blot—never scrub or pull—dirty spots along the gasket.
- Pat the seal dry with a clean towel so trapped moisture does not steam when you next preheat.
- Locate the oven exhaust vent on the backguard or beneath the cooktop control panel and wipe away greasy film with a degreasing kitchen cleaner.
- Slide the clean, dry oven racks back into their glides, restore power at the breaker or outlet, and run the empty oven at 350°F for 15 minutes to evaporate any lingering moisture.
Oven Cleaning Method Comparison
| Cleaning Method | Active Time | Total Wait Time | Best For | Safety & Appliance Impact |
|---|---|---|---|---|
| Baking Soda & Vinegar (DIY) | 30–45 mins | 8–12 hours | Heavy grease, burnt spills, pre-holiday deep cleans | Zero harsh fumes; zero thermal stress on electronics or fuses |
| Steam Clean Cycle / Water Bowl | 15–20 mins | 45–60 mins | Light splatters, fresh spills, monthly upkeep | Very safe; will not lift thick, carbonized grease on its own |
| Commercial Fume-Free Spray | 30 mins | 2–4 hours | Moderate grease when you cannot wait overnight | Low odor, but requires thorough rinsing to prevent chemical burn-off smell |
| High-Heat Self-Clean Cycle | 10 mins | 3–5 hours | Extreme buildup only (use sparingly) | Hits 800°F+; produces smoke/fumes and can trip thermal fuses or damage boards |
When to Call a Pro
A thorough manual cleaning resolves most smoke, odor, and visibility issues, and it protects your range from the intense heat stress of a self-clean cycle. However, if you notice during cleaning that your electric bake element is blistered, cracked, or pitted, or if you hear unusual noises when you turn the range back on—such as the issues covered in our guide on why a gas oven makes a popping noise—cleaning alone will not solve the problem.
Similarly, if someone already ran the self-clean cycle and the oven door is now stuck locked, the display is blank, or the oven refuses to heat, an internal thermal fuse, door latch motor, or control board has likely failed. Typical professional repair costs for a blown thermal fuse, faulty igniter, or jammed door lock assembly generally run between $150 and $350 depending on your local market and range model. Always leave gas valve adjustments, internal high-voltage wiring, and hidden fuse replacements to an experienced technician. If your range needs professional attention before your next big meal, True Appliance Repair can connect you with an independent local technician through our oven and stove repair service page.
FAQ
Why do appliance technicians advise against using the self-clean oven feature?
Self-cleaning cycles lock the oven door and heat the cavity to between 800°F and 900°F for several hours to incinerate food into ash. Because modern ranges pack sensitive electronic control boards, cooling fans, and thermal fuses into tight spaces with heavy insulation, that extreme heat often causes components to overheat and fail. Avoiding the cycle—especially in the weeks leading up to major holidays—prevents sudden breakdowns.
What happens if I accidentally get baking soda on the oven heating element?
If baking soda paste gets onto an electric heating element or a gas burner tube, wait for the appliance to stay unplugged and cool, then wipe it off thoroughly with a damp microfiber cloth. Baking soda left on a hot element will bake into a white crust and can create a burning smell or uneven hot spots when the element heats up. Make sure the element is completely clean and dry before restoring power.
Can I use a razor blade scraper on the bottom of my oven?
No, you should avoid metal razor blades on the porcelain enamel floor and walls of your oven, as well as on the tempered interior door glass. Even a tiny scratch in the enamel can expose the raw metal underneath to rust, and microscopic nicks in tempered oven glass can cause the pane to shatter when exposed to high baking temperatures. Always stick to a sturdy plastic pan scraper or nylon spatula.
How often should I deep clean my oven?
For an average household that bakes a few times a week, deep cleaning the oven every three to four months keeps grease from carbonizing into thick black layers. Wiping up fresh spills with a damp cloth as soon as the oven cools—and placing a foil-lined baking sheet on the rack below bubbly pies or casseroles (never directly on the oven floor)—will stretch the time needed between full deep cleans.