
When thick layers of frost take over your shelves and drawers, you lose valuable food storage space and force your cooling system to work overtime. Learning how to defrost a freezer fast and safely clears out stubborn ice in about an hour without risking costly punctures to the interior walls or cooling coils. Grab a few old towels and a pot of hot water to get your freezer back to peak efficiency right before the busy holiday cooking season.
1. Unplug the Freezer and Protect Your Floors
Before doing any hands-on work inside your appliance, you must cut the power and prepare for melting ice. Even a modest layer of frost turns into a surprising amount of water once it melts.
- Unplug the power cord from the wall outlet, or flip the dedicated circuit breaker in your electrical panel if the plug is out of reach behind a heavy unit.
- Shut off the ice maker water line if your freezer has an automatic ice maker, so it does not try to fill while you work.
- Lay thick bath towels or a shallow baking sheet around the base of the appliance to catch drips.
- Locate the defrost drain hose (common on chest freezers and manual-defrost upright models) and place a shallow pan underneath the exterior drain plug.
- Keep the freezer door propped wide open with a chair or heavy towel so warm room air can start circulating immediately.
2. Pack Frozen Food Into Insulated Coolers
Food safety is the biggest concern when defrosting a freezer, as frozen items begin to soften once they sit on the counter for more than twenty minutes. Grouping your food properly keeps everything rock-solid while you melt the frost.
- Line a large cooler (or several heavy cardboard boxes) with thick blankets or newspaper for extra insulation.
- Pack frozen meats, dairy, and dense items tightly together at the very bottom of the cooler, since packed food holds its own cold temperature much longer than scattered items.
- Place bags of ice or frozen gel packs on top of the food before closing the cooler lid tightly.
- Toss out expired items or heavily freezer-burned packages now so you do not waste time putting them back later.
- Remove all wire shelves, plastic bins, and ice trays and set them in the kitchen sink to come to room temperature before washing them; pouring hot water on cold glass or brittle plastic can make it crack.
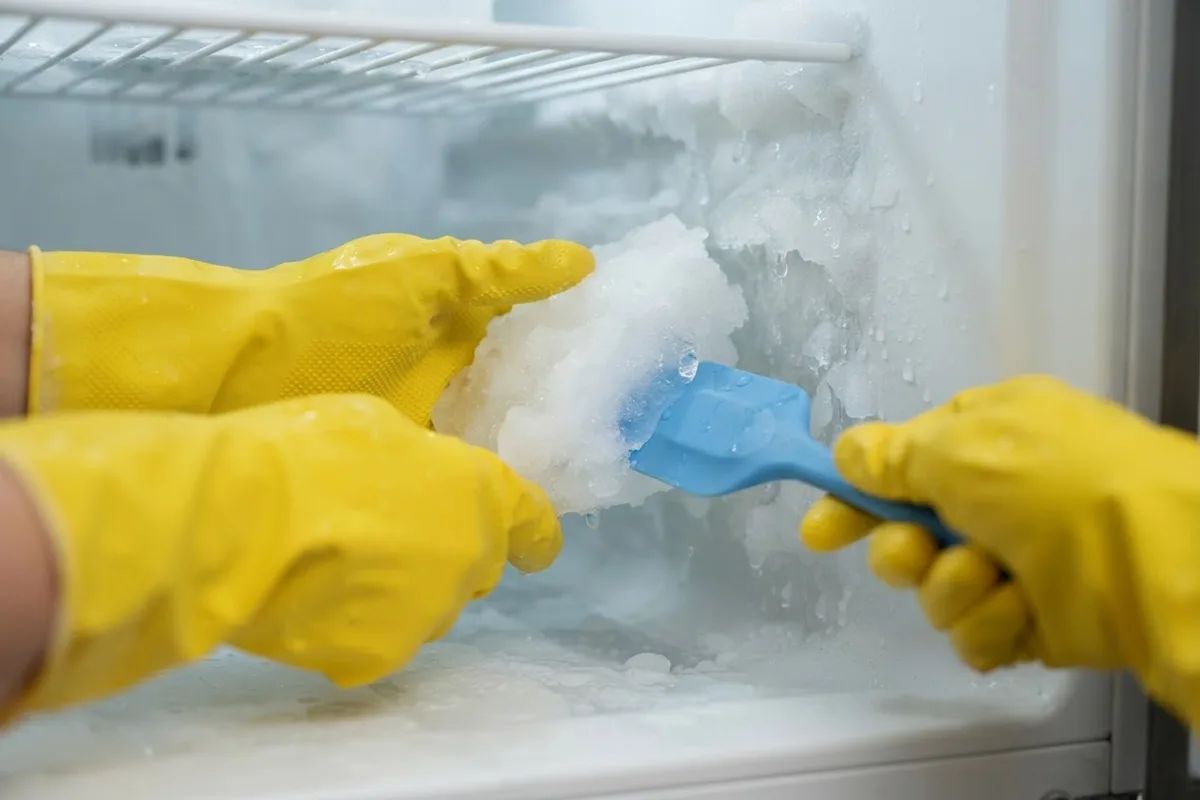
3. Use Bowls of Hot Water to Melt Frost Fast
If you have several hours, you can simply leave the door open and let the ice melt on its own. When you need to know how to defrost a freezer fast so your groceries do not thaw, gentle steam is the safest accelerator.
- Bring a medium pot of water to a boil on the stove.
- Fold a thick dish towel and place it on the center shelf or floor of the freezer to act as a heat-protective trivet.
- Set the pot or a heat-safe bowl of steaming water directly onto the folded towel.
- Close the freezer door for 15 to 20 minutes to trap the steam inside; the moist heat quickly loosens the bond between the ice and the interior walls.
- Swap in a fresh bowl of hot water after 15 minutes if the frost is more than half an inch thick.
- Position a portable household fan outside the open freezer door on a dry floor (well away from any puddles or dripping water) to blow room-temperature air inside if you prefer not to use steam.
4. Gently Lift Loose Ice With a Plastic Spatula
Never use an ice pick, metal butter knife, screwdriver, or sharp metal scraper to chip away frost, and keep high-heat hair dryers or heat guns out of the compartment. Puncturing the thin plastic liner or hidden evaporator coils causes a refrigerant leak in the sealed system, which is an expensive repair that often forces an early replacement.
| Defrosting Method | Speed | Safety Level | Why It Works (or Fails) |
|---|---|---|---|
| Steaming Water Bowls | 30–60 mins | Safe | Moist heat releases ice from walls naturally |
| Room Fan Airflow | 45–90 mins | Safe | Constant warm air circulation melts frost evenly |
| Warm Wet Washcloths | 30–60 mins | Safe | Targets stubborn corners and shelf tracks |
| Metal Knives / Picks | Variable | Unsafe | Punctures evaporator coils and ruins the sealed system |
| Hair Dryers / Heat Guns | Variable | Unsafe | Warps plastic liners and poses severe shock hazards |
- Wait until the frost looks glossy and begins separating from the walls on its own.
- Slide a flexible plastic spatula or wooden spoon gently behind the loosened slabs of ice.
- Lift the large chunks of ice out by hand and dump them directly into your kitchen sink.
- Press a cloth dipped in warm water against stubborn ice patches around shelf supports or air vents until they release cleanly.
- Sponge up standing meltwater from the bottom of the compartment as you go so it does not overflow onto your kitchen floor.
5. Clean and Dry the Interior Completely
Any moisture left behind on the walls, shelves, or door seals will instantly freeze into a brand-new layer of frost the moment you turn the appliance back on. Taking ten minutes to sanitize and dry the cabinet prevents odors and slows down future ice buildup.
- Mix two tablespoons of baking soda with one quart of warm water in a clean bucket or bowl.
- Wipe down the interior walls, ceiling, and floor using a soft sponge dipped in the baking soda solution to neutralize stale food smells.
- Clean the rubber door gasket carefully, wiping inside the folds to remove sticky crumbs or mildew; if the door refuses to seal properly afterward, check out these fixes for why your freezer door keeps popping open.
- Wash the removable shelves and drawers in the sink with mild dish soap and warm water once they have reached room temperature.
- Dry every interior surface, shelf, and drawer thoroughly with a clean microfiber towel until not a single drop of water remains.
6. Inspect Door Seals and Restart Before Restocking
Once the cabinet is bone-dry, a quick check of the door seal ensures humid kitchen air cannot sneak inside and undo your hard work. If your frost problem is accompanied by loud noises, strange smells, or warm spots, review our guide on the 7 signs your refrigerator is dying before reloading your food.
- Close the freezer door on a dollar bill and tug it gently; if the bill slides out with zero resistance, the gasket is worn or dirty and letting humid air leak inside.
- Slide the dry shelves and bins back into their tracks and replace the drain plug if you removed it earlier.
- Plug the power cord back into the outlet (or turn the circuit breaker back on) and turn on the ice maker water supply.
- Wait 30 to 45 minutes for the interior temperature to drop toward 0°F (-18°C) before transferring your food back from the coolers.
- Wipe condensation off food packages as you load them, and leave an inch of breathing room around the interior air vents so cold air circulates freely.
When to Call a Pro
If you have a manual-defrost chest or upright freezer, defrosting once or twice a year is normal maintenance. However, if you own a modern frost-free refrigerator-freezer and thick frost returns within a week or two of defrosting, an automatic defrost component has likely failed. A burned-out defrost heater, faulty defrost thermostat, or bad control board requires electrical testing and part replacement.
In the US, professional repairs for an automatic defrost system typically range from $150 to $400 depending on the faulty part, though exact pricing varies by area and model. If you accidentally punctured a coil during defrosting or suspect a sealed-system refrigerant issue, stop immediately and contact a technician. True Appliance Repair can connect you with an experienced local pro for refrigerator and freezer repair so you can get your kitchen running smoothly again.
FAQ
How often should you defrost a freezer?
You should defrost a manual-defrost freezer whenever the ice buildup reaches a quarter-inch (about 6 mm) thick, which usually happens once or twice a year. Frost thicker than a quarter-inch acts like insulation over the cooling coils, forcing the compressor to run longer and raising your electric bill.
Can I use a hair dryer to defrost my freezer faster?
Avoid using a hair dryer or heat gun inside a freezer. The concentrated high heat easily warps or melts the thin plastic interior walls, and operating a corded electric heating tool near melting water and puddles creates a serious electrical shock hazard.
Why does my frost-free freezer have ice buildup?
Frost-free freezers usually build up ice for one of two reasons: warm, humid room air is leaking past a dirty or torn door gasket, or the automatic defrost cycle has failed. If the door closes tightly and the gasket passes the dollar-bill test, a technician may need to test the defrost heater, defrost thermostat, or control board.
Will baking soda or cooking spray keep freezer frost from coming back?
Baking soda is great for removing odors during cleaning, and wiping a tiny drop of vegetable oil on the rubber door gasket helps keep the seal supple, but neither will stop frost if warm air is entering the cabinet. The best way to prevent rapid frost buildup is drying the interior completely after defrosting, keeping the door seal clean, and never putting uncovered hot food directly into the freezer.