
Notice water pooling under your refrigerator crisper drawers or freezing into a thick ice sheet on the freezer floor? A clogged defrost drain line is the single most common cause of internal refrigerator water leaks. Unclogging this line takes less than an hour, requires basic household tools, and prevents severe floor damage and food spoilage.
During normal operation, frost builds up on your refrigerator evaporator coils. The appliance periodically runs an automatic defrost cycle to melt this ice, allowing water to flow down a small drain hole into a pan beneath the cabinet. When food particles, dust, or ice block this narrow drain, water backs up into the compartment. Follow these five straightforward DIY steps to clear the obstruction and restore smooth drainage.
1. Unplug the Unit and Clear the Drain Access Area
Safety is the top priority before beginning any hands-on appliance work. Always unplug the refrigerator power cord from the wall outlet and turn off the water supply valve if your unit includes an ice maker or door water dispenser.
Next, locate the defrost drain opening. On top-freezer and bottom-freezer models, the drain hole is typically situated on the lower back wall of the freezer compartment, directly beneath the cooling coils or behind a plastic access panel. On side-by-side models, it is located near the bottom of the freezer section.
Remove all food items, wire shelves, and plastic drawers to gain unrestricted access to the drain area. If a heavy block of ice covers the drain opening, melt it slowly using a spray bottle filled with warm water or allow it to thaw naturally. Never use sharp metal tools like knives or ice picks to pry away ice, as puncturing the plastic lining or evaporator tubes will permanently destroy the appliance.
2. Flush the Drain with Warm Water and Baking Soda
Once the drain opening is visible, prepare a mild cleaning solution to break down internal sludge, mold, and trapped food debris. Mix one teaspoon of baking soda into two cups of warm tap water until fully dissolved.
Draw the warm solution into a turkey baster, syringe, or squeeze bottle. Place the tip directly over the drain hole and squirt the liquid into the channel using steady pressure.
Listen carefully as you inject the water. You should hear liquid dripping into the drain pan located in the bottom compressor bay beneath the refrigerator. Repeat this process three to four times to thoroughly flush out organic buildup.
If the warm liquid backs up immediately and fills the drain cup without flowing down, the obstruction is solid—either packed debris or an ice plug deep within the line—and requires mechanical clearing.
3. Clear Stubborn Clogs Using a Flexible Wire or Tube
When liquid flushing alone fails to break through the blockage, you need a flexible mechanical tool to dislodge trapped debris without scratching or puncturing the plastic drain pipe.
Feed a length of 1/4-inch flexible plastic tubing, a soft nylon drain snake, or a heavy-duty weed trimmer line down through the drain opening. Gently push the line downward while twisting it slightly between your fingers to navigate through tight bends.
Work the flexible tool back and forth to break up ice pockets and push clogs down toward the discharge point. Avoid using stiff metal coat hangers or sharp wire, which can easily pierce thin vinyl drain hoses hidden behind cabinet insulation.
After working the tool through the drain line, follow up with another round of hot water squirted from your turkey baster. Continue flushing until water flows freely down the pipe into the lower drain pan.
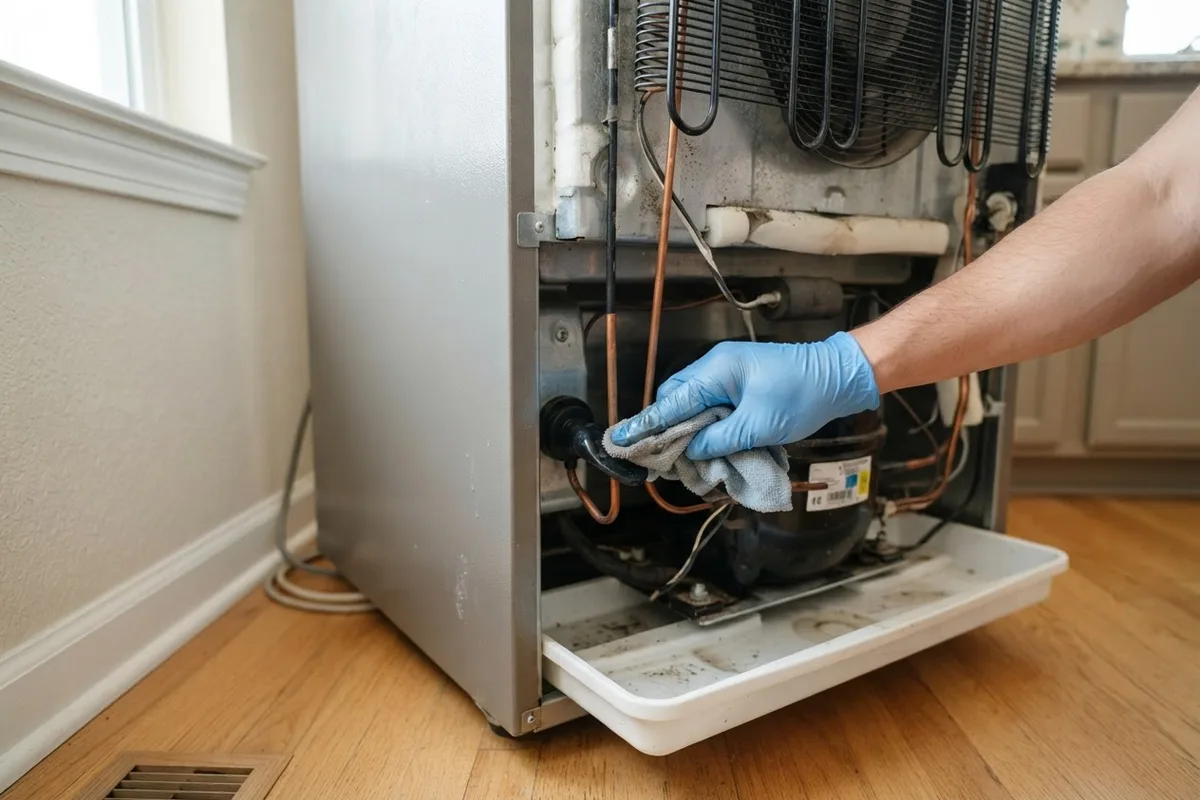
4. Clean the Rubber Drain Valve at the Back of the Fridge
Pull the refrigerator away from the kitchen wall to access the lower rear cabinet. Verify once more that the power cord is disconnected from the outlet before removing the lower rear panel.
Unscrew the metal or fiberboard access panel using a nut driver or Phillips screwdriver to reveal the compressor section and the lower terminus of the drain line. Locate the rubber valve fitted onto the bottom of the drain tube. This component—often called a duckbill valve or grommet—is designed to allow water out while preventing warm air and insects from entering the cabinet.
Sticky residue, dust, and mineral deposits frequently cause the rubber lips of the duckbill valve to seal shut permanently, trapping water in the tube above. Firmly squeeze the rubber valve with your fingers to pop open the slit and release trapped water and sediment.
Remove the rubber valve completely and wash it in a sink with warm, soapy water. If the rubber has hardened, cracked, or become permanently sticky, replace it with a fresh valve to prevent recurring drain backups.
5. Inspect and Clean the Refrigerator Drain Pan
The drain pan rests in the lower equipment bay next to the compressor motor. It catches condensate water so that ambient heat from the running compressor and condenser coils can evaporate the liquid naturally.
Slide the drain pan out from the front kick plate or rear access area. Inspect the pan for standing water, slime, mold, or visible hairline cracks.
Wash the pan thoroughly using dish soap, warm water, and a cup of white vinegar to eliminate bacteria and lingering mold spores. Ensure the pan is completely dry before reinstalling it.
Verify that the drain pan rests perfectly level directly beneath the drain discharge tube. If the pan is cracked, warped, or misaligned, condensate will spill onto your kitchen floor even if the drain tube itself flows smoothly.
Defrost Drain Troubleshooting Quick Reference
Use this quick-reference table to identify common symptoms related to defrost drain issues and choose the appropriate fix:
| Symptom | Primary Cause | Recommended DIY Action | Pro Needed? |
|---|---|---|---|
| Water under crisper drawers | Frozen or debris-blocked top drain hole | Flush hole with warm baking soda solution | No |
| Water leaking on floor behind fridge | Misaligned or cracked lower drain pan | Clean, realign, or replace the drain pan | No |
| Drain tube refreezes every 2-3 days | Failed drain heater or faulty thermostat | Test defrost heater component continuity | Yes |
| Persistent mildew smell inside cabinet | Mold in rubber duckbill valve or drain line | Remove and wash duckbill valve with soap | No |
| Water dripping continuously from ceiling | Blocked upper air damper or frozen line | Defrost upper housing and check damper | No |
When to Call a Pro
Clearing a clogged defrost drain is a manageable DIY project for most homeowners. However, certain underlying mechanical failures require professional diagnostic equipment and specialized hands-on service.
If your defrost drain line refreezes every few days despite thorough clearing, the problem is likely an electrical issue rather than a simple clog. A burned-out defrost heater wire, a failing defrost bi-metal thermostat, or a malfunction on the main electronic control board can prevent the system from keeping the drain cup clear during auto-defrost cycles.
Stop work immediately and contact a professional if you notice electrical burning odors, exposed wiring, or sealed-system refrigerant leaks. Working on high-voltage electrical panels or sealed cooling lines poses serious safety hazards.
Standard appliance repair service calls generally cost between $120 and $300, depending on replacement parts and regional labor rates, though total costs vary by area and model. If basic DIY steps do not resolve the leak, True Appliance Repair can match you with a local appliance pro to diagnose complex electrical or cooling system faults safely.
FAQ
How often should I clean my refrigerator defrost drain?
It is good practice to inspect and flush your defrost drain once every 12 to 18 months as part of your regular appliance maintenance steps. Cleaning the line before heavy seasonal usage helps prevent unexpected water pooling and mold growth behind crisper drawers.
Why does water keep freezing inside my defrost drain hole?
Water refreezes inside the drain hole when heat from the defrost cycle fails to reach the drain cup. This usually happens if the drain heater strap is loose, the freezer temperature is set well below 0°F (-18°C), or a worn door gasket admits humid room air that creates excessive frost, contributing to freezer cooling issues.
Can I use liquid bleach to clear a clogged defrost drain?
Avoid pouring undiluted household bleach down the defrost drain line. Bleach can degrade vinyl plastic tubing, harden rubber duckbill valves, and leave behind harsh chemical fumes that affect stored food. Stick to warm water mixed with baking soda or mild dish soap for safe, effective cleaning.
Where is the defrost drain located on a bottom-freezer refrigerator?
On bottom-freezer models, the defrost drain is located inside the back wall of the freezer compartment, centered directly below the cooling evaporator coils. Accessing it typically requires pulling out the sliding freezer baskets and removing the plastic back cover panel.