
Preventative upkeep is the single best way to avoid expensive emergency service calls and keep your household running without interruption. Setting aside just thirty minutes every month for simple maintenance can extend the operational life of your kitchen and laundry units while trimming your energy bills. Follow these six straightforward steps to keep your home appliances operating safely and efficiently all year long.
Clear Dust from Refrigerator Condenser Coils
Dust, pet hair, and kitchen grease accumulate constantly on refrigerator coils, forcing the compressor to work twice as hard to maintain cool temperatures. When coils remain dirty over long periods, energy consumption rises and internal components face premature wear. Cleaning these coils monthly or bi-monthly protects your food supply and reduces unnecessary wear on the cooling system.
- Pull the refrigerator away from the wall and disconnect the power cord from the electrical outlet.
- Locate the condenser coils behind the rear panel or behind the toe kick plate at the bottom front.
- Snap off the toe kick panel or unscrew the rear access shield using a standard screwdriver.
- Attach a narrow crevice tool to your vacuum cleaner and gently pull away visible dust webs and lint.
- Use a long-handled coil brush to loosen stubborn grime between the tight coil loops.
- Vacuum up any remaining debris from the floor beneath the unit before pushing the appliance back into place and plugging it back in.
Taking ten minutes for this basic check supports optimal airflow and helps prevent the cooling issues covered in our guide on 7 quick appliance maintenance checks every homeowner needs.
Flush and Sanitize the Garbage Disposal
Food particles, grease residue, and hard water minerals collect inside garbage disposals, creating foul kitchen odors and slow-draining sinks. A monthly deep flush removes hidden organic buildup and keeps the internal grinding components moving freely without jamming.
- Turn off the disposal wall switch and unplug the unit beneath the sink for safety.
- Shine a flashlight down the drain and use kitchen tongs to extract any visible dropped utensils, bones, or foreign objects.
- Plug the unit back in and re-establish power.
- Pour one cup of baking soda into the drain opening, followed immediately by one cup of plain white vinegar.
- Allow the mixture to foam and sit for ten minutes to dissolve grease and organic residue.
- Flush the drain with hot tap water while running the disposal for 30 seconds.
- Toss a dozen ice cubes and a few citrus peels into the chamber, then run the cold water and disposal simultaneously to sharpen the blades and freshen the drain.
If you encounter stubborn clogs or lingering smells, check out our detailed guide on how to clean a garbage disposal for step-by-step troubleshooting.
Inspect Washing Machine Hose Connections
Flexible supply hoses connected to your clothes washer are under constant water pressure. Over time, rubber hoses degrade, bulge, or develop hairline cracks that can lead to catastrophic indoor flooding. A quick monthly visual and physical inspection prevents water damage before it starts.
- Pull the washer away from the rear wall to gain clear sight of the hot and cold water supply lines.
- Turn off the water supply valves behind the machine before handling the connections.
- Run your fingers along the full length of both hoses, feeling for soft spots, blisters, cracks, or active moisture.
- Check the threaded brass or plastic couplings at the wall valves and appliance inlets for drips or corrosion.
- Ensure the hoses maintain a smooth curve without sharp kinks or pinch points against the wall.
- Wipe down any surface moisture and tighten loose fittings hand-tight plus a quarter turn with pliers.
If your rubber hoses show any signs of cracking or are more than five years old, replace them with reinforced stainless steel braided hoses immediately.
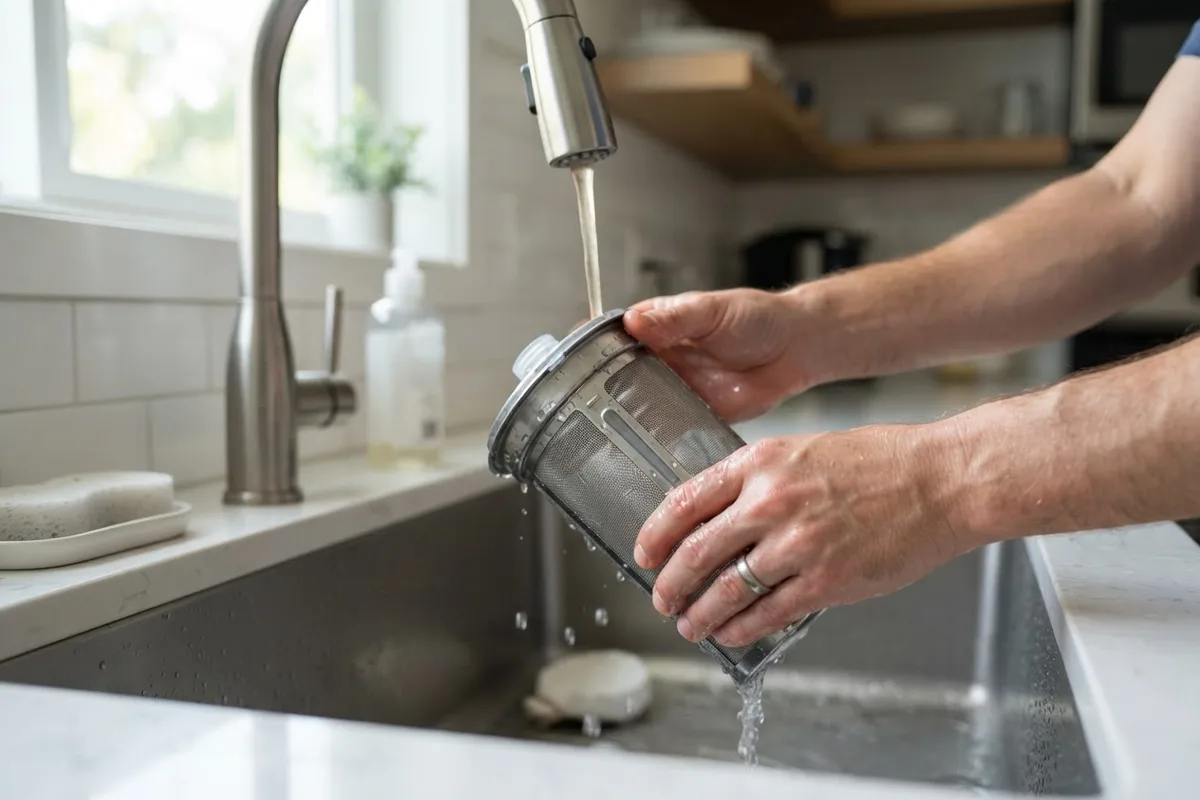
Clean the Dishwasher Drain Filter
Modern dishwashers utilize manual-clean micro-filters rather than loud hard-food disposers. When food soil, seeds, and grease clog this filter screen, water circulation drops, leaving dishes dirty and forcing the drain pump to overheat.
- Open the dishwasher door and remove the lower dish rack completely.
- Locate the cylindrical filter assembly at the bottom of the tub near the base of the lower spray arm.
- Turn the upper filter module counterclockwise a quarter-turn and pull it straight up to release it.
- Disassemble the mesh filter screen from the main plastic cylinder if your model separates.
- Carry the filter parts to the sink and rinse them under warm running water using a soft nylon brush to remove food particles and grease film.
- Check the sump area beneath the filter location for stray glass, toothpicks, or solid debris.
- Reinsert the filter assembly, turning it clockwise until it locks firmly into place.
Regular filter cleaning prevents standing water and cycle interruptions. For deeper system maintenance, consider scheduling professional service through our dishwasher repair resource team.
Vacuum Built-Up Lint from Dryer Vents
While cleaning the lint screen after every load is essential, fine lint fibers inevitably bypass the screen and accumulate inside the cabinet transit duct and exterior wall vent line. This buildup restricts airflow, doubles drying times, and poses a serious home fire hazard.
- Unplug the dryer from the electrical outlet. For gas dryers, shut off the gas supply line valve before proceeding.
- Pull the machine forward and disconnect the flexible exhaust duct from the back of the dryer.
- Vacuum inside the rear exhaust port of the machine using a flexible hose extension.
- Insert a dryer vent cleaning brush into the wall duct, rotating it as you push it through to dislodge packed lint.
- Vacuum the loosened lint from inside the pipe opening.
- Go outside to inspect the exterior vent hood, removing any lint, bird nests, or stuck damper flaps.
- Reattach the duct tightly using metal hose clamps or foil tape, then restore power.
Check Range Hood and Oven Door Gaskets
Oven door gaskets and range hood filters accumulate airborne grease and carbonized spills. A damaged oven gasket allows heat to escape into your kitchen, causing uneven baking and wasted energy, while grease-laden hood filters reduce kitchen ventilation.
- Open the cold oven door and inspect the woven fiberglass or rubber seal around the perimeter.
- Check for frayed fabric, tears, missing retaining clips, or stiffened sections that prevent a tight seal.
- Close the door on a dollar bill; if you can pull the bill out easily without resistance, the gasket is worn and requires replacement.
- Slide the metal mesh grease filters out of your overhead range hood.
- Submerge the filters in a sink filled with boiling water, dish soap, and half a cup of baking soda for 15 minutes.
- Scrub gently with a non-abrasive brush, rinse thoroughly with hot water, let air dry completely, and reinstall.
For major cooking equipment maintenance or heating issues, explore our dedicated oven and stove repair options.
Monthly Maintenance Schedule Quick Reference
| Appliance | Task | Primary Tool Needed | Estimated Time |
|---|---|---|---|
| Refrigerator | Vacuum condenser coils & clean toe kick | Vacuum crevice tool & coil brush | 10 minutes |
| Garbage Disposal | Baking soda & vinegar deep flush | Baking soda, vinegar, ice cubes | 10 minutes |
| Washing Machine | Inspect supply hoses & check leaks | Flashlight & adjustable pliers | 5 minutes |
| Dishwasher | Wash mesh drain filter | Soft brush & liquid dish soap | 5 minutes |
| Clothes Dryer | Clean cabinet duct & vent duct line | Dryer vent brush & vacuum | 15 minutes |
| Oven & Hood | Inspect door seal & degrease filters | Baking soda, hot water, dollar bill | 15 minutes |
When to Call a Pro
While routine monthly maintenance handles superficial dust, minor grease, and basic filter care, complex mechanical or electrical issues require professional expertise. Always stop and contact a qualified technician if you encounter any of the following scenarios:
- Persistent electrical burning smells, sparking outlets, or breakers that trip continuously when an appliance turns on.
- Active water leaks coming from internal seals, pumps, or tub gaskets inside washing machines or dishwashers.
- Gas odors near range connections or dryer hookups (evacuate your home immediately and contact your utility provider before seeking repairs).
- Sealed system cooling failures inside refrigerators, such as a running compressor paired with warm internal temperatures.
- Grinding metal noises coming from motors or tub bearings during operation.
For internal component replacements or structural repairs, True Appliance Repair can match you with a local appliance pro to diagnose and repair your unit safely.
FAQ
How often should appliance maintenance tasks be done?
Most basic maintenance checks, such as cleaning dishwasher filters and garbage disposals, should happen monthly. Tasks like cleaning refrigerator condenser coils and deep-cleaning dryer exhaust ducts can be done every one to three months depending on pet ownership and household size.
Can regular maintenance lower energy bills?
Yes. Clean refrigerator coils, clear dryer vents, and residue-free dishwasher filters allow motors, heating elements, and compressors to operate at peak thermodynamic efficiency. This reduces total run times and directly lowers monthly electricity and gas consumption.
How do I know if my appliance needs repair or replacement?
If an appliance requires frequent repairs, has reached the end of its typical 8 to 12-year lifespan, or if a single repair cost exceeds 50% of the price of a new unit, replacement is generally the more economical choice. Minor component replacements on newer units are almost always worth repairing.
Is it safe to clean dryer vents myself?
Cleaning the short flexible connector pipe and accessible wall duct is a safe DIY task as long as you disconnect the power cord and turn off gas supply lines beforehand. If your vent duct runs through a complex multi-story wall path exceeding 25 feet, professional duct cleaning is recommended.