
A jammed refrigerator ice dispenser is an frustrating kitchen snag, especially when you need a cold glass of water on a warm day. Whether ice cubes are stuck tightly inside the door chute or the dispenser motor hums without dropping a single cube, most jams stem from simple frost buildup or clumped ice inside the storage bucket.
Before you start poking around the ice chute, safety comes first. Always unplug your refrigerator and turn off its dedicated water supply line before reaching into the mechanical assembly or working near electrical components. If you ever notice burning odors, electrical sparks, or wiring damage, stop immediately and contact a qualified technician.
Here are 5 practical ways to clear a jammed refrigerator ice dispenser and keep your ice flowing smoothly.
Unclog Frozen Frost and Crushed Ice from the Chute
The most frequent cause of an ice dispenser jam is clumped ice frozen inside the door chute. Warm room air enters the dispenser door every time ice is dropped. When that moist air hits cold ice particles left behind in the chute, frost forms, bonding small cubes into a solid ice dam.
To clear a frozen chute clog without cracking the plastic lining, follow these safe steps:
- Unplug the refrigerator or flip the circuit breaker powering the appliance.
- Open the freezer door and pull out the ice storage bin to prevent loose cubes from falling.
- Hold a sturdy plastic spatula or wooden spoon beneath the exterior ice chute trap door.
- Gently push the plastic or wooden utensil upward through the chute from the outside to break apart the frost blockage. Never use metal ice picks, knives, or screwdrivers, as these can easily puncture the plastic dispenser lining or damage the rubber seal.
- Melt stubborn frost residual using a hair dryer set on low heat, keeping the nozzle at least eight inches away from plastic surfaces to avoid warping.
- Wipe the chute entirely dry with a clean microfiber towel before restoring power and replacing the ice bin.
Clear Molded Ice Bridging in the Ice Storage Bin
When an ice maker sits unused for several days, ambient freezer temperature shifts cause the top layer of ice cubes in the storage bucket to melt slightly and freeze together into a dense block. Known as ice bridging, this block prevents the internal auger shaft from turning and pushing individual cubes into the dispenser chute.
Resolving an ice bridge inside the bin requires manual clearing:
- Pull the ice bucket forward and lift it out of the freezer compartment housing.
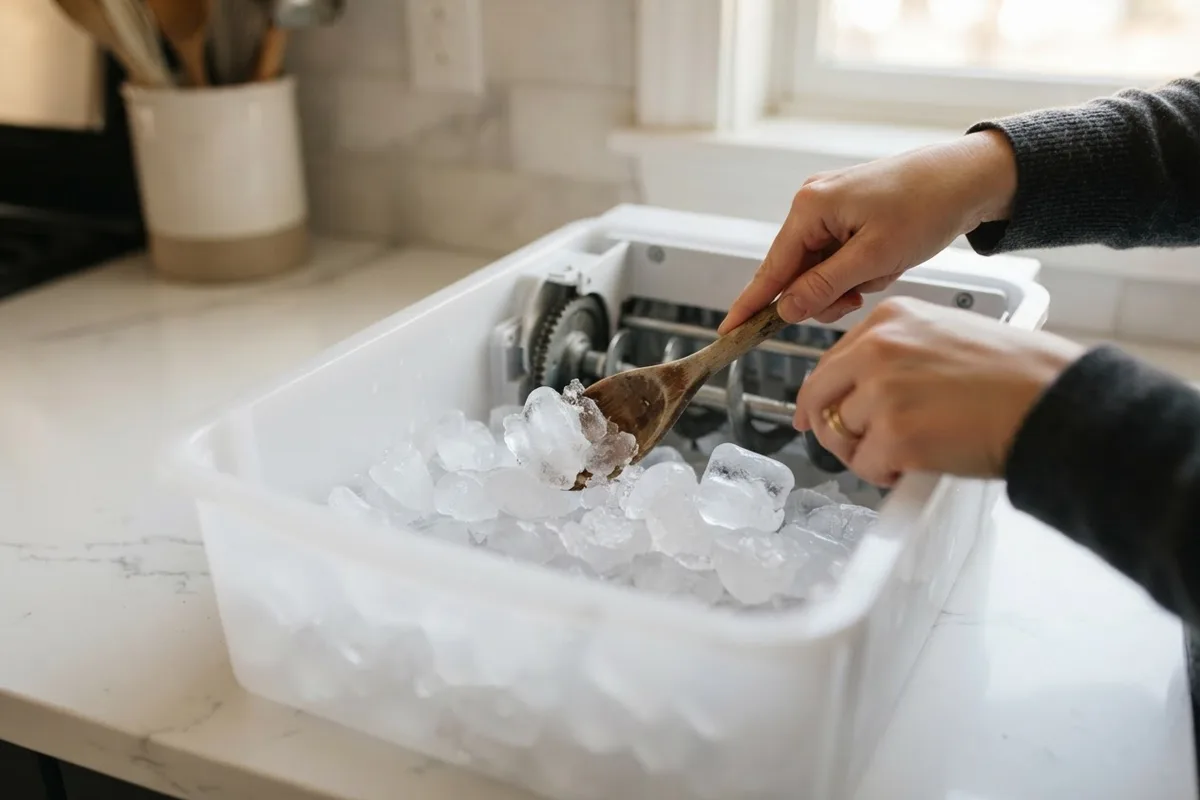
- Inspect the auger coil at the bottom of the bin. If a large chunk of fused ice surrounds the metal spiral, carry the entire bucket to your kitchen sink.
- Turn the auger shaft manually by hand from the rear gear to test for physical resistance.
- Break apart large ice chunks using a warm wooden spoon or dump out the fused ice entirely into the sink.
- Wash the interior of the ice storage bin with mild dish soap and warm water, rinsing away all loose debris.
- Thoroughly dry the ice bin with a towel. Placing a damp bin back into the freezer will cause instant frost buildup and freeze the auger again.
If you frequently deal with frost buildup or uneven freezing, your fridge may be experiencing system-wide cooling issues. Check out our guide on refrigerator temperature fluctuating fixes to stop frost problems before they start.
Inspect and Replace a Damaged Ice Chute Flap
At the exit of your refrigerator ice dispenser chute sits a spring-loaded rubber door called the chute flap or door seal. When you press the dispenser lever, a small motor or solenoid lifts this flap to let ice fall out. When released, the flap snaps tight against a soft foam gasket to seal cold air inside the freezer.
If this flap fails to close completely due to torn rubber, weak spring tension, or trapped ice, warm kitchen air leaks continuously into the chute. This creates constant condensation that turns into heavy frost, jamming the dispenser repeatedly.
Inspect your dispenser door flap with these steps:
- Shine a flashlight up into the exterior dispenser chute while the freezer door is closed.
- Look for visible light leaking around the edges of the dark rubber flap.
- If you see light or feel warm air drifting inward, unplug the unit and snap off the outer dispenser control panel trim using a flat putty knife wrapped in tape.
- Examine the door flap spring, hinge pin, and rubber pad for tears, cracks, or heavy corrosion.
- Clean sticky syrup or grime around the seal edges using a warm cloth soaked in white vinegar.
- If the rubber pad is warped or the return spring is broken, purchase a manufacturer-matched chute door replacement kit. Replacing the flap assembly usually takes less than 20 minutes and costs between $15 and $40.
Check and Clean the Ice Dispenser Solenoid Actuator
When you press the glass actuator pad on your refrigerator door, an electrical coil called a solenoid energizes, pulling a metal plunger upward to open the ice chute door. Over time, moisture penetration, dust, or sticky beverage splashes can cause the solenoid plunger to rust or bind inside its housing, keeping the chute flap shut when you request ice.
Testing and restoring solenoid function:
- Ensure the refrigerator is completely unplugged from the wall outlet.
- Carefully unclip the front dispenser display panel using a plastic trim tool.
- Locate the solenoid module mounted directly above or beside the ice chute spring mechanism.
- Inspect the metal actuator pin for orange rust, white mineral buildup, or sticky residues.
- Wipe the plunger rod clean with isopropyl alcohol and a cotton swab to remove buildup.
- Manually press the solenoid plunger up and down to check for smooth mechanical movement. If the shaft binds or feels gritty, apply a thin coat of food-grade silicone grease.
- If the solenoid coil shows visible scorching or fails to actuate electronically after cleaning, replace the solenoid assembly.
If you notice water gathering near the bottom of your fridge during these checks, review our practical guide on why your refrigerator drain pan is overflowing to fix hidden drain lines.
Free a Stuck Dispenser Motor Drive Bar
Behind your ice storage bin sits the dispenser drive motor. This motor features a heavy metal or hard plastic drive bar (yoke) that splines directly into the rear of the ice bin auger. If ice jams the auger while the motor tries to turn, the drive mechanism can lock up or slip out of alignment.
To realign and free a jammed drive motor assembly:
- Unplug the refrigerator and remove the ice bucket from the freezer shelf.
- Inspect the drive fork protruding from the back wall of the freezer cavity.
- Attempt to turn the drive fork slightly by hand in either direction. It should resist free spinning but move slightly against motor gear pressure.
- Inspect the plastic drive teeth on both the back wall motor shaft and the receiving socket on your ice bin. Look for stripped plastic teeth or cracked drive splines.
- Clear any packed frost or rogue ice cubes accumulated behind the ice bucket tracks.
- Slide the ice bucket straight back into position, ensuring the rear socket seats firmly over the motor drive bar. If the bin does not sit completely flush against the back wall, the drive teeth are misaligned. Adjust the auger gear by hand a quarter-turn and reinsert the bin.
| Ice Dispenser Issue | Common Root Cause | Recommended DIY Solution |
|---|---|---|
| Motor hums, no ice drops | Chute clogged with frozen frost | Clear chute gently with a plastic utensil or hair dryer on low heat |
| Solid clump of ice in bucket | Ice bridging from infrequent use | Wash bucket in warm water, dry thoroughly, and reload clean ice |
| Continuous frost in chute | Damaged chute flap seal or spring | Clean flap seal edges or replace damaged dispenser chute door |
| Dispenser pad makes no sound | Faulty solenoid or control switch | Clean solenoid plunger assembly or replace defective door switch |
| Auger motor grinds loudly | Stripped motor drive bar or shaft | Realign bin alignment teeth or replace broken auger drive socket |
When to Call a Pro
While clearing ice chute blockages and washing ice bins are safe DIY tasks, certain electrical and mechanical repairs require specialized tools and expert diagnostic training. If you have cleared all ice jams but the auger motor remains silent, or if you suspect shorted electrical wiring inside the door panel, it is best to consult an appliance repair specialist.
Complex tasks like replacing internal door wiring harnesses, diagnosing main control board relay failures, or repairing sealed cooling components should always be handled by an experienced professional. A typical professional repair call for dispenser motor or control board replacement generally ranges between $150 and $350, depending on your appliance model and local service rates.
When DIY steps do not solve the problem, True Appliance Repair can quickly match you with an independent local appliance pro to get your ice maker working safely again.
FAQ
Why does my refrigerator ice dispenser keep jamming every few days?
Repeated ice dispenser jams are usually caused by a bad seal on the chute flap door or leaving crushed ice in the chute. When warm room air leaks past a damaged flap seal, it creates heavy frost condensation inside the cold chute, causing falling cubes to stick and freeze into a solid blockage.
Can I use warm water to melt an ice jam inside the chute?
It is best to avoid pouring liquid warm water directly into your refrigerator ice dispenser chute. Water can run into electrical switches, solenoid wiring, or door insulation, leading to electrical shorts or hidden internal mold growth. Instead, use a hairdryer on low heat or a plastic utensil to break up ice dams safely.
How often should I clean my refrigerator ice storage bin?
You should remove, empty, and wash your refrigerator ice bin with warm soapy water every one to two months. Regular cleaning removes stale ice, prevents ice bridging, and eliminates mineral buildup that can slow down the auger motor drive bar.
What should I do if my ice dispenser paddle doesn't respond at all?
If pressing the dispenser paddle produces no sound, check that the freezer door switch is engaging properly and the dispenser lock feature is turned off on your control panel. If the panel is unlocked, unplug the unit for 5 minutes to reset the main control module before testing the actuator solenoid.