
Pulling on your freezer handle shouldn't feel like a strength test that drags the entire refrigerator across your kitchen floor. When a freezer door resists opening, homeowners often worry that a mechanical latch has snapped or the cabinet frame has warped. In reality, stubborn doors usually stem from normal air physics, trapped moisture, or gummy residues along the perimeter seal.
Taking a few minutes to diagnose the resistance will protect your door handle from snapping and save your door hinges from unnecessary strain. Work through these five practical fixes to restore a smooth, effortless swing every time you reach inside.
Break the Pressure Vacuum Safely
Modern upright and French-door freezers create an airtight seal by design. When you open the door, cold, dense air spills out across your kitchen floor while warm, humid room air rushes in to replace it. Once you swing the door shut, the cooling system rapidly chills that fresh pocket of room air down toward zero degrees Fahrenheit. Because cold air contracts and takes up significantly less volume than warm air, an intense internal vacuum forms inside the cabinet.
This suction effect is completely normal, but it can make reopening the door within thirty to sixty seconds nearly impossible. Forcing the handle during this vacuum window can crack plastic handles or misalign the door frame.
- Wait 30 to 45 seconds after closing the door before attempting to open it a second time to allow pressures to normalize naturally.
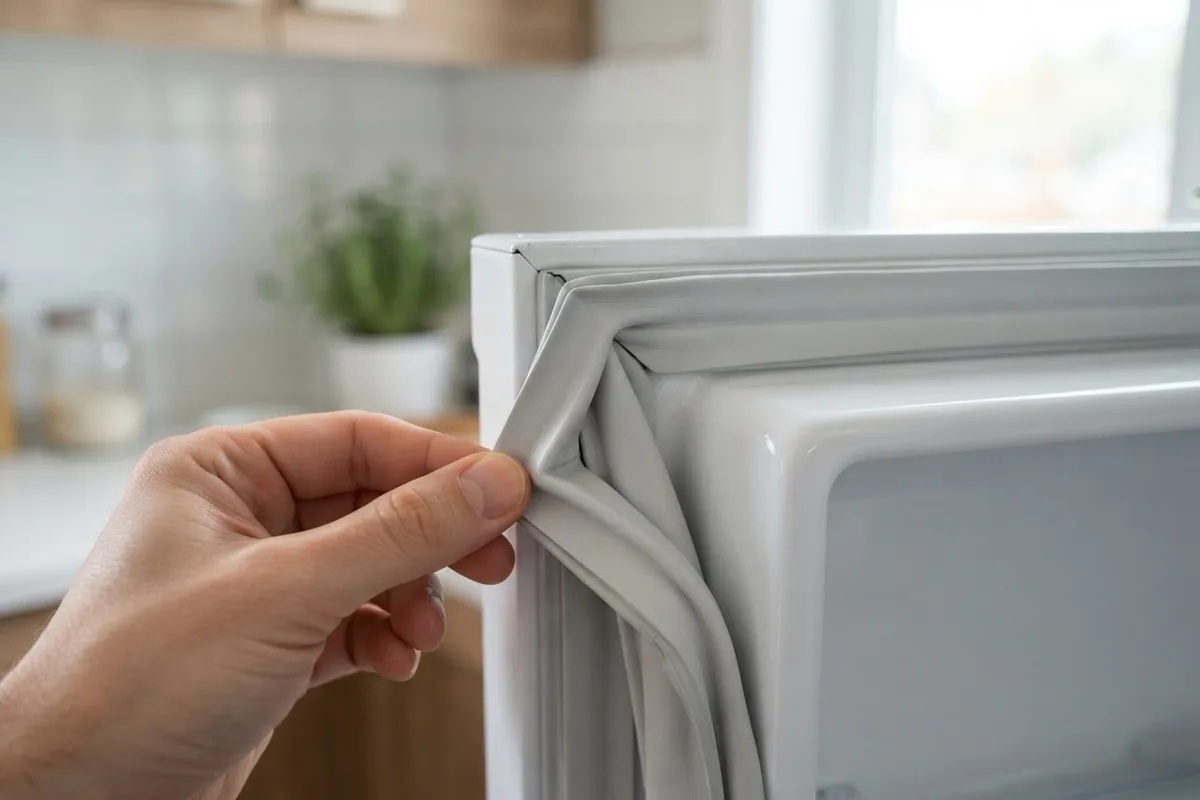
- If you need immediate access, break the suction by slipping your clean fingertip behind the flexible rubber gasket on the side opposite the hinge and peeling it back just an eighth of an inch.
- Listen for a soft hiss of air entering the compartment, which instantly releases the vacuum grip.
- Avoid yanking on the handle with both hands or using butter knives, screwdrivers, or rigid tools that can puncture or tear the delicate rubber profile.
Clean Sticky Residue Off the Gasket
Sugary spills, condiment drips, and melted ice cream frequently migrate down cabinet edges and pool inside the folds of the door seal. Over days and weeks, these sticky substances dry into a tack-like adhesive. Every time the door shuts, the warm, tacky residue bonds the rubber perimeter to the smooth painted steel frame, producing significant mechanical drag when you pull.
Grease and food oils also soften rubber materials over time, causing premature deterioration that can eventually lead to air leaks. Addressing sticky surfaces takes only ten minutes and prevents early wear.
- Mix two tablespoons of baking soda into one quart of warm tap water, or combine equal parts warm water and distilled white vinegar in a spray bottle.
- Open the door and saturate a clean microfiber cloth with your cleaning solution.
- Wipe down the entire face of the magnetic gasket, paying special attention to the bottom edge where liquids pool.
- Fold back the accordion pleats of the gasket to scoop out trapped crumbs, hardened syrup, and dried spills.
- Wipe the matching painted metal face on the refrigerator cabinet where the rubber makes contact.
- Dry both surfaces thoroughly with a lint-free towel to prevent leftover moisture from freezing into surface frost when the door closes.
Clear the Iced-Over Equalizer Vent
Most modern frost-free refrigerators feature a miniature pressure equalization port—often a tiny duckbill valve or concealed channel located near the defrost drain or rear air tower. This channel allows air pressures to equalize quickly after you close the door. When food packages crowd the rear wall or the defrost cycle malfunctions, frost and ice can block this port, trapping the vacuum inside the cabinet indefinitely.
A frozen vent forces the internal vacuum to hold for minutes or hours rather than seconds. If you have noticed symptoms like why is freezer fan making noise, excess frost might already be spreading through your internal air ducts.
- Disconnect the refrigerator from the wall electrical outlet before servicing internal panels.
- Pull the freezer drawers forward and inspect the rear plastic air channel for visible frost plugs or solid ice sheets.
- Rearrange frozen items so boxes and bags sit at least two inches away from all vents, ensuring unhindered airflow.
- Use a handheld hair dryer set to low heat, holding the nozzle six inches away from iced vents to gently melt surface blockages without warping plastic louvers.
- Catch running thaw water with a clean shop towel placed along the freezer floor.
- Plug the appliance back in and monitor whether the door pressure equalizes within sixty seconds of closing.
Lubricate and Recondition the Rubber Seal
As refrigerator door gaskets age, the vinyl material loses its plasticizers, turning dry, chalky, and prone to gripping the cabinet frame with excessive friction. Extreme cold accelerates this dryness, creating a tacky surface texture that mimics adhesive. Reconditioning the perimeter seal restores its flexibility and creates a slick, protective barrier against sticking.
Applying a food-safe lubricant also prevents condensation from freezing between the gasket and the metal frame, which is especially helpful during high-humidity summer weeks or damp winter weather.
- Clean and completely dry the gasket perimeter using the mild soap-and-water method outlined earlier.
- Dispense a pea-sized drop of food-grade mineral oil or pure food-grade silicone grease onto your fingertips.
- Spread a microscopically thin sheen across the flat sealing face of the rubber gasket that contacts the metal cabinet.
- Work the oil around all four edges, avoiding excess buildup that could attract dust or transfer onto clothing.
- Alternatively, rub a block of pure paraffin wax along the clean metal cabinet mating surface to provide a smooth, low-friction release point.
- Close the door firmly and test the swing; you should feel a secure magnetic hold without any gummy sticking.
Level the Cabinet and Realign Door Hinges
When a refrigerator cabinet sits slightly out of level, gravity works against the door swing. If the front feet sit lower than the rear rollers, the door pulls downward at an angle, torquing the upper and lower hinge pins. This mechanical binding makes the door feel unusually heavy to pull open, even when no internal air vacuum exists.
Misalignment also twists the magnetic strip inside the gasket, forcing sections of rubber to rub sideways against the frame rather than releasing cleanly outward. Inspecting your hinge setup ensures smooth mechanical operation.
- Unplug the refrigerator or verify that the floor around the base is dry and unobstructed.
- Remove the base kick plate by pulling outward on its snap tabs to reveal the front leveling legs.
- Place a two-foot bubble level across the top edge of the refrigerator cabinet, checking both side-to-side and front-to-back tilt.
- Use a flathead screwdriver or adjustable wrench to turn the front leveling legs clockwise, raising the front of the refrigerator roughly one-quarter inch higher than the rear.
- Inspect the upper door hinge bracket beneath the plastic hinge cover; loosen the mounting screws slightly to square the door if it sags on the latch side.
- Tighten the hinge fasteners securely, replace the kick plate, and check that the door swings smoothly without binding.
| Problem Indicator | Likely Cause | Recommended DIY Solution |
|---|---|---|
| Resistance lasts only 30-45 seconds after closing | Normal internal air contraction vacuum | Wait 45 seconds or break seal edge gently with finger |
| Handle sticks with a tacky sound every time | Food syrup or grease buildup on gasket | Scrub gasket and frame with baking soda water |
| Constant heavy pull accompanied by rear wall ice | Blocked equalization vent or drain line | Defrost air channels and shift packages 2 inches out |
| Door grinds or catches near the top hinge | Sagging door or loose hinge assembly | Re-level cabinet front legs and tighten hinge screws |
| Gasket sticks fast only in humid summer weather | Moisture freezing seal directly to metal | Apply thin food-grade mineral oil to clean rubber |
When to Call a Pro
Most stubborn freezer doors respond well to cleaning, leveling, or a thirty-second pause between openings. However, persistent resistance combined with thick frost accumulations often points to deeper issues inside the sealed refrigeration system or automatic defrost assembly. If your evaporator coils refuse to defrost automatically, moisture continually migrates into air channels, repeatedly freezing equalization ports solid.
Defrost timer failures, faulty bi-metal thermostats, and burnt defrost heaters require multimeter diagnostics and electrical disassembly. If your freezer is exhibiting other persistent issues like why is my freezer burning food, internal temperature management may be breaking down entirely.
Always shut off electrical power at your breaker box before any electrical component testing. For complex wiring repairs, sealed-system refrigerant faults, or broken internal liner components, turn to a trained technician. Professional diagnostics typically range from $100 to $250, while replacement defrost parts or complex hinge rebuilds average between $175 and $400, depending on regional labor rates and your appliance model. When you need local support, True Appliance Repair can match you with an independent repair technician in your neighborhood to get your kitchen running safely.
FAQ
Why is my freezer door harder to open right after I close it?
When warm room air enters your freezer during an opening, it rapidly cools down once the door shuts. Because cold air contracts, it takes up less physical volume, creating an immediate low-pressure vacuum inside the airtight compartment. This strong vacuum normally equalizes on its own through internal channels within thirty to sixty seconds.
Can pulling a stuck freezer door too hard cause permanent damage?
Yanking on a vacuum-locked door can easily crack plastic door handles, pull handles loose from their mounting anchors, or stretch and tear the rubber gasket accordion folds. It can also twist door hinges out of alignment over time. If a door refuses to yield, gently pry the rubber seal outward with your fingertips to release the pressure rather than pulling harder on the handle.
How often should I clean my freezer door gaskets?
You should inspect and clean your freezer gaskets every three to four months. Regular washings with warm water and baking soda remove sticky food residues, clear away stray ice crystals, and prevent mildew buildup. Applying a micro-thin wipe of food-grade mineral oil twice a year keeps the vinyl flexible and prevents sticky adherence to the metal cabinet frame.
Why does my freezer door pop open when I shut the refrigerator door?
Refrigerators and freezers share internal ductwork to circulate cold air between compartments. When you firmly close the fresh food door, the sudden air displacement pushes through the return vents into the freezer, temporarily pressurizing the compartment and pushing the freezer door outward. Leveling your refrigerator so the front sits slightly higher than the rear helps gravity pull the freezer door securely closed before the seal breaks.