
Standing water in your kitchen sink turns everyday cleanup into an annoying chore. When a disposal grinds normally but leaves behind a murky pool that empties at a snail's pace, a partial blockage or sludge buildup is almost always restricting the outflow. Follow this practical troubleshooting guide to clear the obstruction, restore fast drainage, and keep your kitchen sink flowing freely.
Clear the Splash Guard and Upper Grind Chamber
The removable rubber baffle (splash guard) sitting in the sink collar catches food debris, grease, and soap scum on its underside. Over time, this thick grime narrows the opening and restricts water from flowing smoothly into the grinding chamber.
- Cut the power first. Unplug the unit under the sink or flip the dedicated circuit breaker to off before touching the disposal.
- Remove the splash guard. Pull the flexible rubber collar straight up out of the sink drain.
- Scrub thoroughly. Wash both sides of the baffle in warm, soapy water with a stiff nylon brush to remove built-up slime.
- Inspect the chamber opening. Shine a flashlight into the grinding chamber to check for trapped fibrous food (such as celery, onion skins, or cornhusks) jammed above the shredder ring. Use tongs or needle-nose pliers—never bare hands—to pull out any caught material.
- Reinstall the baffle. Press the rubber collar firmly back into the drain flange until it seats flush.
Flush Starch and Grease with Baking Soda and Vinegar
Unlike solid jams that halt the motor entirely, slow drainage is often caused by a gelatinous layer of congealed cooking oils, fats, and starchy residues coating the disposal walls and internal discharge opening. An effervescent clean breaks up this surface sludge without damaging internal components.
- Pour baking soda. Dump 1/2 cup of baking soda directly into the disposal opening.
- Add white vinegar. Pour 1 cup of distilled white vinegar over the baking soda. The mixture will immediately foam and bubble.
- Let it sit. Allow the solution to work inside the chamber for 15 to 20 minutes to soften grease and organic buildup.
- Flush with hot water. Turn on the hot water tap at full force and run the disposal for 30 to 45 seconds to wash the dislodged residue down the waste line.
Plunge the Sink Drain with Water Sealed
If the grinding chamber is clear but water continues to drain sluggishly, a soft clog may be sitting just past the unit's outlet port. A standard sink plunger uses hydraulic pressure to push or pull the blockage loose.
- Seal secondary openings. If you have a double-basin sink, insert a drain stopper into the non-disposal side and hold it down firmly with a wet washcloth. If your dishwasher connects to the disposal, clamp the rubber drain hose with a hand clamp to prevent dirty water from backing up into the dishwasher.
- Fill the basin partially. Run 2 to 3 inches of water into the sink around the disposal drain to create a tight suction seal around the plunger rim.
- Position and plunge. Place a flat-cup sink plunger directly over the disposal opening. Pump vigorously up and down 8 to 10 times, maintaining the seal.
- Test the flow. Pull the plunger away sharply. Turn on the cold water tap to see if the vortex returns and water drains quickly.
Clean the P-Trap and Discharge Pipe Under the Sink
When plunging fails to resolve the slowdown, the restriction usually sits inside the curved P-trap or horizontal waste pipe directly downstream from the disposal outlet elbow.
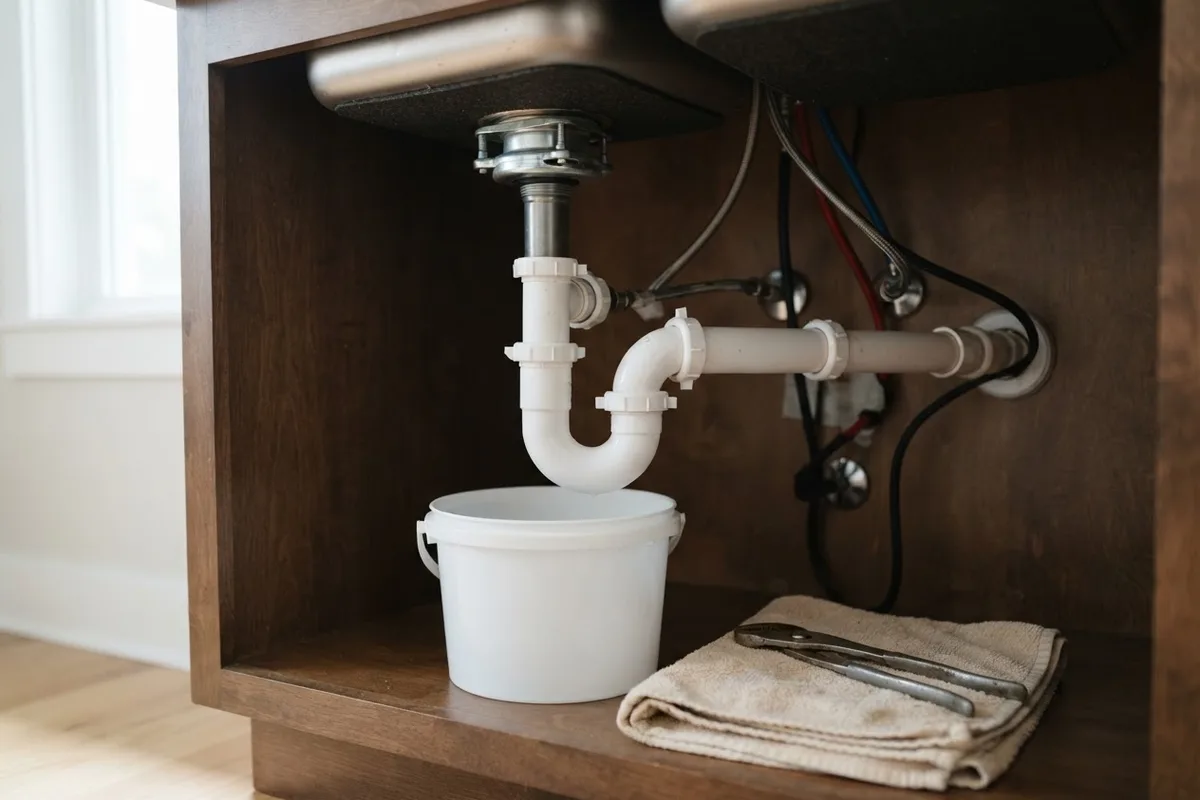
- Prep the workspace. Place a shallow bucket and dry towels under the plumbing pipes beneath your sink. Shut off the under-sink water supply valves for safety.
- Loosen slip nuts. Using channel-lock pliers or by hand, unscrew the plastic slip nuts connecting the curved P-trap to the disposal discharge tube and the wall outlet pipe.
- Remove and empty the trap. Carefully lower the P-trap into the bucket. It will contain standing water and sludge.
- Clear debris. Insert a flexible bottle brush or wire hanger into the curved section and scrape out accumulated food paste, hair, and soap curd.
- Reassemble and test. Inspect the rubber washers for wear, align the pipes, and hand-tighten the slip nuts firmly. Turn on the water to check for leaks under the sink while testing the drain speed. If you notice leaks along the housing seams rather than pipes, review our guide on why your garbage disposal is leaking.
Clear the Dishwasher Drain Tube Connection
A slow-draining sink often coincides with standing water in your dishwasher basin. The small barbed inlet tube on the upper side of the disposal can collect compacted food particles, choking off airflow and slowing wastewater exit speed.
- Disconnect the hose. Loosen the hose clamp securing the ribbed dishwasher drain line to the disposal inlet nipple.
- Inspect the port. Pull the rubber hose off and examine the small inlet opening. Use a screwdriver or small bottle brush to clear out trapped food seeds, grease plugs, or lint.
- Check the drain hose. Squeeze and inspect the end of the dishwasher hose for internal buildup.
- Reconnect securely. Slide the hose back over the disposal nipple and tighten the metal clamp firmly to prevent water leaks during wash cycles. If your sink continues to back up into the other basin, check our troubleshooting steps for why your garbage disposal is backing up.
Garbage Disposal Drain Troubleshooting Guide
Use this quick-reference table to match drainage symptoms with the most likely cause and remedy:
| Drain Symptom | Likely Cause | Recommended DIY Action |
|---|---|---|
| Water drains at a trickle, disposal spins freely | Sludge on splash guard or chamber wall | Scrub baffle; flush with baking soda & vinegar |
| Both sink basins fill up quickly | Clog in main P-trap or wall waste line | Remove and clean P-trap; snake wall drain |
| Disposal hums and water sits completely still | Jammed flywheel / foreign object | Clear chamber with hex wrench via bottom port |
| Dishwasher backs dirty water into sink | Blocked inlet nipple or kinked hose | Clear inlet port and inspect high loop / air gap |
| Water drains slowly with gurgling noises | Blocked plumbing vent or deep line clog | Plunge disposal drain or snake secondary line |
4 Daily Habits to Keep Disposal Drains Flowing Fast
Preventative kitchen routines prevent the dense buildup that leads to slow drainage and premature motor wear.
- Always run cold water during and after grinding. Cold water solidifies fats so the shredder ring can chop them into fine particles. Hot water melts grease, allowing it to coat the inside of your household drain lines further down.
- Feed food scraps gradually. Drop waste into the unit in small batches rather than stuffing the hopper full before switching the unit on.
- Avoid high-starch and fibrous scraps. Keep potato peels, pasta, rice, coffee grounds, and corn husks out of the disposal. These items expand with moisture and form a thick paste that clings to pipes.
- Run a cold water post-flush. Let cold water run for 15 to 20 seconds after the grinding noise stops to ensure all pulverized particles travel completely through the P-trap and into your main sewer stack.
When to Call a Pro
Most slow-draining disposals can be resolved with a thorough cleaning or by clearing the under-sink P-trap. However, if water continues to back up into your sink after clearing all accessible pipes, the obstruction may sit deep inside the main branch line beyond your kitchen wall.
Additionally, if your disposal motor hums without turning, trips your household breaker repeatedly, or shows signs of internal motor seal failure, professional repair or unit replacement may be necessary. Professional disposal replacement typically ranges from $150 to $350 for labor and standard units, though costs vary based on your local area, plumbing complexity, and disposal horsepower.
For complex electrical faults, persistent main line clogs, or full unit replacements, True Appliance Repair can match you with a local appliance pro to get your kitchen running safely. Explore our general appliance repair services to connect with a technician near you.
FAQ
Can I use chemical drain cleaners in a slow-draining garbage disposal?
No. Chemical drain cleaners contain caustic chemicals like sodium hydroxide or sulfuric acid that can corrode the disposal's internal impellers, melt plastic splash guards, and degrade rubber seals. If the disposal turns on while chemicals are present, caustic liquid can splash upward onto your skin or eyes. Stick to baking soda, vinegar, and mechanical plunging.
Why does my disposal drain slowly even though the motor runs fast?
The motor and shredder plate operate independently from the drainage speed through your plumbing. If the motor is spinning freely, the blades are functioning, but sludge inside the P-trap, a choked rubber baffle, or a partial clog inside the lateral wall pipe is restricting the exit path of the wastewater.
How do I use an Allen wrench to clear a slow disposal?
Underneath the disposal unit in your cabinet, locate the small hexagonal socket in the center of the bottom plate. Insert a 1/4-inch Allen wrench (hex key) into this hole and work it back and forth in both directions. This manually rotates the internal flywheel to free caught particles around the shredder ring that may be impeding flow.
Why does my garbage disposal smell like rotting food when draining slowly?
Slow-moving wastewater allows organic food particles to settle in the grooves of the rubber splash guard, the bottom of the grind chamber, and inside the P-trap. As these trapped food scraps decompose, they release sulfurous odors. Cleaning the baffle and flushing the chamber with baking soda and citrus rinds eliminates both the blockage and the odor.