
Opening your freezer only to find snowy frost coating your food packages or a thick sheet of ice covering the bottom drawer is frustrating. Beyond stealing valuable storage space, excessive frost forces your cooling system to work overtime, driving up electric bills and putting unnecessary strain on key components.
Fortunately, most frost and ice buildup stems from simple airflow issues, humid air leaks, or minor drainage clogs that you can resolve without expensive tools. Follow this step-by-step troubleshooting guide to diagnose why ice is building up in your freezer and apply the right DIY fix.
Check and Clean the Door Gasket Seal
The flexible rubber gasket lining your freezer door creates an airtight barrier that keeps warm, moist room air out. When the seal becomes dirty, cracked, warped, or detached, humid air constantly seeps into the freezing compartment. As this moist air hits the sub-zero interior, it instantly condenses and crystallizes into thick frost.
- Inspect the entire perimeter of the gasket for tears, cracks, hardened sections, or mold buildup.
- Clean the rubber folds thoroughly using warm water, mild dish soap, and a microfiber cloth to remove sticky food residue.
- Test the seal strength with the dollar bill test: close the door on a dollar bill along various points around the frame. If the bill slides out easily with zero resistance, the magnetic grip is failing.
- If the gasket is intact but slightly misshapen, warm it gently with a hairdryer on low heat while smoothing it flat with your fingers to restore its shape. If it is brittle or torn, order a model-specific replacement gasket and press it into the door channel.
Unclog the Defrost Drain Hole and Trough
Modern frost-free freezers run an automatic defrost cycle several times a day. The heating element melts frost off the evaporator coils, and the resulting water flows down a drain hole into a pan beneath the unit. If food particles, loose ice chips, or sediment clog this small opening, meltwater backs up into the bottom of the freezer compartment and freezes into a solid sheet of ice.
- Always unplug the refrigerator before accessing interior drainage components.
- Remove the lower freezer drawers and baskets to expose the back floor panel.
- Locate the drain trough and hole beneath the back evaporator panel. If you see standing ice, melt it using a spray bottle filled with warm water or a hair dryer on medium heat.
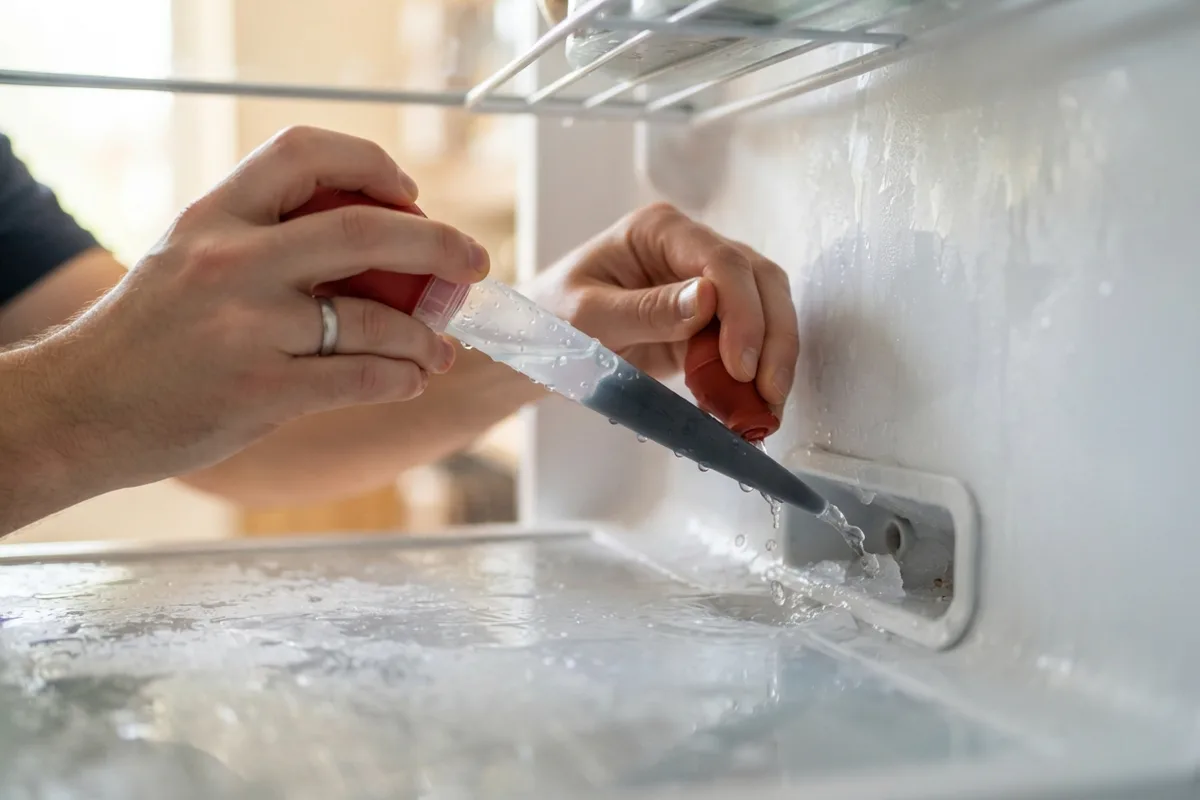
- Flush the drain line using a turkey baster filled with warm water and a splash of white vinegar until you hear water dripping freely into the lower drain pan.
- If stubborn debris blocks the tube, thread a flexible plastic tubing brush or length of weed trimmer line down the opening to clear the path. Learn more about deep clearing in our guide on how to unclog a refrigerator defrost drain.
Organize Contents to Unblock Airflow Vents
Your freezer relies on consistent air circulation driven by the evaporator fan. If bulky frozen pizza boxes, oversized ice cream tubs, or crowded storage bags rest directly against the interior air vents, cold air cannot circulate freely. Trapped moisture pools in stagnant corners, creating dense snow-like frost patterns along interior walls.
- Locate the supply and return air vents, typically positioned along the upper rear wall or sidewalls of the freezer.
- Keep at least two to three inches of clear space in front of every vent grille.
- Avoid overpacking the freezer beyond 80 percent capacity, which restricts internal air loops.
- Conversely, avoid leaving the freezer nearly empty; an empty unit loses thermal mass each time the door opens, drawing in warm ambient air. If needed, fill empty spaces with water bottles to stabilize interior temperatures.
- Maintaining steady airflow also helps preserve your groceries, as detailed in our guide on why refrigerator food is spoiling fast.
Inspect the Defrost Heater and Thermostat
If frost accumulates evenly across the entire back wall panel rather than around the door frame or bottom floor, your automatic defrost system may have suffered a component failure. The defrost thermostat (bimetal switch) monitors coil temperature, while the defrost heater melts frost at timed intervals. When either part fails, frost builds continuously until it chokes the evaporator coils.
- Unplug the appliance and remove the rear interior panel inside the freezer using a nut driver or screwdriver.
- Visually inspect the aluminum cooling coils. If they are buried under a solid block of white frost and ice, the defrost cycle is not triggering.
- Check the defrost thermostat clipped to the top of the coil tubing. If the casing is bulging or cracked, it has failed.
- You can test continuity across the defrost thermostat and heater element using a digital multimeter set to ohms (Ω). A reading of zero resistance or infinite resistance outside manufacturer tolerances indicates a broken component that requires replacement.
Reduce Humidity and Door Openings
Every time you open the freezer door, dense cold air rushes out and warm, humid room air rushes in. During late summer and early autumn when household humidity peaks, frequent or prolonged door openings dramatically accelerate frost accumulation.
- Decide what items you need before opening the door to minimize open duration.
- Ensure items placed in the freezer are completely cooled to room temperature first; putting hot leftovers directly into the freezer generates steam that instantly turns into frost.
- Check that all food containers and zipper bags are sealed airtight to prevent natural food moisture from evaporating into the freezer compartment.
- Check the appliance level: if the front leveling legs are set too low, the door may not swing shut on its own, leaving a hairline gap that lets moist kitchen air enter around the clock.
| Ice Location | Most Likely Cause | Primary DIY Solution |
|---|---|---|
| Bottom floor under drawers | Clogged defrost drain hole | Flush drain line with warm water & baster |
| Around door perimeter & front edge | Damaged or loose door gasket | Clean, re-seat, or replace rubber seal |
| Solid wall across back panel | Failed defrost heater or thermostat | Test components with multimeter; replace bad part |
| Fluffy snow on food packages | Blocked vents or frequent opening | Clear vents, seal containers, limit door open time |
| Around ice maker housing | Leaking fill tube or water valve | Check water inlet line and level the ice maker |
When to Call a Pro
Simple tasks like flushing a drain line, wiping down gaskets, and repositioning food boxes are straightforward for any homeowner. However, if ice buildup persists after clearing the drain and testing the door seal, the issue could involve a malfunctioning electronic control board, a faulty timer, or a sealed refrigerant leak.
Handling electrical wiring, control boards, or sealed refrigeration lines requires specialized diagnostic equipment and training. If you suspect an electrical short, complex board error, or sealed-system issue, stop and consult a qualified technician. When hands-on troubleshooting reaches its limit, True Appliance Repair can match you with a local appliance pro to diagnose and repair your unit quickly.
FAQ
How often should a frost-free freezer need manual defrosting?
A properly operating frost-free freezer should never require manual defrosting. The built-in defrost heater activates automatically every 8 to 12 hours to melt minor frost off the coils. If you find yourself manually defrosting every few weeks, one of the automatic defrost components or door seals is malfunctioning.
Can a clogged water filter cause ice buildup in the freezer?
A clogged water filter typically causes low water pressure at the dispenser or tiny, hollow ice cubes. However, if a failing water inlet valve or loose ice maker line drips water inside the compartment, it can create a localized ice buildup beneath the ice bin. Check our troubleshooting steps for refrigerator ice maker leaks to rule out water supply issues.
What is the ideal temperature setting to prevent freezer frost?
The FDA recommends keeping your freezer set at exactly 0°F (-18°C). Setting the temperature too low (such as -10°F) causes moisture from ambient air to freeze instantly upon contact with interior surfaces, worsening frost accumulation, while setting it too high risks food safety.
Is it safe to scrape ice off freezer walls with a knife?
Never use a sharp metal knife, ice pick, or metal spatula to chip away ice inside a freezer. Evaporator coils and plastic liner walls sit just behind the ice layer; puncturing a refrigerant line causes irreversible damage and safety hazards. Use a plastic scraper, warm wet towels, or a hair dryer held several inches away on medium heat instead.