
Opening your fridge to discover sour milk, wilted produce, or slimy lunch meat days before the expiration date is frustrating and expensive. When groceries spoil ahead of schedule, your appliance is failing to maintain a steady, food-safe temperature. In most cases, simple maintenance issues or failing components are restricting airflow or heat transfer. Before throwing out another round of groceries, follow these five DIY troubleshooting steps to diagnose the problem and restore crisp, cold temperatures.
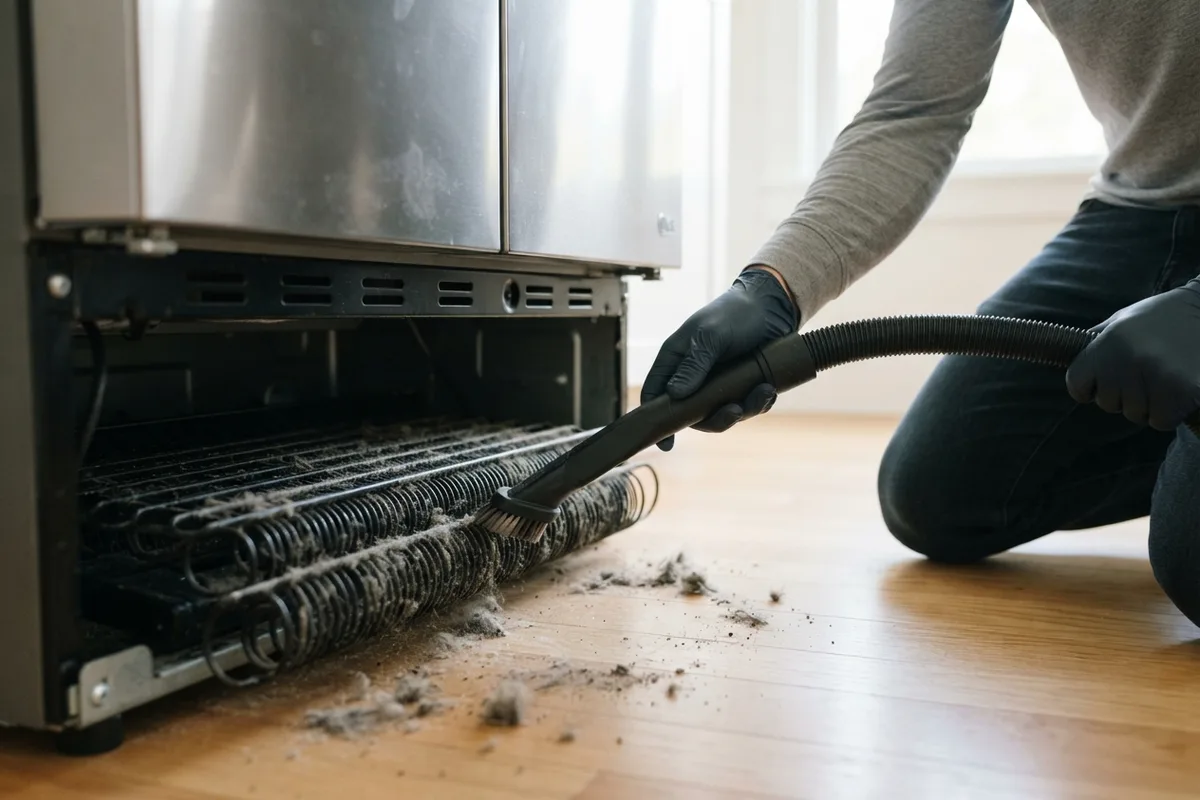
1. Vacuum and Clean the Condenser Coils
Condenser coils release the heat removed from the fresh food compartment into the surrounding room. When these metal coils collect pet hair, dust bunnies, and cooking grease, heat gets trapped inside the cooling system. This forces the compressor to run longer cycles while struggling to pull the cabinet down to safe storage temperatures.
Always unplug the appliance before cleaning around electrical components or coil assemblies. Condenser coils are located either underneath the cabinet behind a snap-off toe kick plate or mounted on the lower rear exterior panel.
- Slide the refrigerator forward and unplug the power cord from the wall outlet.
- Remove the lower front grille with a flathead screwdriver or pull the appliance out to access the rear panel.
- Use a narrow vacuum crevice attachment along with a flexible coil brush to gently lift caked lint and pet fur from the metal fins.
- Vacuum the floor beneath the fridge to prevent loose debris from instantly reattaching when the condenser fan powers back on.
- Reattach the access panel, plug the refrigerator back into the outlet, and wait 12 to 24 hours to check cabinet cooling.
If you have never performed this seasonal chore, review our full guide on how to clean refrigerator coils for additional preventative upkeep tricks.
2. Clear Blocked Air Vents and Baffles
Modern refrigerators circulate chilled air between the freezer section and the fresh food compartment through a series of interior vents. If bulky cereal boxes, gallon jugs, or oversized leftovers are stacked directly against these louvers, airflow stops circulating evenly throughout the shelves. This creates distinct warm pockets where dairy, meats, and produce spoil rapidly.
Locate the directional air vents on the back wall and top ceiling of both the fresh food and freezer sections. Make sure every vent maintains at least two to three inches of open clearance.
- Inspect the back wall of the refrigerator compartment to identify the plastic diffuser and air return openings.
- Rearrange tall items away from the air discharge vents, placing condiments and drinks along the door shelves or side bins instead.
- Check the freezer compartment to ensure frozen food bags are not blocking the primary return duct.
- Wipe down the vent louvers with warm water and mild dish soap to remove sticky residue or frost crystals that impede air movement.
- Maintain moderate food loads; an overfilled or nearly empty refrigerator struggles to retain balanced internal air circulation.
3. Inspect and Reseal the Door Gaskets
The flexible rubber gasket around each refrigerator door forms an airtight perimeter that seals cold air inside while keeping humid kitchen air out. If the gasket is torn, hardened with age, or coated in sticky spills, ambient room air constantly seeps inside. This raises the internal cabinet temperature and causes excessive moisture buildup that speeds up mold and bacterial growth.
Perform a quick paper test to check the mechanical seal on both fresh food and freezer doors.
- Place a dollar bill or strip of paper halfway across the cabinet frame, then close the door.
- Pull the paper straight out. If it slides out with zero resistance, the magnetic gasket is no longer making firm contact.
- Repeat this test along the top, side, and bottom edges of each door perimeter.
- Clean dirty seals with warm water, mild dish soap, and a soft microfiber cloth, paying special attention to the accordion folds.
- If the rubber is warped or pulling away from the track, warm it gently with a hairdryer on low heat while smoothing the rubber into alignment.
Torn, brittle, or cracked gaskets should be removed from the retaining channel and replaced with an exact OEM part.
4. Test and Calibrate Temperature Settings
Refrigerators must maintain a steady internal temperature between 37°F and 40°F (3°C to 4°C) to safely preserve perishables. Freezer compartments should run right at 0°F (-18°C). If built-in digital controls get bumped, or if the internal thermistor falls out of calibration, food can linger in the bacteria danger zone above 40°F without freezing your ice cream solid.
Built-in digital control panels do not always match true shelf temperatures, making a standalone thermometer test essential.
- Place an analog appliance thermometer inside a glass of water and position it in the center of the middle refrigerator shelf.
- Leave the glass undisturbed for 12 to 24 hours to obtain an accurate baseline temperature reading.
- If the reading sits above 40°F, lower the dial or digital temperature setting by one increment.
- Check whether your refrigerator exterior feels unusually warm to the touch; severe case warming can indicate an overworked compressor, as explained in our guide on why a refrigerator hot on the outside happens.
- Wait another 12 hours and re-check the thermometer before making further adjustments.
5. Verify the Evaporator Fan and Defrost Cycle
The evaporator fan pulls air across the cold evaporator coils in the freezer and forces it into the main refrigerator section. If the fan motor fails, or if a failing defrost heater causes thick frost to choke the evaporator coils, cool air cannot reach the fresh food shelves.
Listen closely to the back wall of your freezer compartment to evaluate the evaporator fan motor.
- Open the freezer door and manually depress the door light switch button with your finger.
- Listen for the soft whir of the circulation fan. The fan motor should spin up immediately when the switch is held down.
- If you hear a loud squeaking, rattling, or no fan sound at all, the motor bearings may be seized or the fan blade could be hitting ice buildup.
- Inspect the back interior panel of the freezer. A thick layer of white frost indicates a failed defrost thermostat, bimetal sensor, or defrost timer.
- Unplug the refrigerator and allow a full manual 24-hour defrost with the doors open if thick frost covers the entire evaporator panel.
Freshness & Temperature Troubleshooting Guide
| Observation / Symptom | Primary Mechanical Cause | Recommended Homeowner Action |
|---|---|---|
| Milk souring before expiration | Thermostat set above 40°F | Place thermometer in water glass; adjust controls to 37°F |
| Food warm; freezer still frozen | Evaporator fan failure or vent block | Clear rear vents; listen for fan motor operation |
| Condensation on shelves & jars | Worn or dirty door gasket | Clean rubber seals; perform the dollar bill test |
| Fridge running loud & hot | Dirty condenser coil bank | Unplug fridge; vacuum coils behind lower grille |
| Thick frost on freezer rear panel | Failed defrost cycle system | Perform manual defrost; check bimetal sensor |
When to Call a Pro
While cleaning linty coils, adjusting shelf layouts, and swapping door gaskets are straightforward DIY fixes, some refrigeration failures require professional tools. Problems involving electronic control board diagnostics, faulty start relays, sealed-system refrigerant leaks, or compressor replacements require specialized recovery machinery and technical diagnostic meters.
Always unplug appliances before attempting mechanical inspections. Never attempt to tap into sealed refrigerant lines or disassemble the compressor housing yourself. Typical professional refrigerator repairs range from $150 to $450 depending on local labor rates, appliance model, and replacement parts. If your refrigerator is nearing a decade in service, compare your repair estimate against our repair vs replace appliances guide to choose the most cost-effective path.
When you need quick, hands-on diagnostics, True Appliance Repair can match you with an experienced local appliance pro to get your refrigerator running at peak performance.
FAQ
What is the best temperature setting to stop food from spoiling?
The optimal internal refrigerator temperature is between 37°F and 39°F (3°C to 4°C). Temperatures above 40°F encourage rapid bacterial growth, while settings below 35°F can freeze delicate leafy greens and fresh fruits.
Why does my freezer stay cold while the fridge section is warm?
Most refrigerators use a single cooling system located in the freezer. Cold air is pushed up to the fresh food compartment using a motorized damper and an evaporator fan. If that fan fails, the air baffle sticks closed, or ice blocks the return vent, the freezer will stay frozen while the refrigerator warms up.
How often should I clean my refrigerator condenser coils?
Clean condenser coils at least once every six to twelve months. If you have indoor shedding pets or keep your refrigerator in a dusty environment, inspect and vacuum the coils every three to four months to maintain airflow and energy efficiency.
Can an overstocked refrigerator cause food to spoil?
Yes. When shelves and door bins are packed completely full, cold air cannot circulate around food containers. This creates warm pockets in the corners where perishables spoil prematurely.