
Stepping into a cold puddle in front of your fridge—or chipping away a thick sheet of ice on the floor of your pull-out drawer—is one of the most common headaches with modern French-door and bottom-mount refrigerators. When a bottom freezer is leaking water, the culprit is almost always trapped defrost moisture, a loose water line, or humid kitchen air sneaking past a worn seal. Walk through these six step-by-step fixes to find the source and dry up your kitchen floor for good.
Safety First: Before inspecting any internal panels, defrost drains, or water lines, always unplug your refrigerator from the wall outlet (or flip the kitchen circuit breaker off) and turn off the shutoff valve for the ice maker water supply.
1. Clear a Clogged Defrost Drain Tube
Roughly 80% of bottom-freezer puddles start with a blocked defrost drain. Every few hours, your freezer melts frost off the evaporator coils; that water is supposed to flow down a small funnel and through a tube into an evaporation pan underneath the fridge. When food crumbs, stray peas, or ice plug that hole, the meltwater overflows onto the bottom of the freezer compartment, freezes into a solid slab, and eventually drips out the front door onto your floor.
- Unplug the refrigerator and slide the bottom freezer baskets and drawer out of the way (consult your owner's manual for the drawer clip release tabs).
- Look along the lower back wall or floor of the freezer for a thick sheet of ice.
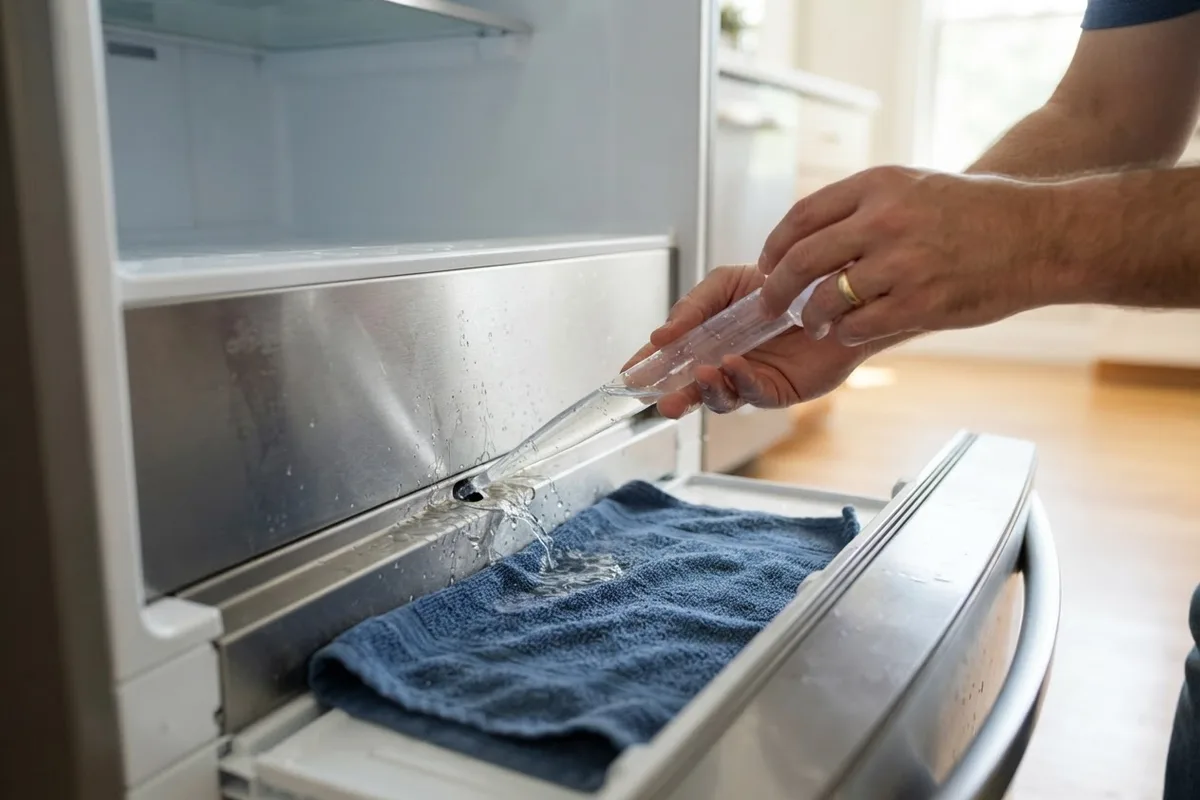
- Lay old towels along the base and melt the ice sheet using a hair dryer on its lowest setting or a turkey baster filled with hot tap water—never chip at the ice with a knife or screwdriver, which can puncture a refrigerant line.
- Once the drain trough at the back is exposed, flush the drain hole in the center with a mixture of warm water and a teaspoon of baking soda using the turkey baster until you hear water trickling freely into the pan below.
2. Clean a Gunked-Up Rubber Duckbill Valve
Even if you melt the ice inside the freezer compartment, water can back up again within days if the rubber check valve at the bottom end of the drain tube is stuck shut. Many bottom-freezer models use a pinched rubber tip—called a duckbill valve—to keep warm kitchen air from rising up the drain tube. Over time, dust and sticky residue glue the rubber lips together so defrost water cannot escape.
- With the fridge still unplugged, pull the unit carefully away from the wall (use furniture sliders to protect hardwood or vinyl floors).
- Unscrew and remove the lower cardboard or metal access panel at the back of the cabinet.
- Locate the plastic or rubber drain tube coming down from the freezer floor into the shallow drain pan.
- Twist or pull the rubber grommet off the end of the tube and wash it thoroughly in warm, soapy water at the kitchen sink.
- Pinch the slit open with your fingers to make sure it isn't warped or glued together, then snap it back onto the tube and reattach the rear access panel.
3. Reseat a Loose Ice Maker Fill Tube
If you see icicles hanging from the ice bin or water dripping specifically down the left side of the bottom freezer drawer, the defrost system is likely fine. Instead, water is spraying or dribbling out of the ice maker fill tube when the valve opens to make a new batch of cubes. If your unit is kept in an unheated space and stops making ice or cooling properly during seasonal swings, check out our guide on why a garage refrigerator stops cooling.
- Unplug the fridge and turn off the household water supply valve behind the fridge or under the kitchen sink.
- Remove the ice bin and look at the small plastic or rubber fill spout at the upper back corner that directs water into the ice mold.
- Feel inside the spout with your finger for a plug of ice; if frozen, thaw it gently with a warm, damp washcloth or a hair dryer held several inches away on low heat.
- Check the back of the refrigerator where the plastic water line enters the cabinet into the fill tube fitting—push the tubing firmly into the quick-connect collar and make sure the retaining clip is snug.
4. Seal or Realign the Freezer Drawer Gasket
When warm, humid kitchen air leaks into a zero-degree freezer drawer, that moisture condenses on the ceiling and walls of the drawer, turns into heavy frost, and drips out the bottom edge as it melts near the rubber gasket. Because bottom freezer drawers slide on heavy metal rails, a single crooked storage basket or sticky track can hold the drawer open by just an eighth of an inch.
- Open the drawer and inspect all four sides of the accordion-style rubber gasket for rips, food spills, or stiff corners.
- Wash the entire gasket and the metal cabinet frame it touches with warm water and mild dish soap, then dry completely.
- Close the drawer on a dollar bill at six different spots around the perimeter; if the bill slides out with zero resistance, the seal isn't making firm contact.
- Soften stiff or flattened sections of the rubber gasket by waving a hair dryer on low heat along the fold while gently pulling the rubber outward toward the cabinet frame, then smear a whisper-thin coat of food-grade petroleum jelly along the hinge side of the seal.
5. Level the Refrigerator Front-to-Back
Refrigerators are engineered to tilt slightly backward so that gravity pulls the doors shut and guides condensation and defrost meltwater toward the rear drain trough. If your kitchen floor slopes forward or the leveling legs were never adjusted after delivery, defrost water will pool at the front lip of the freezer floor instead of running into the drain hole.
- Place a carpenter's bubble level on the top of the refrigerator cabinet, first side-to-side and then front-to-back.
- Pop off the plastic toe-kick grille at the very bottom front of the fridge below the freezer drawer.
- Use an adjustable wrench, socket, or flathead screwdriver to turn the two front leveling legs clockwise to raise the front corners.
- Aim for a slight backward tilt of about a quarter-inch (half a bubble on the level toward the wall) and dead-level side-to-side so the drawer glides shut smoothly.
6. Inspect the Cracked or Overflowing Drain Pan
Sometimes the defrost drain works too well—or your kitchen has been extra humid—and the shallow evaporation pan underneath the refrigerator simply overflows or develops a hairline crack. This usually leaves a mystery puddle right under the center or back of the fridge rather than at the front drawer seam. While you are checking the bottom panel, if you also notice the upper screen acting up, see our troubleshooting steps for when a refrigerator display is not working.
- Unplug the refrigerator and remove either the front toe-kick grille or the rear lower access panel, depending on your model's layout.
- Shine a flashlight onto the shallow plastic drain pan resting near the black compressor or condenser fan.
- Soak up standing water in the pan using a large sponge and wring it into a bucket.
- If the pan slides out, wash it with warm soapy water and hold it up to a bright light to check for cracks in the plastic; replacement pans typically cost $25 to $65 depending on the brand and model.
Quick Diagnostic Table: Bottom Freezer Leaks
| Where You See Water or Ice | Most Likely Cause | Typical DIY Time | Typical Part Cost (Varies by Model) |
|---|---|---|---|
| Solid ice sheet on the freezer floor + front puddle | Clogged defrost drain or duckbill valve | 30–45 minutes | $0–$20 (drain tube kit) |
| Icicles on the ice bin or left side of drawer | Frozen or loose ice maker fill tube | 20 minutes | $0–$35 (fill tube/fitting) |
| Water dripping from bottom of drawer seal + fluffy frost | Drawer gasket gap or blocked drawer rail | 15 minutes | $0–$110 (replacement gasket) |
| Puddle underneath the back or middle of the fridge | Cracked drain pan or leaking water inlet valve | 25 minutes | $25–$85 (drain pan or valve) |
When to Call a Pro
If you have flushed the defrost drain, cleaned the duckbill valve, and leveled the cabinet, yet a thick slab of ice keeps returning on the freezer floor every week, there may be an issue with the defrost heater, defrost thermostat, or an internal drain tube heater that requires testing with a multimeter. Likewise, if water is steadily dripping from the motorized water inlet valve at the back of the fridge or you suspect a sealed-system refrigerant issue, stop and bring in a technician. Professional refrigerator leak and defrost repairs typically run between $150 and $350 depending on your local area and the model.
When a stubborn leak won't quit, True Appliance Repair can match you with an independent local pro for reliable refrigerator repair, or you can reach out to our team to get connected quickly.
FAQ
Why is there a sheet of ice on the bottom of my freezer drawer?
A solid sheet of ice on the bottom of a freezer almost always means the defrost drain hole at the back of the compartment is clogged. When the freezer goes through its automatic defrost cycle, the melted frost cannot go down the drain tube, so it runs forward onto the floor of the freezer and refreezes.
Can I still use my refrigerator while the bottom freezer is leaking water?
Yes, as long as the refrigerator and freezer compartments are holding safe temperatures (below 40°F in the fridge and 0°F in the freezer) and water is not dripping near the wall outlet or power cord. However, you should wipe up floor puddles immediately to prevent slip hazards and hardwood or subfloor damage, and clear the clogged drain within a day or two before ice blocks the evaporator fan.
How often does a bottom-freezer defrost drain need to be cleaned?
Under normal kitchen conditions, a defrost drain only needs attention every year or two, or whenever you notice ice forming under the bottom basket. If your model has a known narrow rubber duckbill valve, cleaning that valve once a year when you vacuum the condenser coils will prevent almost all repeat clogs.
Why does my bottom freezer only leak water every few days?
A leak that shows up every one to three days—rather than a constant drip—points directly to either the automatic defrost cycle or the automatic ice maker. The defrost heater only turns on periodically to melt frost off the coils, so you will only see water spill onto the floor shortly after a defrost cycle finishes or when the ice maker calls for water.