
Opening your dishwasher after a two-hour cycle only to find every bowl, glass, and plastic container dripping wet is a daily kitchen frustration. With holiday dinners and big family gatherings right around the corner, nobody wants to stand at the counter hand-drying a mountain of cookware. Fortunately, a dishwasher not drying dishes usually comes down to a simple setting, loading habit, or single worn component you can check yourself.
Before inspecting any internal parts, always unplug the dishwasher from the wall outlet or switch off its dedicated circuit breaker at your home's electrical panel, and shut off the hot water supply valve under the sink if you plan to move the unit.
1. Refill and Adjust the Rinse Aid Dispenser
Rinse aid is not just for shine; it is a surfactant that breaks the surface tension of water so droplets sheet off dishes instead of clinging to them. Modern energy-efficient dishwashers rely heavily on rinse aid to dry dishes without using excessive electricity.
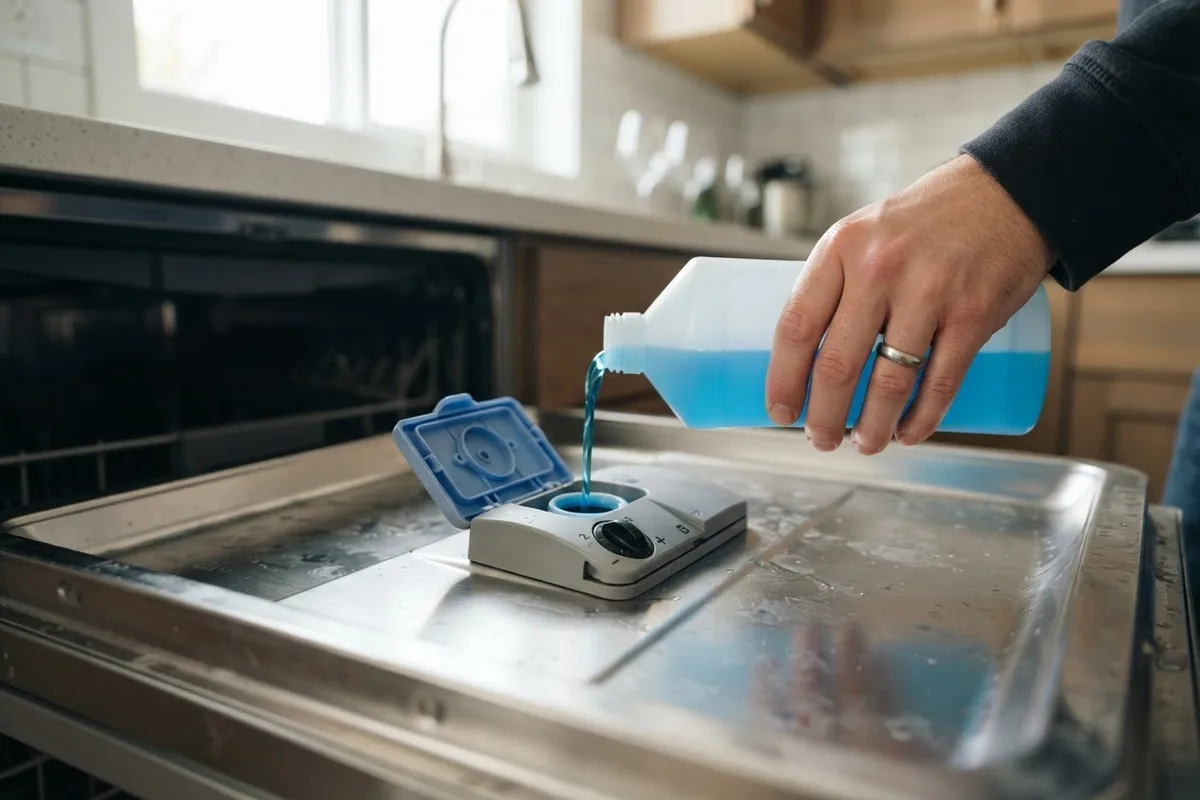
- Open the dishwasher door and locate the rinse aid cap right next to the main detergent cup.
- Twist or flip open the cap and check the fluid window. If it looks clear or empty, pour in liquid rinse aid until it reaches the max fill line.
- Look for the adjustable dial inside or next to the reservoir (usually numbered 1 through 4 or marked Min/Max).
- Turn the dial up one or two notches toward the higher setting, especially if you have hard water or notice water droplets sitting on glasses after the cycle ends.
- Wipe up any spilled liquid immediately so it does not cause excess suds during the next wash.
2. Unload the Bottom Rack First and Space Items
How you load and unload the racks directly controls how well moisture evaporates inside the tub. Overcrowding traps humid air, and unloading from the top down ruins the work the drying cycle did complete.
- Always pull out and unload the bottom rack first. Coffee mugs and bowls on the top rack have concave bottoms that collect small puddles; pulling the top rack out first spills that water straight onto your dry dishes below.
- Leave at least half an inch of space between plates and bowls so warm air can circulate freely.
- Angle cups, Tupperware, and deep bowls slightly downward on the upper rack so water runs off the rims rather than pooling on top.
- Keep plastics on the top rack, away from the lower heating element, and realize that plastic naturally holds less heat than ceramic or glass—meaning it will always dry slower through condensation.
3. Run the Kitchen Hot Water Tap Before Starting
Dishwashers rely on residual heat from the final hot rinse to evaporate water off your dishes, especially in models that use condensation drying instead of an exposed heating coil. In cooler autumn and winter months, the water sitting in your household pipes cools down rapidly.
- Before pressing the start button on your dishwasher, turn your kitchen sink faucet to the hottest setting.
- Let the water run for 30 to 60 seconds until it feels steaming hot to the touch.
- Check your home's water heater thermostat if the tap never gets truly hot; it should be set to around 120°F (49°C) for optimal dishwashing and safe household use.
- Start the dishwasher immediately after turning off the sink tap so the first fill pulls hot water straight into the tub.
4. Select Heated Dry and Check Cycle Options
Many homeowners accidentally bump a cycle modifier button or use an express cycle that skips the drying phase entirely to save time and energy.
- Inspect your control panel before starting a load and verify that Heated Dry, Extended Dry, or ProDry is illuminated.
- Avoid using Quick Wash, 1-Hour Wash, or Eco cycles when you need completely dry dishes; these settings typically lower the final rinse temperature and turn off the heating element.
- Enable the High-Temp Wash or Sani-Rinse option if your machine has one. Raising the final rinse temperature gives ceramic and stainless steel items enough thermal mass to flash-dry once the water drains.
- Prop the door open two to three inches for 20 minutes right after the cycle finishes to let humid steam escape before it condenses back onto cooling dishes.
5. Clear the Steam Vent and Inspect the Fan
Many dishwashers use a motorized vent assembly in the upper corner of the door or side wall to exhaust moist air out of the tub at the end of the cycle. If this vent stays shut or gets clogged, your dishes essentially sit inside a steam room.
- Turn off power to the dishwasher at the circuit breaker.
- Open the door and locate the plastic vent louver on the inner door panel or upper side wall.
- Check the vent slots for grease buildup, food debris, or a large baking sheet that may have blocked the opening during the wash.
- Gently wipe the vent grille with warm, soapy water and a soft brush.
- If your model uses a motorized vent damper or drying fan that fails to open or spin—or if you notice a rhythmic noise and have already checked our guide on why your dishwasher is making a thumping noise—the vent wax motor or fan assembly may need replacement.
6. Inspect the Heating Element and High-Limit Thermostat
American-style dishwashers usually feature a U-shaped or circular exposed heating element at the very bottom of the tub. If this element burns out, or if the high-limit thermostat trips, the air inside the tub will never heat up during the dry cycle.
- Shut off power to the dishwasher at your home's main breaker panel—never touch or test heating components with live power connected.
- Remove the bottom dish rack and visually inspect the metal heating coil around the floor of the tub.
- Look for visible signs of failure: blisters, cracks, burned spots, or heavy white mineral scale coating the metal.
- If you are comfortable using a multimeter, remove the lower access kickplate, disconnect the wire leads from the heating element terminals under the tub, and test for continuity (a healthy element typically reads between 10 and 30 ohms).
- While underneath, check the small clip-on high-limit thermostat mounted against the bottom of the tub; if it lacks continuity at room temperature, it has failed open and cut power to the heater.
Dishwasher Drying Methods: Quick Troubleshooting Guide
Not sure which type of drying system your machine uses? Use this table to match your dishwasher style to the most likely culprit.
| Drying System Type | How to Identify It | Most Common Reason Dishes Stay Wet | Typical Part Cost (Varies by Area/Model) |
|---|---|---|---|
| Exposed Heating Element | Visible metal ring at the bottom of the tub | Burned-out heating element or tripped thermostat | $40 – $120 |
| Condensation Drying | Stainless steel tub with no bottom coil | Empty rinse aid dispenser or cold inlet water | $5 – $15 (rinse aid) |
| Fan-Assisted Venting | Small louver on inner door with audible fan | Stuck vent wax motor or failed drying fan | $50 – $140 |
| Auto-Open Door | Door pops open automatically at cycle end | Blocked door latch or disabled setting on panel | $0 – $90 |
When to Call a Pro
Refilling rinse aid, running hot water at the sink, and adjusting cycle settings are zero-cost fixes any homeowner can handle in five minutes. However, if your heating element shows no continuity, the high-limit thermostat has failed, or the main electronic control board is no longer sending voltage to the heater circuit, the repair involves pulling the dishwasher out from under the counter and working with internal wiring.
Stop and call a professional if you smell burning wires, find melted wire harnesses underneath the tub, or feel unsure about disconnecting water and electrical lines. Depending on the age of your machine, you may also want to weigh the repair cost against our rules on whether to repair or replace a dishwasher (typical heating element or control board repairs range from $150 to $350 including labor, though prices vary by area and model). When you are ready for hands-on help, True Appliance Repair can connect you with a local pro for dishwasher repair to get your kitchen running smoothly again.
FAQ
Why are my plastic containers still wet when plates and glasses are dry?
Plastic is thin and porous, meaning it does not retain heat the way heavy ceramic plates and glass cups do. During the final hot rinse, ceramic dishes absorb heat and evaporate surface water quickly, whereas plastic cools down almost immediately. Adding rinse aid and propping the door open right after the cycle finishes are the two best ways to dry plastics faster.
Does a dishwasher with a stainless steel tub dry without a heating element?
Yes. Many modern dishwashers—especially European-style models—use condensation drying instead of a bottom heating element. The final rinse heats the dishes, while the stainless steel tub walls cool down faster than the dishes, drawing moisture out of the air so it condenses on the steel walls and trickles down to the drain.
Is it safe to run my dishwasher if the heating element is broken?
Yes, it is safe to run the dishwasher, provided the element is not physically cracked or shorting out against the tub. However, your wash water will not get boosted to peak sanitizing temperatures, detergent may not dissolve as effectively, and you will have to air-dry or towel-dry every load until the element is replaced.
How much rinse aid does a dishwasher actually use per load?
A dishwasher automatically dispenses only about half a teaspoon (2 to 3 milliliters) of rinse aid during the final rinse cycle. A full reservoir typically lasts about one month of daily loads, making it a very inexpensive habit that dramatically improves drying performance.