
Pulling a fresh load of dark shirts or towels from the dryer only to find them covered in fuzzy white lint is frustrating. A properly functioning dryer captures loose fabric fibers in the filter trap and exhausts residual airborne dust safely out of the home.
Before inspecting internal dryer parts or reaching behind the appliance, always disconnect the electrical power cord from the wall outlet. For gas dryers, turn the manual gas supply shut-off valve to the closed position before beginning any hands-on inspection.
Here are 5 common reasons clean laundry comes out coated in fuzz, along with straightforward DIY troubleshooting steps to resolve the issue.
1. Clean the Clogged Lint Screen Mesh
Emptying the lint trap between loads removes the visible surface mat of fabric fuzz, but invisible residues build up over months of regular use. Liquid fabric softeners and dryer sheets leave a waxy, transparent film across the fine nylon or wire mesh of the filter.
This invisible coating blocks air from passing freely through the screen. When airflow drops, loose fibers cannot travel into the trap and instead swirl inside the heated drum, embedding back into fabric weaves.
How to Deep Clean the Screen:
- Pull the lint screen completely out of its housing slot.
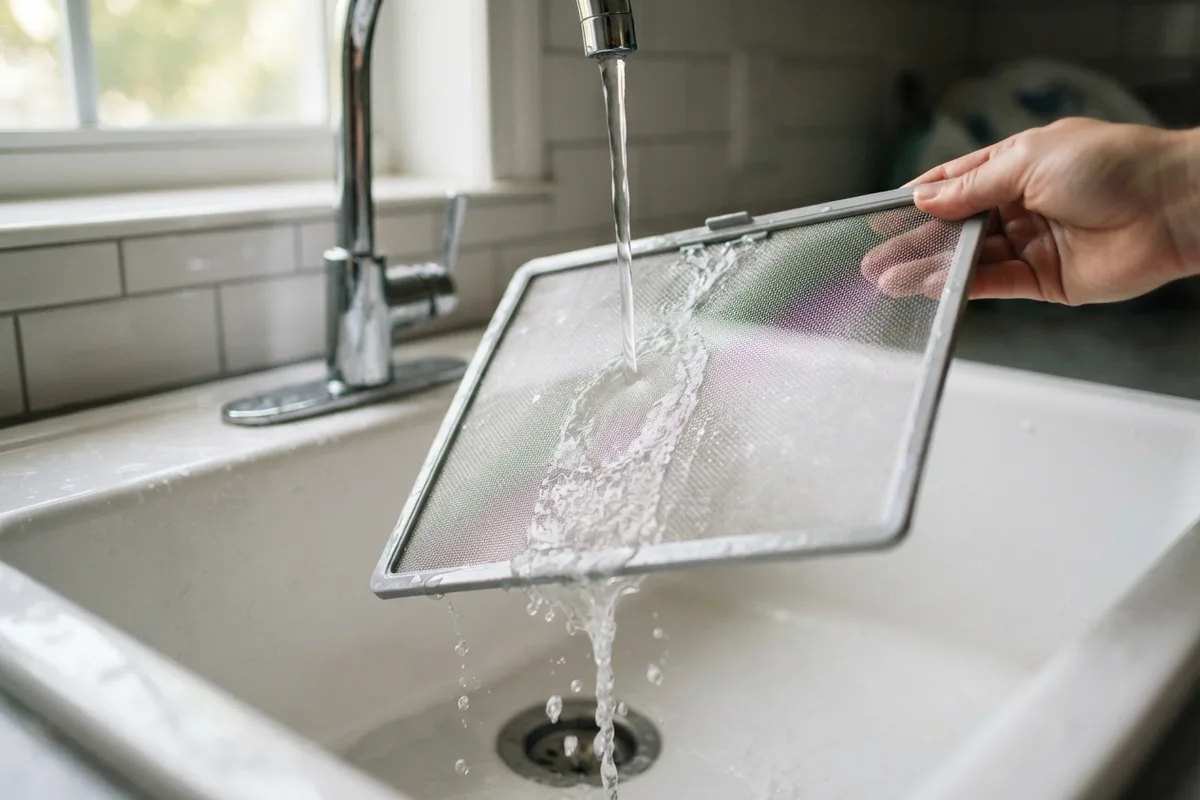
- Carry the filter to a sink and run warm tap water directly over the mesh. If water pools on the screen instead of draining straight through, waxy buildup is present.
- Apply a small amount of liquid dish soap and scrub both sides of the mesh gently using a soft nylon dish brush.
- Rinse the filter with hot water until the water flows freely through the screen without beading up.
- Allow the lint screen to air-dry completely before sliding it back into the dryer housing.
2. Clear Restricted Dryer Exhaust Ducts
When moist, lint-laden air leaves the dryer drum, the blower wheel pushes it through an exhaust vent line leading outside. Over time, lint accumulates in duct elbows, flexible foil transition hoses, and exterior wall dampers.
Heavy duct restrictions choke exhaust velocity. Trapped air backs up into the blower housing and drum cavity, redepositing loose fibers onto wet clothes as they tumble. Restricted venting also creates severe heat buildup, similar to conditions that cause a dryer tripping the breaker.
How to Clear Exhaust Ducts:
- Unplug the dryer from the electrical receptacle and pull the cabinet forward from the wall.
- Loosen the metal worm-drive clamp securing the transition duct to the dryer exhaust outlet, then detach the hose.
- Vacuum loose lint from the rear dryer exhaust port using a narrow crevice tool.
- Feed a rotating dryer vent brush kit through the wall ductwork toward the exterior vent hood, turning clockwise to loosen compacted lint.
- Check the exterior vent hood outside the home to ensure the plastic or metal flapper door swings open freely without lint jams.
3. Replace Damaged Drum Glide Felt Seals
The spinning metal drum of your clothes dryer rests against stationary front and rear bulkheads. Thick felt or Teflon-coated seals cushion these contact points and prevent air from escaping around the edges of the drum.
When a felt seal tears, flattens, or unglues, small gaps open around the drum perimeter. Clothing items snag against the gap, shredding fabric edges and collecting pockets of trapped lint that roll directly back onto your clean laundry.
How to Inspect Drum Seals:
- Open the dryer door and run a hand around the front and rear perimeter of the drum where the revolving metal meets the stationary housing.
- Look for frayed felt strips, missing adhesive sections, or exposed metal-on-metal rubbing marks.
- Spin the drum by hand with the dryer turned off. If you hear squealing or feel rough resistance, the glides and seals have worn thin.
- Unfasten the front cabinet panel, detach the worn felt gasket, scrape away old adhesive with a plastic putty knife, and install a new manufacturer-matched felt seal using high-temperature adhesive.
4. Fix Worn Blower Wheel Fins
The blower wheel is a plastic or metal squirrel-cage fan mounted directly to the motor drive shaft. It draws air past the heating source, pulls it through the tumbling clothes, and propels it out the exhaust pipe.
If a foreign object like a coin, button, or collar stay bypasses the lint trap, it can break plastic fins off the blower wheel or jam the housing. Missing fins reduce CFM airflow drastically, leaving lint suspended inside the drum. Establishing consistent cleaning routines outlined in our guide on how to extend appliance lifespan helps catch these small items early.
How to Check the Blower Wheel:
- Disconnect power to the dryer and remove the lower front access panel or rear housing cover.
- Locate the circular blower housing positioned adjacent to the drive motor.
- Inspect the fan blades for broken fins, cracks along the hub, or heavy compacted lint balls wedged inside the wheel vanes.
- Spin the blower wheel by hand to verify it turns freely without wobbling on the motor shaft. Replace stripped or cracked blower wheels promptly.
5. Stop Overloading the Dryer Drum
Every residential dryer requires sufficient open space for garments to billow and open as the drum rotates. When sheets, towels, and clothes are packed tightly to the top of the door rim, fabric cannot separate.
Tight clothing bundles trap shed fibers between layers instead of releasing them into the exhaust airstream. Overcrowding also forces lint-shedding fabrics, such as cotton flannel or terry cloth, to rub aggressively against lint-attracting materials, such as corduroy and synthetic polyester.
Best Practices for Proper Drum Loading:
- Fill the drum no more than two-thirds full of dry clothing, allowing garments room to lift and drop freely.
- Separate high-lint fabrics (bath towels, fleece, chenille, and flannel) from lint-attracting items (synthetic athletic wear, dark trousers, and knit sweaters).
- Turn lint-sensitive dark garments inside out before placing them into the dryer.
- Shake out wet items individually before loading them rather than transferring dense, tangled balls of laundry from the washer.
Diagnostic Quick-Reference Guide
Use this reference table to pinpoint why your laundry is collecting lint during dry cycles:
| Primary Symptom | Location on Garments | Probable Root Cause | Recommended DIY Solution |
|---|---|---|---|
| Fine grey or white film on darks | Distributed evenly across all items | Waxy buildup on lint screen mesh | Scrub screen with dish soap and warm water |
| Clumpy lint balls stuck in seams | Trapped inside pockets and folds | Overloaded drum / mixed fabric types | Reduce load size and separate towels from synthetics |
| Heavy lint with extended dry times | All garments damp and linty | Restricted exhaust vent line | Clean ductwork with a rotating vent brush kit |
| Streaks of lint and snagged threads | Concentrated along garment edges | Worn front or rear drum felt seal | Replace worn drum seals and support glides |
| Drum noisy with poor air movement | Clothes dusty and hot | Broken blower wheel fins | Inspect and replace damaged blower fan |
4 Quick Steps to Remove Stubborn Lint from Dried Clothes
If a load comes out heavily coated in lint, these four quick steps will restore your clothing without re-washing everything from scratch:
- Use a Sticky Roller: Run a standard adhesive lint roller firmly over the garment while laid flat across an ironing board.
- Tumble with a Damp Microfiber Cloth: Place dry, linty clothes back into the dryer with a single damp microfiber cloth. Run on an "Air Fluff" or no-heat setting for 10 minutes; microfiber naturally attracts and traps loose fuzz.
- Damp Rubber Glove Wipe: Put on a clean pair of rubber dishwashing gloves, dampen the fingertips lightly with water, and sweep downward across the fabric surface to ball up stubborn fibers.
- Add White Distilled Vinegar on the Next Wash: When rewashing lint-covered items, add 1/2 cup of plain distilled white vinegar to the fabric softener dispenser to relax fibers and release trapped lint.
When to Call a Pro
Basic maintenance tasks like washing a mesh filter screen, vacuuming out an exterior vent line, or separating laundry loads are easy for any homeowner. However, internal mechanical issues—such as disassembled drum assemblies, damaged drive motor shafts, broken blower wheel housings, or complex electrical wiring problems—require specialized diagnostic equipment.
Gas dryers also involve dedicated fuel lines and burner valves where improper disassembly presents significant carbon monoxide and fire risks. Always leave gas line repairs and sealed component work to trained technicians.
If clearing your lint screen and exhaust line does not stop lint from coating your clothes, True Appliance Repair can match you with a local appliance pro to diagnose internal drum seals and motor components safely.
For additional support with complex laundry room malfunctions, check our dedicated washer and dryer repair services.
FAQ
Why does my dryer lint screen not catch all the lint?
When dryer sheets and fabric softeners leave an invisible waxy residue over the screen, air cannot pass through the mesh. The air bypasses around the edges of the filter frame, carrying loose lint directly back into the drum and exhaust housing.
Can a clogged dryer vent cause lint on clothes?
Yes. Restricted venting prevents moist, lint-filled air from exiting the home. The stagnant airflow traps lint inside the drum cavity, causing loose fibers to settle back onto tumbling fabrics throughout the cycle.
How often should a dryer exhaust duct be cleaned?
Most residential dryer exhaust ducts should be cleaned thoroughly once every 12 months. Households with large families, multiple pets, or heavy daily laundry use should clean their vent lines every 6 months to maintain proper airflow and prevent fire hazards.
How much does it cost to replace a dryer drum seal?
A replacement dryer drum felt seal typically costs between $20 and $60 for the replacement part. Having a technician install the seal and inspect internal glides generally ranges between $120 and $220, depending on machine accessibility and local labor rates.