
Pulling a favorite knit sweater or cotton t-shirt out of the laundry only to discover pulled threads, frayed seams, or tiny tears is infuriating. When a dryer starts catching fabrics, the underlying cause is almost always a tiny physical gap, a cracked plastic component, or a rough edge inside the rotating drum. With a simple inspection routine and basic household tools, you can pinpoint the catch point and protect your wardrobe from further damage.
Before performing any hands-on troubleshooting, always unplug your dryer from the electrical wall outlet. If your dryer runs on natural gas, shut off the manual gas supply valve behind the unit before pulling the machine away from the wall. For any internal electrical problems or gas line adjustments, always stop and consult a professional technician.
Inspect the Front Felt Seal and Drum Glides
The drum in your dryer rotates against stationary front and rear bulkheads. To prevent clothes from slipping into the perimeter gap, manufacturers install thick felt seals and smooth plastic or Teflon glides. Over years of heat and heavy tumbling loads, these felt strips flatten, tear, or wear down completely. Once a gap opens between the drum rim and the front bulkhead, thin fabric edges slip in and become pinched while the drum turns, creating shredded hems or pulled threads.
To inspect the seal:
- Disconnect dryer power completely.
- Open the dryer door and visually inspect the entire perimeter where the rotating drum meets the front housing.
- Run an old pair of nylon pantyhose or a soft microfiber cloth along the entire circular rim. If the material snags anywhere, you have found worn felt or an exposed metal lip.
- Gently lift up on the front lip of the drum. If there is more than 1/8 inch of upward play, the plastic drum support glides have likely worn out and dropped the drum out of alignment.
Replacing worn drum glides or felt seals requires removing the top and front cabinet panels. If you notice accompanying squeals or scraping sounds, review our appliance noise guide to confirm whether your drum bearings need attention at the same time.
Check for Cracked or Loose Drum Baffles
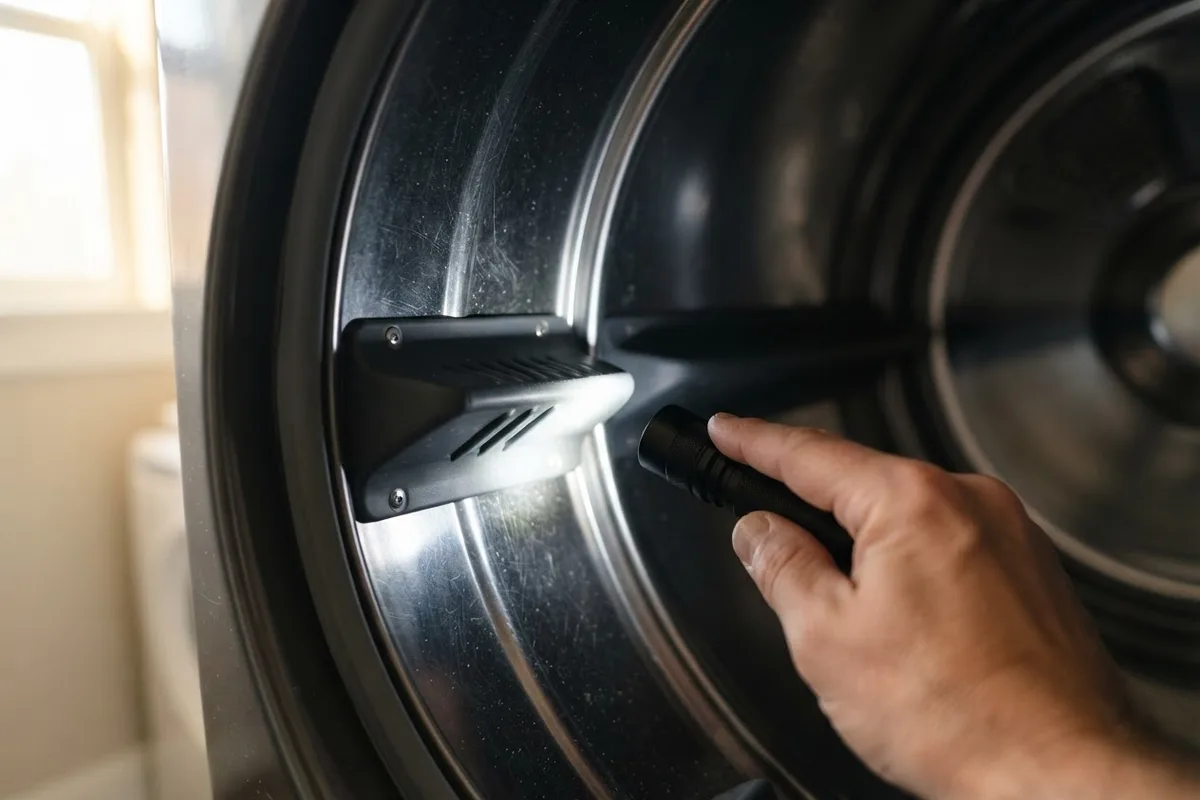
Drum baffles—the curved plastic or metal fins mounted inside the drum—lift and tumble clothes through the warm air stream. Because they endure repeated impacts from heavy denim, metal zippers, and sneakers, baffles frequently crack, warp, or work their mounting screws loose. A hairline fracture in a plastic baffle acts like a claw, snagging delicate knits as the drum spins.
Inspect each baffle carefully:
- Shine a bright flashlight into the drum and run your fingers along the sides, tips, and base of every baffle.
- Wiggle each baffle firmly with your hand. A secure baffle should not shift or pull away from the drum wall.
- Check the seam where the baffle contacts the metal drum wall. If there is a visible gap, threads and zipper cords can slide underneath and twist until they snap.
- Tighten any loose mounting screws using a nut driver or screwdriver from inside the drum or under the outer drum wrapper (depending on your specific model).
If a baffle is cracked or has a chipped corner, do not attempt to glue it back together. Dryer heat quickly breaks down household glues, releasing fumes and creating sticky residue. Replace the damaged baffle with an identical replacement part.
Examine the Lint Filter Frame and Grille
A surprising number of laundry snags happen right at the lint trap entrance. Whether your filter slides into the top cabinet panel or sits in the bottom rim of the door opening, the plastic housing takes steady abuse. Dropped laundry, heavy buttons, and rough handling can bend the filter frame or chip the retaining housing, leaving sharp plastic burrs that grab garments.
Follow these steps to check the assembly:
- Slide the lint screen out and examine its perimeter edges. Check for warped plastic corners, cracked screen mesh, or missing felt edges.
- Inspect the filter housing slot inside the dryer door frame. Look for warped edges that stand proud of the surrounding metal.
- Clean out compacted lint clumps inside the housing using a narrow vacuum crevice attachment. Built-up lint can prevent the filter from seating completely flush.
- Slide the filter back into place and run a microfiber cloth across the transition seam. The filter top should sit completely flush with the surrounding duct housing.
If the filter frame sits crooked or has a cracked corner, replacing the filter cartridge costs very little and takes seconds. If your washer is also causing laundry headaches, you may want to check our guide on why your washer drum is loose to ensure your washer spin cycle is not weakening fibers before clothes even reach the dryer.
Sand Down Chipped Enamel or Rough Drum Spots
Most modern residential dryer drums are built from either rust-resistant stainless steel or porcelain-coated carbon steel. Over time, metal belt buckles, open jean zippers, and forgotten pocket items can chip away porcelain enamel or scratch deep burrs into the drum surface. The exposed metal edge rusts slightly and snags delicate fibers on every revolution.
To locate and smooth rough drum patches:
- Put a sheer nylon stocking over your hand and rub your palm slowly across the entire inner surface of the drum, including around every single air perforation hole.
- When the nylon catches, mark the spot with a small piece of painter's tape.
- For minor metal burrs, lightly buff the rough spot using extra-fine 400-grit to 600-grit wet/dry sandpaper until the surface feels glass-smooth to the touch.
- For chipped porcelain enamel, clean the bare spot with rubbing alcohol and let it dry completely. Apply a thin layer of manufacturer-approved high-temperature appliance touch-up paint.
- Allow the touch-up enamel to cure completely according to package instructions—usually at least 24 to 48 hours—before running a heated drying cycle.
Taking time to smooth out tiny surface imperfections prevents mysterious pinholes from ruining your casual shirts and sweaters.
Remove Trapped Underwires and Foreign Objects
Bra underwires, safety pins, paper clips, and loose screws from pockets frequently slip through the drum's exhaust perforations. Once trapped, the wire or metal tip can stick out just enough to hook clothing while the drum rotates. Because the foreign object may only poke through intermittently when the drum flexes under load, it can be tricky to spot without close inspection.
Here is how to extract wedged objects:
- Turn off dryer power at the wall outlet.
- Shine a bright work light through the small exhaust holes at the back or front of the dryer drum.
- Look for the silver tip of an underwire or a bent hairpin poking through the grille holes.
- Grip the protruding tip firmly with needle-nose pliers.
- Carefully maneuver the wire back through the hole into the drum. Avoid yanking forcefully, which can bend the metal perforated panel or snap the wire off inside the air duct.
If the wire broke off behind the rear drum wall, you will need to remove the rear access panel or front bulkhead to retrieve it from the blower housing before it causes airflow blockages or motor strain.
Dryer Snagging Diagnostic Guide
Use this quick-reference table to match the damage on your clothing with the most likely source inside your dryer:
| Damage Pattern | Primary Suspect | Recommended Action |
|---|---|---|
| Pulled threads along hems and seams | Worn drum felt seal or glides | Test perimeter with nylon stocking; replace worn felt |
| Tiny holes in the center of t-shirts | Chipped drum enamel or metal burr | Sand smooth with 400-grit paper; apply touch-up paint |
| Deep snags or shredded knit fabrics | Cracked or loose drum baffle | Tighten mounting screws or install new baffle fin |
| Snags near corners and collars | Raised lint filter housing | Reseat filter; replace bent frame or clear slot debris |
| Intermittent ripped fabric with gray streaks | Trapped underwire or nail in drum vent | Inspect perforations with flashlight; remove with pliers |
When to Call a Pro
Many dryer snagging problems can be resolved with simple DIY adjustments like tightening a loose baffle, smoothing a metal burr, or clearing a foreign object from a vent hole. However, if your inspection reveals collapsed drum support rollers, a badly warped drum cylinder, or severely deteriorated bulkhead seals that require tearing down the entire cabinet, calling an experienced appliance technician is the smartest move.
Professional repairs for drum glide and seal replacements typically range between $150 and $300, depending on your appliance brand, parts availability, and local labor rates. If you have a gas dryer and need structural disassembly near the burner housing, professional service ensures all safety standards are met. When you need dependable help, True Appliance Repair can match you with an independent local appliance pro to get your laundry routine running smoothly again.
FAQ
Can washing machines cause the same snagging marks as dryers?
Yes. A chipped agitator fin, a cracked door gasket, or a foreign object lodged in the washer wash basket holes can snag fabrics during vigorous wash or spin cycles. If you inspect your dryer and find no rough edges, test your washing machine using the same nylon stocking technique to confirm where the snag originates.
How can I prevent clothes from snagging while I wait on repair parts?
Turn garments inside out, zip all zippers, clasp all bra hooks, and button shirts before loading them into the machine. Place delicate items, sweaters, and athletic wear into zippered mesh laundry bags. Keep load sizes moderate so clothes tumble freely instead of packing tightly against the drum perimeter.
Why does my dryer leave black or brown streaks along with snags?
Black or brown marks indicate that clothing is getting pinched between the rotating drum and the stationary housing, where friction burns the fabric. This is a classic sign of worn drum glides or a flattened felt seal allowing a gap to form. Stop using the dryer until the seal or glides are replaced to avoid permanent heat-friction stains on your wardrobe.
Is it safe to use epoxy or tape to cover a cracked dryer baffle?
No. Standard adhesives, duct tape, and household epoxies are not designed to withstand continuous dryer heat, which frequently exceeds 135 to 150 degrees Fahrenheit. The adhesive will soften, transfer sticky chemical residue onto your clothes, and create a worse snagging hazard. Always replace a broken baffle with a proper heat-rated factory replacement part.