
Opening your washing machine only to find the inner drum sagging, wobbling side-to-side, or banging violently against the cabinet is alarming. While a small amount of springy movement is normal to absorb spin vibrations, excessive play signals a mechanical failure underneath or behind the tub. Understanding what holds the drum in place will help you diagnose the root problem quickly and protect your laundry room floor from secondary damage.
Always prioritize safety before opening up any appliance cabinet. Unplug the washing machine from the wall outlet and turn off both hot and cold water shutoff valves behind the unit. Drain any residual standing water before moving the machine away from the wall to begin your inspection.
Test Inner vs Outer Tub Play (The Spin & Lift Test)
Before disassembling cabinet panels, determine whether the entire tub assembly is bouncing or if the inner metal wash basket has separated from the outer plastic tub shell. Modern washing machines suspend the outer tub on heavy springs and dampening struts. The inner drum sits inside that outer tub, anchored to a central spindle shaft and bearing assembly.
- Open the washer door or lid with the machine completely empty and powered off.
- Place your fingers on the top edge of the inner stainless steel drum and attempt to lift it upward toward the ceiling.
- Observe whether the outer tub moves along with it. If the outer tub moves with the inner drum with firm spring resistance, the internal bearings and spider arm are intact.
- If the inner basket lifts independently by an inch or more, or clicks upward against the outer shell, the internal support structure or rear bearings have failed.
- Spin the drum briskly by hand. A healthy drum spins smoothly and silently; a grinding rumble or visible wobble confirms internal bearing or shaft failure.
Learning to identify warning sounds in appliances can help you pinpoint whether that wobble is coming from loose hardware or metal-on-metal bearing friction before deeper damage spreads.
Inspect Worn Shock Absorbers on Front-Load Washers
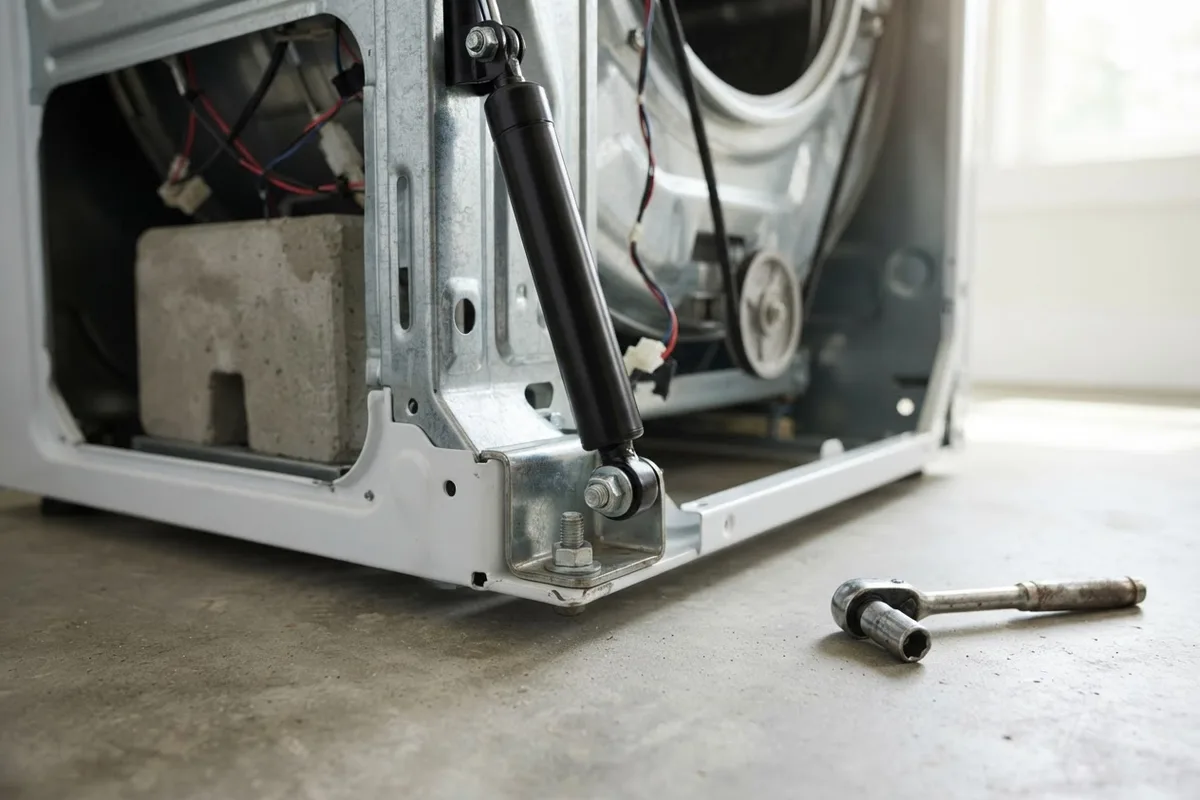
Front-loading washing machines rely on two to four hydraulic or friction dampening struts mounted between the base chassis and the bottom of the outer tub. These struts absorb lateral energy during high-speed extraction. When friction pads inside the shocks wear smooth or fluid seals rupture, the tub loses dampening resistance and swings loosely like an unanchored pendulum.
- Disconnect power and water lines, then remove the front lower service toe-kick panel or the rear access panel using a nut driver.
- Locate the dampener struts connected to the bottom of the outer tub.
- Look for telltale black oil stains, greasy grit, or cracked plastic sleeves along the strut shaft.
- Grasp each shock absorber body and tug it up and down. A healthy strut offers stiff, smooth mechanical resistance like an automotive shock. If it slides freely with zero resistance, the dampener has failed.
- Replace shock absorbers in complete sets. Replacing only one bad shock creates an uneven load balance that quickly destroys the remaining struts.
Replacement strut kits are widely available and typically secure with plastic retaining pins or simple mounting bolts.
Check for Snapped or Stretched Suspension Springs
Washing machine tubs hang suspended from the upper cabinet frame by heavy-duty steel tension springs. Top-load washers often feature four corner suspension rods with integrated springs, while front-loaders feature two to four heavy overhead springs holding the tub from the top deck. If a spring snaps or unhooks from its chassis eyelet, the entire drum assembly drops to one side, looking visibly crooked.
- Remove the top panel of your front-load washer by unscrewing the rear perimeter screws and sliding the cover backward.
- For top-loaders, pop the main top deck open using a stiff putty knife to release the front spring clips.
- Inspect the top suspension springs hooked into the cabinet frame. Check for broken hooks, stretched coils, or rubber isolator pads that have disintegrated.
- On top-load suspension rods, push down firmly on each corner of the inner basket and release. The tub should rebound once and stop immediately. If it bounces repeatedly like a pogo stick, that corner rod spring has lost tension.
- Hook detached springs back into their slots, or replace worn rod assemblies as a full set of four to maintain level suspension.
Diagnose a Cracked Spider Arm or Flange Assembly
On front-load washers, the inner stainless steel basket attaches to the rear drive shaft through a three-pronged cast aluminum bracket called the spider arm (or tub flange). Over years of use, detergent residues, fabric softener, and hard water minerals react with the aluminum in an electrochemical reaction known as galvanic corrosion. Eventually, one of the three spider arms cracks and snaps.
When a spider arm breaks, the inner drum droops downward inside the outer tub, scraping against the front rubber door gasket during each rotation. The drum will feel loose at one specific angle when rotated, but tight at others.
To check the spider arm, rotate the empty drum by hand one-quarter turn at a time. At each interval, attempt to push the drum up and down. If you detect play in only one quadrant of the circle, an arm has sheared off. Replacing a spider arm requires completely splitting the outer tub shell, a labor-intensive project that often warrants deciding whether to repair or replace the machine.
Examine Failed Tub Bearings for Play and Noise
Rear tub bearings allow the inner basket to spin at up to 1,400 RPM while maintaining a watertight seal with the outer tub. A rubber shaft seal keeps water away from these steel ball bearings. When the seal deteriorates, soapy wash water washes away grease and rusts the bearing balls.
As the steel bearings pit and wear down, tolerances widen. This allows the drive shaft to wobble inside the bearing housing, giving the inner drum significant loose play in all directions.
- Rotate the drum slowly by hand and listen closely. Worn bearings produce a distinctive rumbling, roaring sound similar to a skateboard rolling over rough asphalt or a jet engine spooling up.
- Look at the rear of the outer tub shell behind the drive pulley. Rust stains dripping down the back of the plastic tub indicate water has penetrated the seal.
- Push the top rim of the stainless drum backward and forward. More than 1/8 inch of back-and-forth play on the shaft confirms bearing failure.
Addressing bearing failure early prevents the spinning basket from contacting and cutting through the outer tub shell, which turns a standard mechanical repair into a catastrophic water leak.
Verify Loose Balance Weights or Drive Pulley Bolts
To counterbalance the tremendous centrifugal force of wet laundry, manufacturers bolt heavy concrete or cast-iron weights to the top, bottom, and front of the outer tub. In addition, a drive pulley on the rear of the tub connects the drum shaft to the drive belt.
Heavy vibrations over hundreds of cycles can cause mounting bolts to back out, creating clunking noises and excessive loose motion during spin cycles.
- With the machine unplugged and top panel removed, inspect the concrete counterweights bolted to the tub.
- Wiggle each block by hand. If the weight shifts on its mountings, tighten the heavy retaining bolts with a socket wrench.
- Inspect the concrete blocks for fractures or crumbling around the bolt holes. Cracked weights must be replaced immediately, as loose chunks can destroy plastic tub walls.
- Move to the rear of the unit and inspect the large drive pulley wheel. Ensure the center retaining bolt is torqued down securely and the pulley does not wobble on the splined shaft.
If you have also noticed uneven wash performance, reviewing why washer water levels run low can help ensure your machine runs balanced cycles without overtaxing components.
| Cause | Primary Symptoms | Difficulty Level | Typical Repair Cost Range |
|---|---|---|---|
| Worn Shock Absorbers | Tub bangs against cabinet on spin; oily strut bodies | Moderate DIY | $40 – $110 (parts only) |
| Snapped Suspension Spring | Drum visibly tilted or sagging to one side | Easy–Moderate DIY | $30 – $80 (parts only) |
| Loose Counterweight Bolts | Heavy thudding on wash agitation; visible weight wobble | Easy DIY | $0 – $20 (tools / bolts) |
| Broken Spider Arm | Drum droops, scrapes door seal in one quadrant | Advanced / Pro | $150 – $350 (parts only) |
| Failed Tub Bearings | Roaring spin cycle; rust stains behind tub; loose play | Advanced / Pro | $180 – $400 (parts & seals) |
Note: Repair costs reflect broad typical US ranges for parts and vary by area, brand, and appliance model.
When to Call a Pro
Basic maintenance tasks like replacing shock absorbers, reconnecting upper suspension springs, or tightening counterweight bolts are straightforward afternoon tasks for confident homeowners using common hand tools. However, split-tub repairs—such as pressing in new tub bearings, seating delicate shaft seals, or replacing a cracked spider arm—require disassembling virtually every internal component of the washer.
If your machine requires bearing presses, motor realignment, or you lack the space and time to manage a full tub teardown, bringing in a specialist is the smartest path forward. If you ever detect burning electrical smells or notice water reaching internal wiring, stop work and shut off power immediately.
When a drum problem goes beyond simple exterior hardware, True Appliance Repair can match you with an independent, local appliance pro to diagnose the tub assembly and restore quiet, stable laundry days.
FAQ
How much play should a washing machine drum normally have?
On a healthy front-load washer, the entire tub assembly should flex springily when pushed downward and immediately snap back to center. However, the inner metal drum should have almost zero independent wiggle room relative to the outer plastic tub. If the metal basket moves up, down, or back-and-forth while the outer tub stays stationary, internal bearings or spider brackets are compromised.
Can I run my washer if the drum feels loose?
Running a washing machine with a loose drum is risky. If the looseness stems from failed bearings or a broken spider arm, the metal basket will shift off-axis at high spin speeds, slicing through the outer plastic tub, ripping the rubber door boot, and causing severe water leaks. Discontinue use until you identify and correct the cause.
Is it worth repairing a broken washer drum spider arm?
It depends on the age of your washing machine. A spider arm replacement requires several hours of labor to split the outer tub and rebuild the drive assembly. If your washer is under six years old and otherwise in great condition, replacing the flange can add years of life. For older units, the combined cost of parts and labor often approaches the cost of a modern replacement.
Why does my washer drum bang against the cabinet during spin?
Banging usually indicates failed shock absorbers, a broken suspension spring, or severely uneven leveling feet. When shocks lose dampening resistance, the tub oscillates out of control during the spin cycle rather than absorbing vibration, causing the plastic tub shell to strike the outer metal cabinet walls violently.