
Opening the cabinet under your kitchen sink only to discover a soggy puddle of smelly water is a homeowner's worst nightmare. When you notice a garbage disposal leaking from the bottom, gravity is often playing a trick on you—water from a loose top gasket or side drain hose frequently runs down the outer casing and drips right off the base. With a flashlight, a dry paper towel, and fifteen minutes, you can trace the drip to its exact source and fix most minor leaks yourself.
Before reaching under the sink or touching any connections, unplug the garbage disposal from the under-sink outlet or switch off its circuit breaker at the main electrical panel. Water pooling near the lower motor housing and reset button creates a serious shock hazard, so verify the power is completely off before you begin.
1. Perform the Dry Paper Towel Dye Test
Because water travels downward along the curved body of the unit, a leak originating at the top sink flange or the side dishwasher inlet often looks like it is coming straight out of the bottom motor housing. Pinpointing the true source saves you from replacing a unit that only needs a $3 gasket.
- Unplug the unit at the receptacle or flip the breaker off.
- Empty the cabinet and thoroughly wipe the entire exterior of the disposal, the mounting ring, and all connected pipes with a dry towel until no moisture remains.
- Put the sink stopper in place, fill the kitchen sink basin with three inches of cold water, and add four drops of dark red or blue food coloring.
- Pull the stopper to let the dyed water rush through the unit while you watch closely with a flashlight.
- Press a clean white paper towel against the top flange, the side inlet, the discharge pipe, and finally the bottom plastic plate. Wherever the colored dye transfers first is your true leak point.
2. Tighten the Dishwasher Drain Hose Clamp
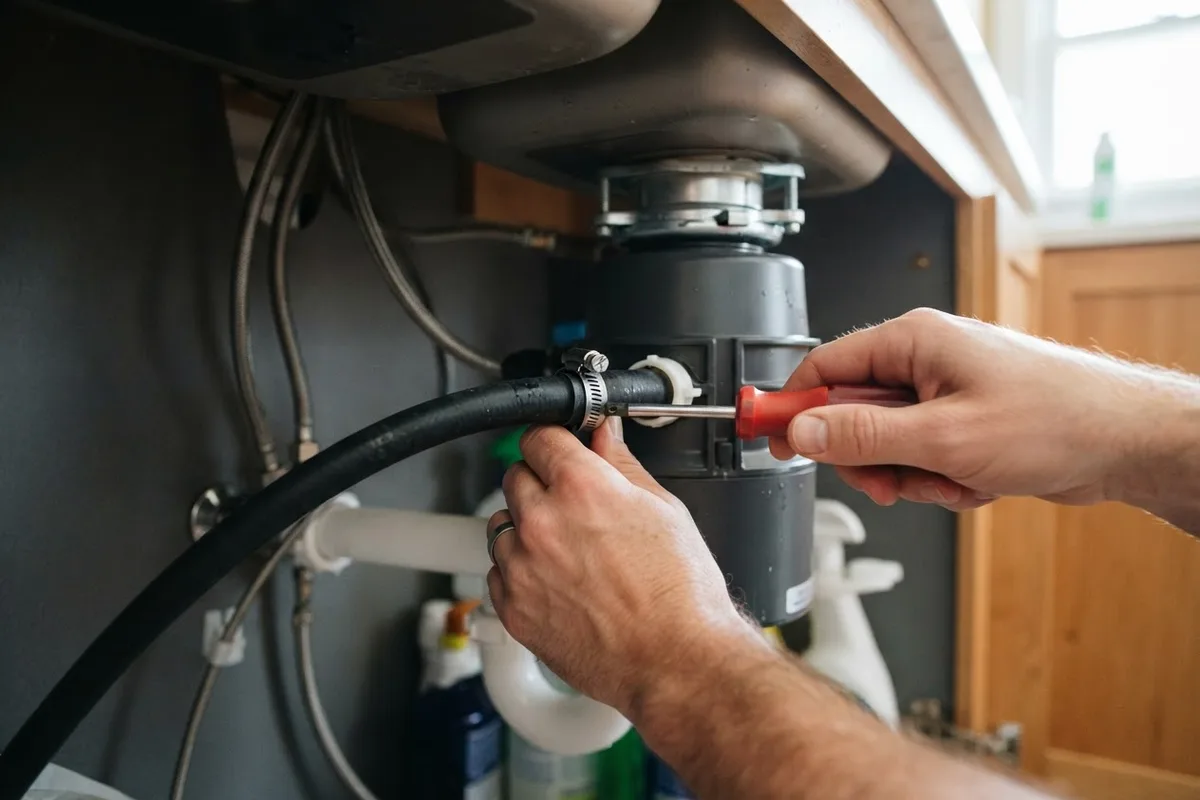
If your paper towel picks up dyed water near the upper side nipple, the rubber dishwasher drain hose is likely dripping down the side of the canister and pooling on the bottom rim. Over time, thermal expansion from hot dishwasher wash cycles causes the rubber boot to soften and loosen.
- Confirm the disposal is unplugged and place a shallow baking pan underneath the unit to catch residual water.
- Inspect the black ribbed or smooth rubber hose attached to the upper side inlet of the disposal.
- Use a 5/16-inch nut driver or a flathead screwdriver to tighten the metal worm-gear clamp clockwise until it compresses the rubber snugly against the plastic inlet nipple.
- If the rubber hose end looks cracked, brittle, or swollen, loosen the clamp completely, pull the hose off, and check the inside of the inlet.
- If your disposal is behaving strangely after water backs up, check out our guide on why your garbage disposal reset button keeps popping out to make sure moisture hasn't tripped the overload protector.
3. Replace a Worn Discharge Drain Pipe Gasket
The larger curved pipe bolted to the side of the unit carries ground food waste into your home's main plumbing trap. Inside that connection sits a flat or beveled rubber gasket that flattens out after years of vibration, letting water trickle down the side seam to the base.
- Place a bucket under the curved waste elbow attached to the side of the disposal.
- Use a screwdriver or socket wrench to remove the two metal bolts holding the metal flange plate against the side of the unit.
- Gently pull the elbow pipe away from the housing and peel out the old rubber gasket inside the groove.
- Wipe the mating surfaces clean of black food sludge or mineral crust using a damp rag.
- Press a new replacement tailpiece gasket into the groove, align the metal bracket, and tighten both bolts evenly—alternating a few turns on each side so the flange presses flat without cracking the plastic elbow.
4. Reseal the Top Sink Flange with Plumber's Putty
Sometimes water bypasses the sink drain opening entirely, seeping between the stainless steel sink basin and the top mounting lip before sliding silently down the outside of the cylinder. If you feel moisture at the very top collar during your towel test, the plumber's putty has dried out and crumbled.
- Disconnect the power cord and detach the side discharge elbow from the household P-trap.
- Support the bottom of the heavy disposal with one hand and insert a screwdriver or hex wrench into one of the three ears on the lower mounting ring, turning it counterclockwise to unlock and lower the unit.
- Check the three mounting screws above; if they are merely loose, tighten them evenly with a screwdriver to compress the existing seal.
- If the seal is crumbly, loosen the three mounting screws, pop the snap ring off with a flathead screwdriver, and lift the top flange out of the sink hole.
- Scrape away old putty, roll a fresh rope of plumber's putty as thick as a pencil, wrap it under the flange lip, press it firmly into the sink opening, and reassemble the mounting ring and disposal.
5. Check the Lower Reset Button and Bottom Plate
If the top flange, dishwasher hose, and side discharge elbow remain bone dry during your dye test, yet dyed water drips directly from the bottom plastic cover or out of the small square reset button hole, the internal lower shaft seal has failed.
- Ensure the electrical cord is unplugged from the wall before inspecting the bottom plate.
- Shine your flashlight directly onto the bottom face of the disposal where the red reset button and the center hex wrench hole sit.
- Look for orange rust trails, crusty white mineral tracks, or active water droplets emerging from the seams of the plastic end cap or around the reset switch.
- Inside the unit, a watertight seal separates the wet grinding chamber above from the electric motor windings below. When grit and age wear through that internal seal, water pours straight through the motor cavity.
- Because internal motor seals are factory-pressed and not sold as serviceable homeowner parts, water coming directly out of the reset button or motor vents means the unit itself must be replaced. Watch for other signs your garbage disposal is dying to see if age has caught up with the motor.
6. Inspect the Outer Casing for Hairline Cracks
Occasionally, water leaks from the lower half of the housing not through the motor vents, but through a split in the plastic or metal shell itself. Heavy bones, fruit pits, or metal silverware accidentally dropped into the chamber can jam against the impellers and crack the internal grind liner.
- With the power disconnected, run your fingers carefully around the lower bulge of the exterior casing.
- Look and feel for vertical hairline fractures in the plastic shroud or bubbling corrosion spots pushing through the outer shell.
- Open the cabinet doors, turn on the cold faucet with the stopper removed, and watch the side of the casing while water flows through.
- If water weeps directly through a split in the body wall, stop using the unit immediately; water inside the outer jacket can short out the electrical wiring harness.
- A cracked housing cannot be safely patched with epoxy or tape due to high centrifugal pressure during grinding, so replacement is the only safe fix.
Quick Reference: Garbage Disposal Leak Locations
| Where Water Appears First | Likely Culprit | DIY Repair vs. Replace Unit |
|---|---|---|
| Top collar directly under sink | Dried plumber's putty or loose mounting screws | DIY Repair ($3–$8 for plumber's putty) |
| Upper side nipple (small hose) | Loose dishwasher hose clamp or split rubber boot | DIY Repair ($2–$15 for clamp or adapter) |
| Lower side pipe (curved elbow) | Flattened rubber discharge gasket or loose flange bolts | DIY Repair ($3–$10 for new rubber gasket) |
| Bottom reset button or air vents | Failed internal lower shaft and motor seal | Replace Unit ($100–$250+ for new disposal, varies by model) |
| Side or bottom outer casing wall | Cracked internal grinding chamber from jammed debris | Replace Unit ($100–$250+ for new disposal, varies by model) |
When to Call a Pro
Tightening a hose clamp, swapping a rubber tailpiece gasket, or applying fresh plumber's putty are straightforward weekend projects that cost less than $15 in basic hardware store supplies. However, you should stop and call a professional if the disposal is hardwired directly into your home's electrical system without a plug, if the leak has soaked an under-sink electrical outlet, or if corroded galvanized drain pipes under the sink crumble when you try to loosen the P-trap.
Replacing an entire garbage disposal typically costs between $200 and $550 including the new unit and installation labor, though pricing varies by area and model horsepower. If your internal seal has blown out and you would rather skip the heavy lifting under a cramped cabinet, True Appliance Repair can match you with a local pro for kitchen appliance repair or help you schedule a local technician to get your kitchen sink back in working order safely.
FAQ
Why is my garbage disposal leaking from the reset button?
Water dripping directly out of the red reset button means the internal watertight seal between the upper grinding chamber and the lower electric motor has worn out. Once water enters the motor housing, it follows gravity out through the lowest opening—the reset switch hole. Because this internal seal cannot be replaced separately, you will need to replace the garbage disposal.
Can I still use my sink if the garbage disposal is leaking from the bottom?
You should avoid running water down the disposal side of the sink until the leak is fixed, and you must unplug the unit immediately so water does not cause an electrical short. If you have a double-bowl sink, check how the plumbing is connected underneath; if both drains share a central tee before the P-trap, you can usually use the non-disposal bowl sparingly while keeping a bucket under the leaking unit.
How long does a garbage disposal usually last before the bottom seal fails?
Most household garbage disposals last between 8 and 12 years with normal kitchen use. Units that frequently grind acidic foods like citrus peels, harsh chemical drain cleaners, or bleach tend to suffer premature rubber seal failure in as little as 5 to 6 years because chemicals dry out and crack the internal shaft gasket.
Is it cheaper to repair a leaking garbage disposal or replace it?
If the leak is coming from an external connection—like the top sink flange, dishwasher hose, or side discharge pipe—repairing it yourself costs under $15 for fresh putty or a new gasket. If the leak is coming through the bottom motor vents or reset button due to a failed internal seal, replacement is the only option since rebuilding the sealed motor assembly costs more than buying a brand-new unit.