
A weak, tiny flame on your gas range turns boiling a pot of water into an endless waiting game. If your burners light up but produce only a fraction of their normal heat output, the culprit is usually a simple gas flow or airflow restriction. Before you assume you need a brand-new range, try these safe, practical troubleshooting steps to restore full cooking power.
Clear Clogged Burner Ports and Orifices
The most frequent cause of a weak flame is debris blocking the tiny openings where gas exits the burner head. Boiled-over pasta water, grease splatters, and burnt seasonings bake into a hard crust that chokes off gas delivery.
- Shut off power and cool the range: Disconnect your range power cord or switch off the cooktop breaker, and make sure all burners are completely cool to the touch.
- Remove burner grates and caps: Lift the cast iron grates and pull off the round burner caps.
- Inspect the burner ports: Look around the perimeter of the burner ring for plugged slots or holes.
- Unclog with a fine metal tool: Use a straightened metal paperclip, safety pin, or fine sewing needle to gently push debris through each port. Avoid wooden toothpicks because they easily snap off inside the orifice and create an even worse blockage.
- Clean the brass gas jet: In the center of the burner base sits a tiny brass orifice. Carefully clear any lint or residue from this opening without scratching or enlarging the hole.
If you also notice color changes in your flame after clearing debris, see our guide on why your gas stove flame is yellow to fine-tune your burner's air-to-gas ratio.
Dry Out Moisture from Recent Spill Cleanups
If your flame suddenly became low or uneven right after deep cleaning your stove, trapped water is almost certainly suffocating the gas flow. Liquid soap and rinse water easily pool inside the narrow burner channels and prevent gas from reaching the ignition points.
- Lift the burner components: Remove the caps and bases from any affected burners.
- Wipe down excess water: Use a clean, dry microfiber cloth to soak up pooled moisture in the burner recesses.
- Air dry or use low heat: Allow the burner parts to air dry on a towel for 30 to 45 minutes. You can speed up the process by using a handheld hair dryer on medium heat across the burner base for two minutes.
- Oven drying method: Alternatively, place removable cast-metal burner caps in an oven heated to 200°F for 15 minutes to evaporate all internal moisture.
- Test the flame: Reassemble the dry parts and ignite the burner. The flame should snap back to its normal height and deep blue color within a few seconds.
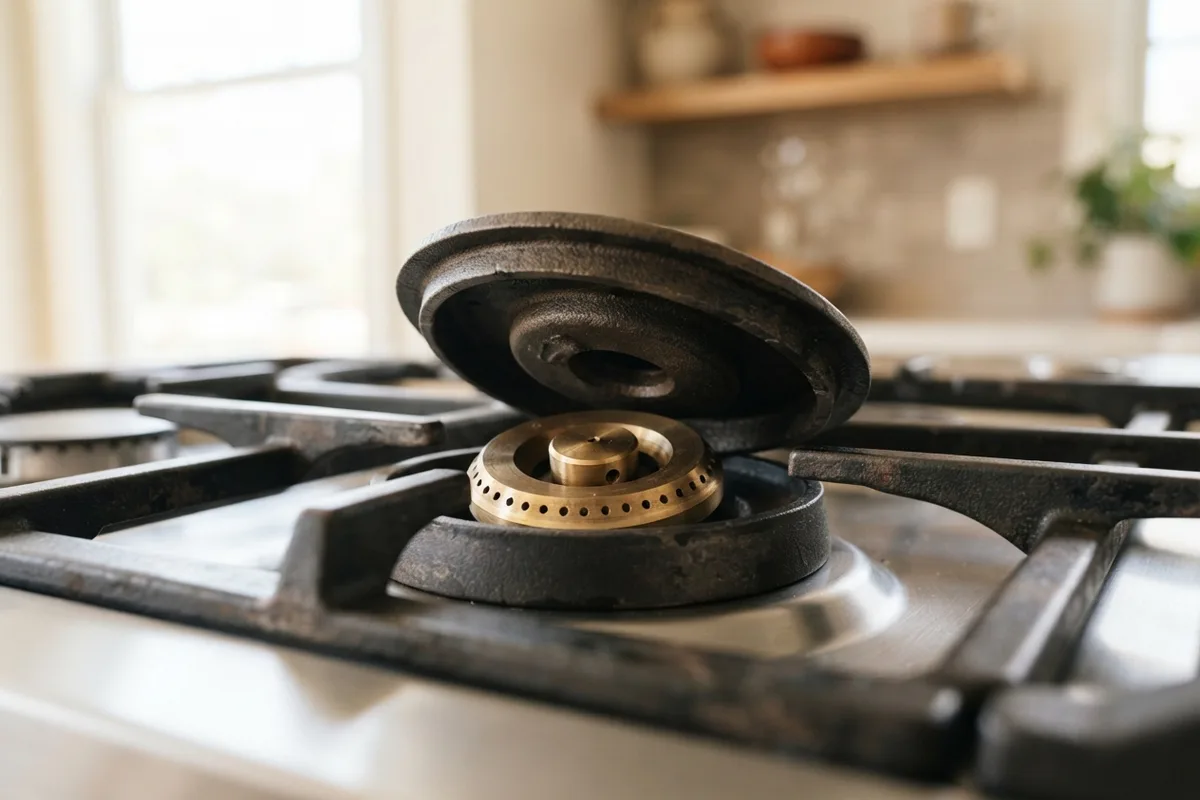
Realign the Burner Cap and Base Correctly
A burner cap that sits slightly crooked restricts the gas flow on one side while dumping excess gas on the other. This misalignment leads to a weak, sputtering flame on the restricted side and poor overall cooking performance.
- Let the cooktop cool completely: Never adjust burner caps while the metal is hot.
- Check the seating notches: Most modern cooktop burners feature small alignment pins or underside grooves designed to lock onto matching tabs on the range top.
- Seat the cap flush: Place the burner cap directly over the burner head and gently rotate it until you feel it drop firmly into its indexed groove.
- Check for wobble: Lightly press your fingertips along the edges of the cap. If it rocks, tilts, or slides freely, it is not properly seated.
- Test the perimeter: Turn on the burner. The flame ring should be uniform, stable, and even all the way around the burner circumference without lifting or fluttering.
If your igniter clicks repeatedly while trying to light the misaligned burner, read our checklist for a gas stove burner not lighting to address ignition switch problems.
Reset the Gas Line Regulator Safety Valve
Modern gas ranges and supply lines feature internal regulators and excess-flow safety valves designed to trip if they detect a sudden surge or drop in line pressure. When tripped, these valves drop gas pressure down to a trickle, resulting in low flames across every single burner.
- Turn off all range knobs: Ensure every burner knob and the oven control are set to the full "OFF" position.
- Shut off the gas supply: Locate the dedicated gas shut-off valve behind the stove or in an adjacent cabinet and rotate the lever perpendicular to the pipe to turn it off.
- Wait five minutes: Allow pressure inside the internal manifold and flexible line to equalize completely.
- Reopen the gas valve slowly: Turn the shut-off valve handle very slowly back to the parallel (open) position. Opening the valve too fast can instantly re-trip the excess-flow safety mechanism.
- Light one burner first: Turn on your primary cooktop burner. Allow the line to purge any small air pockets for 3 to 5 seconds until a robust, steady flame establishes itself.
Check the Main Gas Shut-Off Valve Position
A partially closed manual shut-off valve starves your cooktop of the volume it needs to run multiple burners simultaneously. If a single burner looks fine on low heat but shrinks when turned to high, or drops when a second burner is ignited, a restricted supply valve is a common cause.
- Pull the range out safely: Gently slide your stove away from the wall, taking care not to pinch, bend, or overextend the flexible yellow corrugated gas connector.
- Inspect the handle angle: Look at the manual shut-off ball valve located on the rigid gas supply pipe. The handle must point directly in line with the pipe run for 100% full flow.
- Correct partial turns: If the handle sits at a 45-degree angle (often knocked during cleaning or storage), rotate it so it aligns completely parallel with the pipe.
- Inspect the flexible connector: Check that the flexible supply hose has no tight kinks, sharp bends, or heavy objects pressing against it.
- Perform a multi-burner load test: Turn on two large burners at the same time. If both maintain full flame height without shrinking, your volume restriction is solved.
Gas Stove Flame Troubleshooting Guide
Use this quick-reference table to match your flame symptoms with the most likely cause and recommended DIY action:
| Symptom | Most Likely Cause | Quick Solution |
|---|---|---|
| One burner has tiny, patchy flames | Clogged burner ports or gas jet | Clean orifice with a straight pin or paperclip |
| Flame clicks, pops, and sputters | Trapped moisture from cleaning | Dry burner head thoroughly with a hair dryer |
| Flame is high on one side, low on the other | Tilted or misaligned burner cap | Re-seat the cap flush into its alignment tabs |
| All burners produce weak flames together | Tripped line regulator or low supply | Reset gas valve slowly; check main shut-off handle |
| Flame drops when another burner turns on | Partially closed valve or undersized pipe | Fully open gas supply valve; inspect line for kinks |
When to Call a Pro
Most low-flame issues resolve easily with thorough cleaning, drying, and proper cap alignment. However, hands-on work with gas appliances requires strict caution. You should stop troubleshooting and call a professional technician if:
- You smell strong raw gas (rotten egg odor) anywhere around the range or supply line.
- All burners remain weak after resetting the shut-off valve, pointing to a failed appliance pressure regulator or whole-home gas delivery issue.
- You suspect an internal gas manifold leak or broken control valve stem.
- You need a conversion between natural gas and liquid propane (LP), which requires specific orifice sizing and regulator adjustments.
For complex internal component replacements or gas supply diagnostics, True Appliance Repair can match you with an experienced local technician to get your kitchen running safely. Professional repair costs for cooktop regulators and valves typically range from $150 to $350, depending on your region and appliance model.
Frequently Asked Questions
Why is only one burner on my gas stove weak while the others work fine?
When a single burner produces a low flame, the issue is localized to that specific burner assembly. The most common causes are clogged port holes around the ring, a dirty brass jet orifice, trapped water from recent cleaning, or a misaligned burner cap. The main gas line and regulator are working properly if the remaining burners burn strong.
Can I use a wooden toothpick to clean gas stove burner holes?
No, you should never use wooden toothpicks to clean burner ports or gas orifices. Toothpicks break easily under pressure, and the tip can lodge firmly inside the tiny gas jet. Removing a broken piece of wood from an orifice often requires dismantling the entire burner base. Always use an unbent metal paperclip, safety pin, or fine sewing needle.
Why does my gas flame get smaller when I turn on the oven?
If turning on the oven causes your cooktop flames to shrink, your range is experiencing a gas volume drop. This usually indicates a partially closed main shut-off valve behind the stove, a kinked flexible gas line, or an undersized supply line that cannot deliver sufficient cubic feet per hour (CFH) when multiple components draw gas at once.
How high should a normal gas stove flame be on high heat?
A standard residential gas stove burner on its highest setting typically produces a steady, well-defined blue cone flame measuring approximately 1 to 1.5 inches in height. The flame should sit evenly on the burner base without lifting, hissing loudly, or showing excessive yellow or orange tips.