
Pulling a sheet of holiday cookies out of the oven only to find the back row scorched and the front row still pale dough is one of the most frustrating kitchen moments. When your oven is baking unevenly, the culprit is usually restricted airflow, a shifted temperature sensor, or a worn door seal rather than a catastrophic breakdown. By working through six simple checks—starting with zero-cost pan and rack adjustments and moving into safe hardware inspections—you can eliminate hot spots and get back to reliable, golden-brown results.
Safety First: Before inspecting or touching any internal oven components, Heating elements, or sensors, always unplug the range from the wall outlet or switch off its dedicated circuit breaker at your electrical panel. For gas ranges, also locate the manual gas shutoff valve behind the unit and turn it to the closed position if you need to move the appliance or inspect the burner area. Allow the oven cavity to cool completely before placing your hands inside.
1. Reposition Oven Racks and Stagger Bakeware
Airflow is the hidden engine of even baking. Even a brand-new range will produce hot spots if baking sheets are crowded against the oven walls or stacked directly on top of one another, blocking rising heat.
- Center your primary rack: Move your main baking rack to the true middle position (usually slot 3 out of 5 or 6) while the oven is cool. Radiant heat bounces off the top and bottom walls, so the center slot gives food the most balanced exposure.
- Leave a two-inch perimeter: Measure at least two inches of open space between your baking pans and the front, back, and side walls of the oven cavity so heated air can circulate freely.
- Stagger multi-rack pans: If you must bake on two racks at once, place the racks in the upper-middle and lower-middle positions. Offset the pans so one sits toward the front left and the other sits toward the back right—never directly above one another.
- Rotate halfway through: Until you resolve any underlying hardware issues, rotate your pans 180 degrees and swap top-to-bottom racks halfway through the baking time.
2. Switch From Dark or Glass Pans to Light Aluminum
Sometimes the oven isn't the problem at all—your bakeware is changing how heat transfers into the food. Dark nonstick coatings, cast iron, and glass dishes absorb radiant heat rapidly, causing edges and bottoms to brown much faster than the center.
- Test with heavy-gauge, light-colored aluminum: Light, shiny metal reflects excess radiant heat rather than absorbing it, allowing cakes, cookies, and biscuits to rise evenly before the bottoms crust over.
- Drop the temperature for glass or dark metal: If a recipe requires a glass casserole dish or a dark nonstick pan, reduce your target oven temperature by 25°F and check for doneness a few minutes early.
- Skip the aluminum foil liner: Never line the bottom floor of your oven or cover an entire rack with aluminum foil to catch drips. Foil acts as a heat shield and reflector, trapping intense heat underneath and starving the upper cavity of warm air. In gas ovens, foil on the floor can also block vital air vents and combustion slots.
- Clean baked-on grease off old pans: A shiny aluminum sheet that has turned dark brown from polymerized oil behaves just like a dark nonstick pan. Scrub old sheets with baking soda paste to restore their reflective surface.
3. Test and Calibrate the Temperature Sensor Probe
Inside the upper rear corner of almost every modern oven is a thin metal rod called the temperature sensor probe (or thermistor). If this probe gets bumped by a heavy roasting pan and touches the metal oven wall, it reads the wall temperature instead of the air temperature, causing short-cycling and uneven baking.
- Disconnect power: Turn off the oven breaker at the main electrical panel and make sure the interior is cool.
- Inspect the sensor position: Locate the pencil-sized metal cylinder sticking out of the back wall (usually three to six inches long). Check that it extends straight out into the air and is not bent against the back or side wall.
- Check the mounting bracket: Gently wiggle the small metal flange holding the sensor to the wall. If the screws are loose, tighten them with a Phillips or nut driver so the probe sits rigid.
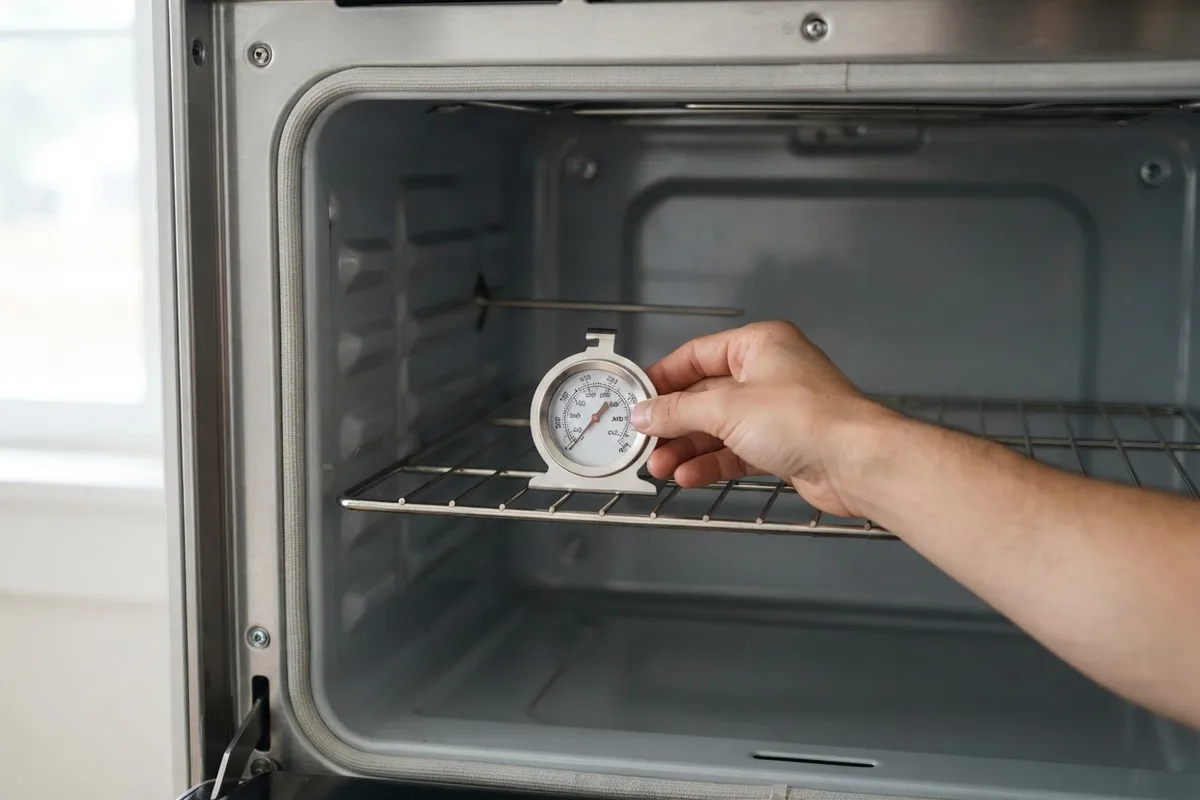
- Verify accuracy with an oven thermometer: Restore power, hang an inexpensive analog dial thermometer in the exact center of the middle rack, and preheat to 350°F. Let the oven cycle for 20 minutes after the preheat beep.
- Adjust the calibration offset: If the thermometer reads within 15 to 25 degrees of 350°F, you can usually recalibrate the digital control board through the settings menu (check your owner's manual for the exact key press). If the temperature swings wildly by 50 degrees or more, the sensor probe itself may need replacement.
4. Inspect Electric Heating Elements or Gas Burners
An electric oven relies on both the lower bake element and the upper broil element cycling on and off to maintain an even temperature envelope. In a gas oven, a single burner tube beneath the floor distributes flames through heat spreader plates. When one of these heat sources weakens on one side, food bakes crookedly.
- Perform a visual glow test (electric ovens): With the racks removed, turn the oven to Bake at 400°F and look through the window after five minutes (if your model has a hidden bake element under the floor, listen and watch for uneven floor heating or skip to step 3). The exposed tubular element should glow a uniform cherry red across both sides.
- Inspect for blisters and pits (electric ovens): Turn off the oven, switch off the circuit breaker, and wait until the element is completely cool. Run a flashlight along the metal sheath. Any dark spots, tiny pinholes, raised blisters, or white powder buildup mean the internal wire is failing and the element needs replacement.
- Check the gas burner flame (gas ovens): Remove the bottom oven rack and, if your manual permits simple lift-out removal, lift out the metal oven floor panel to view the burner tube and baffle plate. Turn the oven to Bake and watch the igniter and flame. The flame should spread cleanly along both sides of the burner tube with steady blue cones.
- Clean blocked burner ports: Turn the oven off, shut off the gas and power, and let the burner cool. If one side of the burner had no flame or lazy yellow tips, gently brush baked-on crumbs out of the tiny portholes using an old toothbrush or a sewing needle—never a wooden toothpick, which can snap off inside the port.
5. Seal Heat Leaks Around the Door Gasket and Hinges
If the back of your oven is always hotter than the front, cool kitchen air is likely slipping in around the door perimeter. When heat escapes out the front, the rear sensor compensates by firing the heating element harder, scorching the back of your pan while the front stays pale. For a deeper walkthrough on sealing the front perimeter, check out our guide on why your oven door is leaking heat.
- Run the paper strip test: Open the cool oven door, place a standard sheet of printer paper against the frame, and close the door on it. Pull the paper out. You should feel firm, even drag. Repeat this every six inches around all four sides of the door.
- Inspect the fiberglass or silicone gasket: Run your fingers along the braided mesh or rubber seal framing the door opening. Look for flattened spots, frayed fiberglass, hardened grease crusts, or sections where the retaining clips have popped out of their holes.
- Wipe away food debris: Clean the gasket gently with a warm, damp microfiber cloth and a drop of mild dish soap. Avoid harsh degreasers or abrasive pads, which shred braided seals.
- Check the door hinges: Open the door to its broil stop position (cracked open a few inches) and let go. If the door drops loosely or sits crooked when closed, the hinge springs have stretched out and won't pull the door tight against the seal.
6. Check the Convection Fan Blade and Motor
If you use a convection setting (or if your oven runs its circulation fan automatically during standard bake cycles to balance temperatures), a sluggish or jammed fan will cause immediate hot and cold zones.
- Listen and watch during preheat: Turn the oven to Convection Bake at 350°F. Look through the glass window at the circular baffle in the center of the back wall. The fan blade should start spinning smoothly—note that many models only spin the fan once the door is closed.
- Disconnect power at the breaker: Switch off the circuit breaker and let the oven cool down completely before opening the door to inspect the fan.
- Check for physical obstructions: Shine a flashlight through the rear fan cover vents. Make sure loose aluminum foil, parchment paper scraps, or heavy grease buildup haven't wedged against the metal blades.
- Test the fan spin by hand: If the blades are accessible or if you can remove the three or four mounting screws on the fan baffle cover, gently spin the fan blade with your finger. It should glide freely without grinding, wobbling, or scraping the housing. If the motor shaft feels stiff or seized, the convection fan motor assembly requires replacement.
Quick-Reference Guide: Uneven Baking Symptoms & Typical Costs
| Baking Symptom | Most Likely Cause | DIY vs. Pro | Typical US Repair Range* |
|---|---|---|---|
| Bottoms burn before tops cook | Dark pans, rack too low, or foil on oven floor | Easy DIY | $0 – $30 (new aluminum pan) |
| Front of pan pale, back burned | Worn door gasket or weak door hinges | DIY / Pro | $40 – $220 |
| Left side cooks faster than right | Blistered bake element or clogged gas burner ports | DIY / Pro | $30 – $250 |
| Everything overcooks or undercooks | Shifted or faulty temperature sensor probe | DIY / Pro | $25 – $180 |
| Uneven browning on multi-rack bakes | Blocked airflow or failed convection fan motor | Pro | $150 – $350 |
Note: Prices reflect broad typical US ranges combining parts and labor; actual costs vary by area, brand, and model.
When to Call a Pro
Changing how you place your racks, swapping out dark bakeware, cleaning a dirty gasket, and recalibrating your digital offset are all safe tasks any homeowner can finish in an afternoon. However, you should stop and call a professional technician if you smell raw gas, notice scorching or melted wire insulation behind the access panels, find a hidden bake element that has shorted out beneath the oven floor, or diagnose a failed electronic control board.
If your range is more than 10 to 15 years old and facing a major control board or gas valve repair, review our 7 signs your oven is dying to decide whether fixing it makes financial sense. When you are ready for an expert diagnosis, True Appliance Repair can match you with an independent local pro for reliable oven and stove repair.
FAQ
Why is my oven burning the bottom of food while the top is still raw?
Burning on the bottom usually happens when heat is concentrated too close to the base of your pan. Make sure your rack is in the center position rather than the lowest slot, remove any aluminum foil lining the oven floor, and switch from dark nonstick or glass pans to light, shiny aluminum sheets. In electric ovens, a failed upper broil element can also force the lower bake element to work overtime, scorching the bottom of your food.
Does a weak gas oven igniter cause uneven baking?
Yes, a weak igniter is one of the most common culprits in gas ovens. As a glow bar igniter ages, it takes too long to draw enough electrical current to open the gas safety valve, causing the oven temperature to drop far below your target before firing back up in a long, intense burst. This wide temperature rollercoaster burns the edges of baked goods while leaving the centers gummy.
Where should I place my oven rack for the most even baking?
For single-rack baking—including cookies, layer cakes, biscuits, and casseroles—always place the rack in the exact center slot of the oven cavity. This keeps the food equidistant from both the bottom heat source and the top ceiling where heat reflects downward. Only move the rack lower for tall roasts (like a whole turkey) so the top of the meat stays centered in the oven.
How often should I check my oven temperature accuracy?
It is smart to test your oven temperature with a standalone hanging thermometer once a year, ideally in early autumn before holiday baking season kicks into high gear. Everyday vibrations from opening and closing the door, high-heat cleaning cycles, and accidental bumps with roasting pans can slowly shift the sensor probe's accuracy over time.