
When you walk past your range and feel a blast of hot air, or notice the control knobs getting uncomfortably warm, your oven door is likely losing its seal. An oven door leaking heat forces the heating elements to work overtime, drives up utility bills, and leaves your holiday roasts and cookies undercooked in the middle. The good news is that most heat leaks come down to a dirty gasket, a shifted rack, or fatigued door hinges that you can inspect and fix yourself in under an hour.
Before starting any hands-on inspection or repair, turn the oven completely off, let every surface cool to room temperature, and unplug the range or flip its circuit breaker at the electrical panel. If you have a gas range, avoid moving the unit aggressively so you do not strain the gas connector line.
1. Run the Dollar Bill Test Around the Door
Before buying parts, pinpoint exactly where hot air is escaping. A visual check often misses small gaps along the bottom corners or top latch area, especially when the metal frame expands during preheating.
- Make sure the oven is completely cool and turned off at the breaker.
- Open the oven door and place a crisp dollar bill or a strip of standard printer paper flat against the front frame.
- Close the oven door fully so it traps the paper between the rubber or fiberglass gasket and the metal oven face.
- Gently tug the paper straight out. You should feel noticeable, even drag against the paper.
- Repeat this test every four inches around all four sides of the door.
If the paper slides out with zero resistance in one or two spots, you have found your heat leak. Pay special attention to the top center near the lock latch and the bottom left and right corners where hinges pull the door tight.
2. Clean Baked-On Grease Off the Oven Gasket
A crusty layer of caramelized grease, spilled casserole splatters, or burnt sugar on the door seal acts like a tiny wedge. Even a sixteenth of an inch of hardened food debris prevents the braided fiberglass gasket from compressing flat against the metal frame.
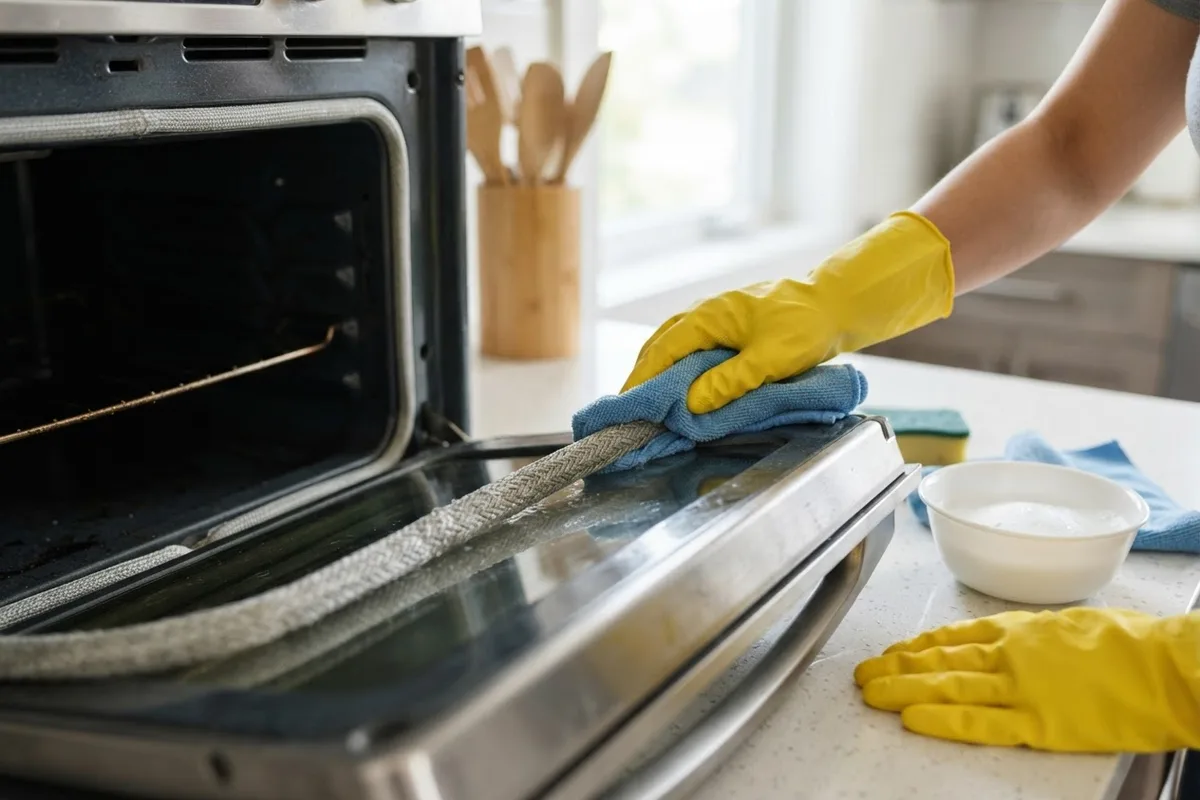
- Mix a solution of warm water and a few drops of mild dish soap in a small bowl. For stubborn grease, make a thin paste of baking soda and water.
- Dip a soft microfiber cloth or non-scratch sponge into the soapy water and wring it out until barely damp—never soak a fiberglass gasket.
- Gently wipe the entire perimeter of the gasket, rolling your fingers lightly to clean the creases without stretching the braided fibers.
- Wipe the corresponding metal contact strip on the oven cabinet face where the gasket rests.
- Dry both surfaces thoroughly with a clean towel and let the gasket air-dry for an hour before heating the oven.
Avoid harsh abrasive scouring pads or caustic aerosol oven cleaners on the gasket, as they break down the flexible fiberglass weave and cause it to fray.
3. Reseat or Replace a Worn Oven Door Gasket
Over years of opening, closing, and high-heat baking cycles, the flexible oven door gasket flattens out, turns brittle, or pulls loose from its mounting holes. Checking the gasket is one of the smartest steps when reviewing 7 signs your oven is dying, because a simple seal swap often makes an older unit perform like new.
- Inspect the entire length of the gasket for frayed braiding, permanent flat spots, melted sections, or torn rubber.
- If the gasket is intact but sagging, look closely at the small metal retaining clips or barbed pins along its back edge and press them firmly back into the keyhole slots around the door liner.
- If the gasket is torn or permanently flattened, order an exact replacement seal using your range's model number (typically $30 to $85 for the part, though prices vary by model).
- Starting at the top center, pull the old retaining pins straight out of the door holes. If your model traps the gasket behind the inner door panel, remove the perimeter screws while supporting the glass.
- Push the new gasket's pins into the holes one by one without stretching the material, working evenly around the corners so it doesn't bunch up.
4. Check for Warped Racks or Oversized Bakeware
Sometimes the door seal and hinges are in great shape, but something inside the oven cavity is physically pushing the inner glass outward. Even a slight bump against the inner door liner creates a quarter-inch gap along the top edge.
- Open the oven door and verify that every oven rack is installed with the upward-curved stop guard facing the back wall of the oven.
- Slide each rack all the way back until it rests against the rear stops. A rack installed backward will stick out an extra inch and hold the door ajar.
- Check heavy baking stones, cast-iron Dutch ovens, or oversized half-sheet pans to ensure they are centered and not touching the front glass when the door closes.
- Remove any aluminum foil wrapped around the racks or lining the bottom floor of the oven. Foil bunches up near the front lip, blocks airflow vents, and reflects intense radiant heat right into the door seal.
- Sight down the front edge of each wire rack to make sure it has not warped from heavy loads.
5. Inspect and Replace Weak Oven Door Hinges
Oven doors rely on heavy-duty spring hinges to pull the door tightly against the cabinet frame. When those springs fatigue or a hinge arm bends—often from someone leaning on the open door or dropping it—the top of the door tilts outward by a fraction of an inch.
- Open the door slowly to the broil-stop position (usually cracked open about four inches). If the door drops past this point or flops all the way open without resistance, the hinge springs are worn out.
- Look into the hinge slots on the lower left and right corners of the oven opening with a flashlight to check for bent metal arms, cracked rollers, or broken spring coils.
- Make sure the hinge receivers inside the oven frame are free of fallen food debris that could block the hinge from seating fully.
- To replace worn hinges, open the door fully and flip the small locking latches forward over the hinge arms.
- Lift the door up and out at roughly a 45-degree angle, set it padded-side down on a blanket, and swap out both hinges as a matched pair so tension stays balanced.
Always replace both the left and right hinges at the same time; pairing one strong new spring with one weak old spring can twist the door frame.
6. Check the Inner Door Glass and Baffle Alignment
Modern oven doors aren't solid slabs—they are engineered with two to four panes of heat-reflective glass separated by air channels. Cool air enters vents at the bottom of the door, rises between the panes to absorb heat, and exits through vents at the top. If a glass pack shifts or the vents clog, heat radiates outward.
- With the oven off and cool, shine a flashlight through the front window and inspect the inner glass panes. None of the internal panes should be tilted, cracked, or rattling.
- Inspect the inner glass retainer frame for loose perimeter screws. Tighten any loose screws snugly by hand with a Phillips screwdriver—do not overtighten against glass.
- Check the slotted air vents along the very top and bottom edges of the oven door.
- Use a dry paintbrush and a vacuum crevice attachment to clear out dust bunnies, crumbs, or pet hair blocking the cooling channel.
- Never block the top door vents with wet dish towels hanging over the handle, as trapped heat can overheat the electronic control board above.
Quick Troubleshooting & Cost Guide: Oven Door Heat Leaks
Note: Typical US cost ranges below are broad estimates and vary by region, appliance brand, and model.
| Symptom You Notice | Most Likely Cause | Typical DIY Part Cost | Typical Pro Repair Range |
|---|---|---|---|
| Hot air puffing from one small section | Baked-on grease or loose gasket pin | $0 (cleaning only) | $90 – $150 (service call) |
| Gasket is frayed, brittle, or flattened | Worn fiberglass/rubber door seal | $30 – $85 | $140 – $250 |
| Door sags at the top or drops open fast | Fatigued or bent door hinge springs | $50 – $130 (pair) | $175 – $320 |
| Door stops short of closing by 1/2 inch | Reversed oven rack or shifted hinge lock | $0 (adjustment) | $90 – $150 |
| Intense heat radiating through window | Cracked or shifted inner heat-shield glass | $75 – $180 | $200 – $375 |
When to Call a Pro
Cleaning a greasy seal, flipping a reversed rack, and snapping a pin-style gasket into place are straightforward Saturday projects for most homeowners. However, you should stop and call a professional technician if the oven door frame itself is warped, if replacing the gasket or hinges requires disassembling a heavy multi-pane glass door pack with high-tension springs, or if leaking heat has already damaged the upper electronic control board or melted internal wiring.
Additionally, if you ever notice a gas odor or hear an unusual sound near the burner tubing while inspecting your range, consult our guide on why your gas stove is making a hissing noise and step away if you suspect a gas leak. When a repair goes beyond simple DIY adjustments, True Appliance Repair can connect you with a local pro for oven and stove repair to get your kitchen running safely before the busy baking season.
FAQ
Is it safe to use an oven if the door is leaking heat?
Using an oven with a heat leak is not recommended. Escaping superheated air can scorch adjacent wooden kitchen cabinets, melt plastic control knobs, and overheat the sensitive electronic control board mounted above the door. It also creates a burn hazard on the exterior handle and wastes significant electricity or gas.
Can I use high-heat silicone or glue to fix a loose oven gasket?
Avoid using standard household glues or hardware-store silicone on an oven door gasket unless the adhesive is explicitly rated as food-safe for temperatures above 500°F to 600°F. Most residential oven gaskets are designed to be held mechanically by metal retaining clips, pins, or the inner door liner, so replacing a stretched gasket is safer and longer-lasting than gluing it.
Why is heat coming out of the top of my oven door even with a new gasket?
A gentle stream of warm air rising from the slotted vents along the top edge of the door is normal on most modern ranges. Ovens use convection cooling channels inside the door and exhaust vents near the back or top to keep the outer glass and electronics from overheating. However, if the air feels scorching hot or escapes around the sides where the gasket touches the frame, the door hinges likely need replacement.
Does the self-clean cycle ruin oven door gaskets and hinges?
Running the high-heat self-clean cycle heats the oven cavity to roughly 800°F to 900°F for several hours, which accelerates wear on the braided fiberglass gasket and weakens hinge springs over time. Wiping spills promptly with baking soda and water instead of using self-clean will help your door seal last years longer.