
You set the oven to broil expecting intense, direct heat to sear a steak or brown a casserole, only to find the top heating element remains completely cold. A malfunctioning broiler ruins dinner plans and signals a break in your kitchen range's heating circuit. Whether you own an electric range with a standard broil element or a gas oven with a top igniter, troubleshooting the issue is often straightforward.
Before touching any internal component, prioritize safety. Unplug the range from the wall outlet or switch off the dedicated circuit breaker in your home's main electrical panel. For gas ranges, turn off the manual gas shutoff valve behind the appliance before inspecting internal parts. If your lower baking functions normally while the top broil function stays dark, one of five common failure points is usually responsible.
Inspect the Broil Element for Visible Damage
Electric ovens rely on a heavy-gauge heating element mounted directly to the top interior roof of the oven cavity. Over years of high-temperature cycles, thermal expansion and contraction weaken the metal sheath, leading to localized burnout.
To inspect the element safely:
- Ensure the oven is completely cool to the touch and disconnected from power.
- Open the oven door and locate the dark metal coiled element along the interior ceiling.
- Use a bright flashlight to examine the entire length of the tube for blistered metal, white ash deposits, visible cracks, or complete breaks in the coil.
- Check the mounting brackets and terminal posts at the rear wall. Loose mounting screws or scorched ceramic insulators near the rear terminal connections indicate severe electrical arcing.
If you observe any physical distortion, blistering, or broken metal, the element has failed internally and must be replaced. Electric broil elements cannot be repaired; installing a new coil restores proper high-heat radiation. If you recently noticed your oven slow to preheat, a deteriorating top element may have been failing gradually over time.
Test the Broil Element with a Multimeter
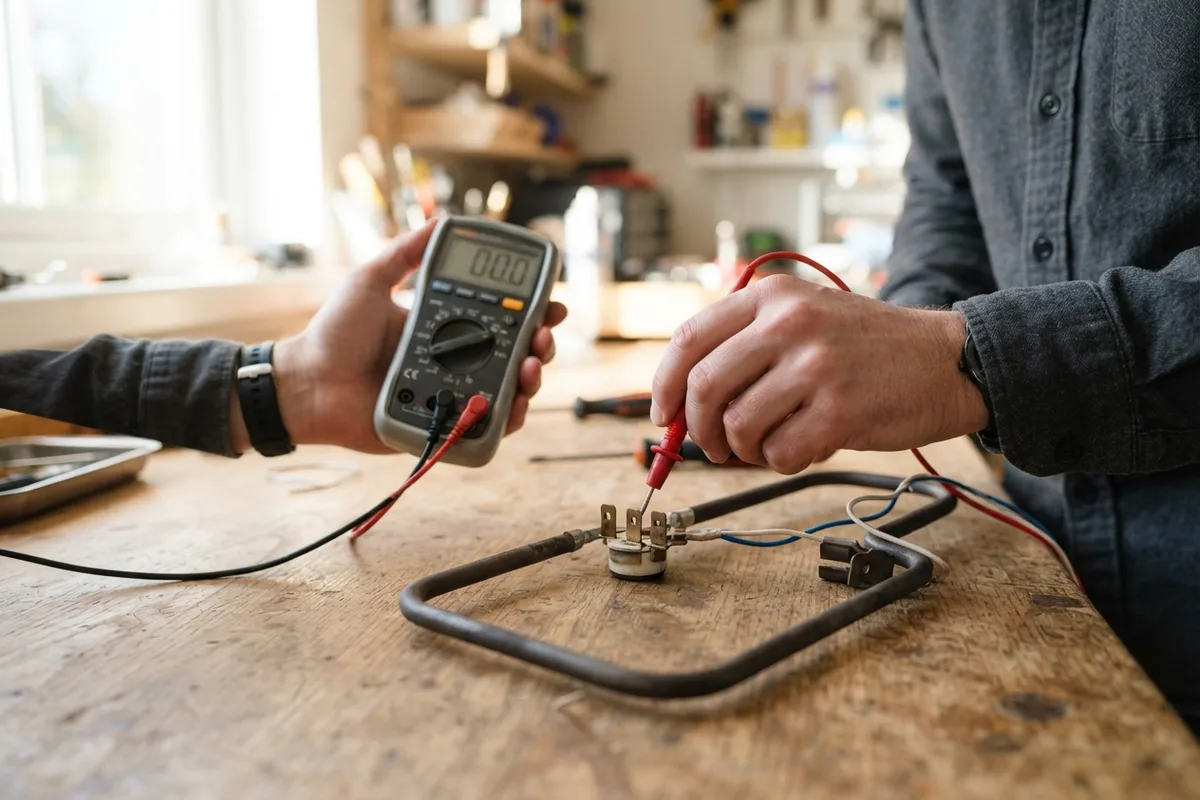
Even if a heating element looks structurally intact, the internal nickel-chromium resistance wire may have snapped without leaving an obvious external burn mark. Testing electrical continuity with a digital multimeter provides definitive proof of whether electricity can flow through the coil.
Step-by-step continuity test:
- Confirm the oven is unplugged or the circuit breaker is switched off.
- Remove the retaining screws holding the broil element to the top of the oven cavity using a nut driver or Phillips screwdriver.
- Gently pull the element forward a few inches to reveal the two spade terminals connected to the wiring harness.
- Carefully pull the wire connectors off the element terminals using needle-nose pliers, gripping the metal terminals rather than yanking the wire insulation. Label or tape the wires so they do not slip back through the rear cavity holes.
- Set your multimeter to the lowest ohms (Ω) setting or continuity mode.
- Touch one multimeter probe to each terminal post on the element.
A healthy electric broil element typically displays a resistance reading between 15 and 40 ohms. If the multimeter reads infinite resistance (O.L or open loop), the circuit is broken inside the element tube, confirming a dead element that requires replacement.
Check the Broil Igniter on Gas Ovens
Gas ranges use a dedicated broil igniter mounted near the top burner tube rather than an electric heating coil. When you select broil, the electronic control board sends current to the igniter. As the igniter heats up to a bright yellow-orange glow, its electrical resistance drops, triggering the gas valve to open and ignite the burner.
Troubleshooting a gas broil igniter:
- Disconnect the gas supply and unplug the range power cord.
- Inspect the igniter located above the top gas burner tube inside the oven cavity.
- Look closely at the gray silicon carbide glow bars. A cracked, chipped, or soot-covered igniter element will fail to draw sufficient current to open the gas safety valve.
- Plug the range back in temporarily (keeping hands away from electrical connections) and initiate a broil cycle while observing the top igniter through the glass door.
- If the igniter glows faint orange or remains completely dark after two minutes, it is not generating enough heat to trigger the safety valve.
Replacing a weak or burned-out gas igniter resolves most gas broiler failures. Always shut off the gas valve completely before removing mounting screws and uncoupling the igniter harness plug.
Inspect the Oven Temperature Sensor
The oven temperature sensor—a thin metallic probe protruding from the upper rear corner of the oven interior—monitors cavity temperature and communicates with the control board. If the sensor sends inaccurate resistance signals, the control board may instantly shut off power to the broil circuit, assuming the cavity has already reached target temperature.
How to inspect and test the sensor probe:
- Unplug the range from power.
- Locate the temperature probe in the top rear wall of the cavity.
- Unbolt the mounting flange screws and carefully pull the wire harness through the wall opening.
- Unplug the quick-connect plastic harness clip.
- Set your multimeter to measure resistance in ohms (Ω).
- Measure across the two wire terminals inside the sensor connector plug.
At standard room temperature (70°F / 21°C), a standard Resistance Temperature Detector (RTD) sensor should measure approximately 1,050 to 1,100 ohms. If your reading falls below 950 ohms or above 1,200 ohms at room temperature, the sensor is out of calibration and must be replaced. Integrating this test into your regular appliance maintenance checks prevents unexpected cooking disruptions during holiday meal preparation.
Verify Control Board Relays and Wiring
If the broil element or gas igniter and temperature sensor test fine, the issue lies within the power supply circuit or main electronic control board. The control board uses mechanical relays to send 240 volts to an electric broil element or 120 volts to a gas igniter circuit. Over time, internal relay contacts can pit, scorch, or burn out completely.
Checking wiring and control components:
- Ensure the appliance is completely unplugged or power is switched off at the breaker panel.
- Remove the rear access panel behind the control console to access the main circuit board.
- Perform a visual inspection of the circuit board, searching for blackened relay housing, charred copper traces, or swollen capacitors.
- Check wire harness connections between the control board and the broil element terminals. Look for melted wire insulation, loose spade connectors, or burnt terminal block connections.
Wiring harnesses with damaged insulation or burnt spade connectors must be trimmed and repaired with high-temperature insulated terminals. If the board shows charred relays or melted solder joints, the electronic control board requires replacement.
Broiler Troubleshooting Quick Reference
| Component | Visual Symptom | Multimeter Test Result | Recommended Solution |
|---|---|---|---|
| Electric Broil Element | Blisters, cracks, ash deposits | Infinite resistance (O.L) | Replace broil element |
| Gas Broil Igniter | Weak orange glow or dark | High resistance or open loop | Replace gas igniter |
| Temperature Sensor | No visible damage | Outside 1,050–1,100 Ω range at 70°F | Replace sensor probe |
| Thermal Fuse | Intact physical appearance | Infinite resistance (Open) | Replace thermal fuse |
| Control Board Relay | Charred relays, burn marks | Voltage not passing to element | Replace control board |
When to Call a Pro
While replacing a surface broil element or temperature sensor is a manageable DIY task for many homeowners, certain repairs present safety hazards that require expert intervention. Working with high-voltage 240V circuits, diagnosing main control boards, or working on gas supply lines and safety valves can cause severe injury or property damage if handled incorrectly.
If your troubleshooting indicates a failure inside the main electrical panel, a gas safety valve malfunction, a leak in the gas line, or a complex wiring harness short, stop work immediately and consult a professional. Typical broiler component replacement costs range between $120 and $350, depending on part availability, though exact pricing varies by area and appliance model.
When internal testing involves dangerous voltage or gas lines, True Appliance Repair can match you with a local appliance repair professional to inspect and restore your range safely. For broader household appliance issues, True Appliance Repair provides access to technicians nationwide.
FAQ
Why does my oven work on bake but not broil?
Bake and broil functions rely on separate heating circuits and individual components. Electric ovens use a bottom element for baking and a top element for broiling. Gas ovens utilize separate burners and igniters for top and bottom heat. If your bake cycle operates normally, the issue is isolated to the top broil element, top igniter, or the dedicated broil relay on the control board.
Can a blown thermal fuse prevent the broiler from working?
Yes. Many modern electric ranges feature an inline thermal fuse or high-limit thermostat mounted to the back or top exterior of the oven cavity. If the oven overheats—often during a self-cleaning cycle—the thermal fuse trips to cut power to the heating elements. On some models, a tripped thermal fuse disables the entire range, while on others, it specifically shuts down high-heat circuits like the broiler.
How do I know if my broil element is burned out or if it is the control board?
You can determine which part has failed by using a multimeter to test for continuity across the element terminals while the range is completely unplugged. A healthy broil element shows 15 to 40 ohms of resistance. If the element tests within normal range and wiring connections are intact, but no voltage reaches the element during operation, the control board relay or selector switch is defective.
Is it safe to use my oven if the broiler is not working?
If the broiler element is physically broken, cracked, or arcing sparks, do not turn on the oven. An arcing element can short out the control board or create an electrical hazard. However, if the broiler simply remains cold due to a dead element or faulty igniter, using the standard bake cycle is generally safe, provided there are no exposed bare wires or burning gas odors.