
A standard residential electric or gas oven should reach 350°F within 10 to 15 minutes. When preheat times stretch to 25, 30, or even 45 minutes, your unit is wasting energy and signaling an underlying component failure. Catching this issue early prevents complete heating failure right when you are preparing for big family meals or weekend baking.
Slow preheating usually stems from a weakening heating element, a worn gas igniter, a faulty temperature sensor, or heat escaping past a damaged door seal. Before performing any physical inspection or maintenance, perform basic home appliance safety checks: turn off power at the circuit breaker or unplug the range, and shut off the gas supply line valve when working on gas models.
Here are five practical troubleshooting steps to help you identify why your oven is slow to preheat and how to fix it.
1. Inspect the Electric Bake and Broil Elements
In electric ovens, both the bottom bake element and top broil element work together during the initial preheat phase to bring the cavity up to temperature quickly. Once preheated, the lower element handles most of the baking work. If either element burns out or degrades, preheating times can double or triple because the oven relies on only half its heating capacity.
To inspect the elements, first restore power briefly and turn on a standard preheat cycle. Carefully observe through the oven door window. Within two to three minutes, both upper and lower heating coils should glow a uniform bright red. If a hidden bake element is installed under the cavity floor, feel for radiant heat rising from the floor (without touching hot metal).
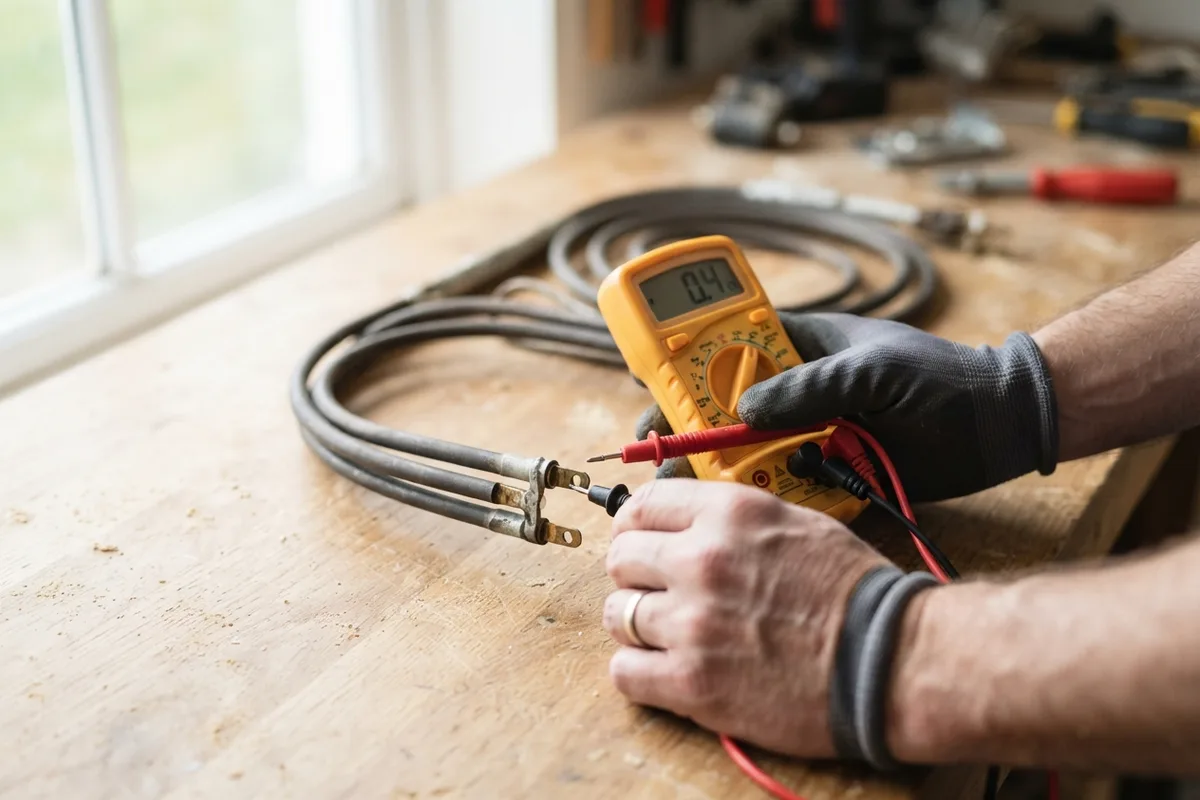
If one element remains dark or displays visible dark spots, blisters, or cracks along the tubing, it has failed. Turn off power, disconnect the range, and remove the retaining screws securing the element to the rear wall. Pull the element forward slightly to access the wire slip connectors. Unplug the wires—taking care not to let them snap back into the wall cavity—and test resistance across the terminals using a multimeter. A healthy element reads between 20 and 40 ohms. An open circuit (infinite resistance) confirms the element needs replacement.
2. Test the Gas Oven Igniter Amperage
A gas oven relies on a silicon carbide or silicon nitride igniter (often called a glow bar) to ignite the gas burner. When you start the preheat cycle, electrical current flows through the igniter, causing it to glow red-hot. As the igniter heats up, its electrical resistance drops, allowing amperage to rise. Once the circuit draws between 3.2 and 3.6 amps, the gas safety valve opens and releases gas to the burner tube.
Over time, igniters weaken. A worn igniter may still glow bright orange, but it fails to draw enough amperage to open the safety valve promptly. Instead of opening within 30 to 60 seconds, a weak igniter can take 5 to 10 minutes to trigger gas flow, cycling intermittently and dramatically slowing down the preheat process.
To check the igniter, remove the bottom oven panel and flame spreader plate to expose the burner assembly. Shut off electrical power and check the igniter for visible cracks or discoloration. If you possess a clamp meter, measure the electrical draw along the igniter wire harness during startup. An amperage reading below 3.0 amps indicates a weak igniter that must be replaced. Replacement igniters are inexpensive and straightforward to install using simple hand tools.
3. Clean and Test the Temperature Sensor
The oven temperature sensor is a thin metal probe located in the upper rear corner of the oven cavity. It monitors internal air temperature and sends resistance signals back to the main control board to cycle heat on and off. If the probe accumulates a heavy coat of baked-on grease, carbon buildup, or food splatters, the thermal mass insulates the sensor. This insulation causes delayed temperature readings, leading to sluggish preheat cycles or erratic baking results.
Start by giving the sensor probe a gentle cleaning. Wait until the oven is completely cool, then wipe the metal stem using a microfiber cloth dampened with warm water and mild dish soap. Avoid harsh abrasives or steel wool, which can scratch the protective stainless steel casing.
If cleaning does not resolve slow preheat times, test the sensor's internal resistance. Disconnect electrical power, remove the mounting screws holding the sensor bracket to the rear wall, and carefully pull the sensor forward to expose the plastic wiring harness. Unplug the harness and measure terminal resistance using a multimeter set to ohms. At standard room temperature (70°F), a functional RTD sensor should measure approximately 1,080 ohms. A reading significantly above or below this baseline indicates internal calibration drift, requiring sensor replacement.
4. Replace a Worn or Brittle Door Gasket
Even if your heating elements or gas burners generate maximum heat, your oven will struggle to reach temperature if hot air constantly escapes into your kitchen. The flexible rubber or woven fiberglass gasket surrounding the door opening creates an airtight seal necessary to trap thermal energy inside the cavity.
Inspect the door gasket along all four edges while the oven is cool. Look for visible signs of damage, such as torn sections, crushed rubber, brittle cracking, or missing retaining clips. Check for dark carbon staining along the outer frame, which indicates hot air has been blowing past the seal during operation.
You can perform a simple paper test to check sealing tightness. Open the door, place a strip of printer paper across the gasket, and close the door firmly. Pull the paper gently. If it slides out with zero resistance, the door latch or gasket has lost tension. Replacing a push-in silicone door seal requires no tools: pull the old seal out of its perimeter channel, clean the groove with soapy water, and press the new seal firmly into place starting at the top corners.
5. Calibrate the Oven Temperature Control
In some cases, the oven is actually reaching temperature, but the electronic control board or thermostat dial is miscalibrated, under-reporting cavity heat by 25°F to 50°F. When the display shows 300°F after 15 minutes, the oven interior might actually be at 350°F, forcing the unit to keep heating far longer than necessary.
Place an accurate, standalone stainless steel oven thermometer on the center rack. Turn on a preheat cycle to 350°F. When the oven chimes to indicate preheating is complete, wait 5 minutes and check the thermometer reading through the glass door without opening it. If the internal temp differs significantly from the display, consult your owner's manual for calibration procedures. Most modern electronic range displays allow you to adjust temperature offsets up or down by up to 35°F directly from the control panel buttons. If your oven is burning food after calibration attempts, review our guide on Why Is My Oven Burning Food? for deeper control board troubleshooting.
Oven Preheating Symptoms & DIY Solutions
Use this quick reference guide to identify why your oven is slow to preheat and determine the best resolution:
| Primary Symptom | Probable Cause | Recommended DIY Fix | Typical DIY Difficulty |
|---|---|---|---|
| Igniter glows but takes >5 min to light burner | Weak igniter drawing <3.0 amps | Replace gas igniter assembly | Intermediate |
| Oven takes 30+ min; broil element never glows | Burned-out broil element | Replace upper broil element | Easy |
| Hot air blowing out around oven door frame | Damaged or hardened door gasket | Install new rubber/fiber seal | Easy |
| Temperature off by 25–50°F across cycles | Miscalibrated control offset | Calibrate settings via control pad | Very Easy |
| Erratic preheat times with error codes | Dirty or failing temp sensor probe | Clean or replace probe | Easy |
When to Call a Pro
While replacing an electric heating element, door seal, or temperature sensor is manageable for most DIYers, certain heating problems require specialized equipment and professional diagnosis. If you have verified that external components like the igniter and elements are functioning, but the oven still fails to heat or triggers recurring electrical fault codes, the main control board or internal wiring relay may be damaged.
Stop and call a professional technician immediately if you detect a persistent gas smell, notice scorched wiring insulation near the terminal block, or experience repeated breaker trips when starting a bake cycle. Working with gas supply lines or live high-voltage internal harnesses carries serious safety risks.
If you prefer expert help, True Appliance Repair can match you with a local appliance pro who can evaluate your range, diagnose complex electrical failures, and restore your unit quickly. Professional oven repairs typically cost between $150 and $350, depending on part availability, unit age, and local labor rates (costs vary by area and model).
FAQ
How long should an oven take to preheat to 350°F?
Most modern gas and electric residential ovens reach 350°F within 10 to 15 minutes. High-efficiency ranges equipped with rapid preheat features can achieve target temperatures in under 10 minutes. If your oven takes longer than 20 minutes to reach 350°F, a heating element, igniter, or seal is likely degraded.
Can a dirty oven cause slow preheat times?
Yes. Thick layers of burnt grease and spillover residue on the oven cavity walls act as thermal insulation, absorbing heat energy rather than reflecting it back into the cavity. Additionally, carbon crust buildup on gas burner ports or temperature sensor probes disrupts airflow and sensor accuracy, delaying preheat completion.
Is a weak gas oven igniter dangerous?
A weakening igniter is not immediately dangerous, but it should be replaced promptly. Delayed ignition allows gas to accumulate inside the burner tube before lighting, which can cause minor gas popping, delayed flare-ups, or unburned fuel odors in the kitchen.
Why does my oven take longer to preheat on convection mode?
Convection mode should actually preheat at the same speed or slightly faster than standard bake mode because the convection fan circulates hot air evenly across the cavity. If convection preheat is extremely slow, check whether the dedicated convection heating element encircling the fan motor has burned out.