
A quiet oven is something most homeowners take for granted until a sudden rattling, grinding, or loud buzzing sound interrupts dinner preparation. While electric and gas ranges naturally make subtle clicking or humming sounds during operation, persistent or loud noises usually signal a loose component or a wearing mechanical part.
Fixing a noisy oven early prevents minor vibrations from damaging internal wiring or ruining motor bearings. By systematically checking the most common vibration sources—from simple rack alignments to convection fan blade obstructions—you can identify the cause of the noise and determine whether it is a quick DIY fix or a task for a technician.
Inspect Loose Oven Racks and Internal Accessories
Vibration is the primary cause of rattling noises in both electric and gas ovens. As the appliance heats up, metal expands, and the internal circulation fan or cooling blower creates subtle vibrations throughout the cavity. If your oven racks, broiling pans, or temperature probes are not seated firmly in their guides, these normal vibrations translate into an annoying metallic chatter.
Start your inspection by removing all removable items from inside the oven, including unused racks, bakeware stored inside, and roasting pans. Slide each remaining rack completely out and push it back in, ensuring it sits squarely within its side rails. Inspect the side rack support frames—some range models feature removable wire rack ladders secured by thumb screws or brackets. If these brackets work loose over time, tighten them by hand or with a screwdriver.
After clearing extra accessories and re-seating the racks, test the oven by turning on a brief bake cycle. If the rattling disappears, a loose pan or misaligned rack was the culprit.
Tighten Loose Backing Panels and Fan Covers
If the noise sounds like a persistent metallic vibration coming from behind the unit or inside the back wall, a loose sheet metal panel or fan cover guard is often to blame. The back of your range features thin metal access panels that shield electrical wiring, terminal blocks, and fan housings. Thermal expansion from repeated heating and cooling cycles can loosen panel mounting screws over time.
Before performing any hands-on inspection, safety must come first. Unplug the oven from its wall outlet or turn off the dedicated circuit breaker in your electrical panel. For gas ranges, also close the gas shut-off valve located on the supply line behind the appliance.
Once power is safely disconnected, slide the range out from the cabinet cutout to access the rear panel. Use a nut driver or Phillips screwdriver to check every exterior screw along the back cover plate. Tighten any loose screws, but avoid overtightening, which can strip the thin sheet metal threads. Inside the oven cavity, inspect the circular or square convection fan cover plate mounted on the back wall. Ensure its retaining screws are snug so the cover does not vibrate against the back wall when the fan runs.
Clean and Inspect the Convection Fan Blade
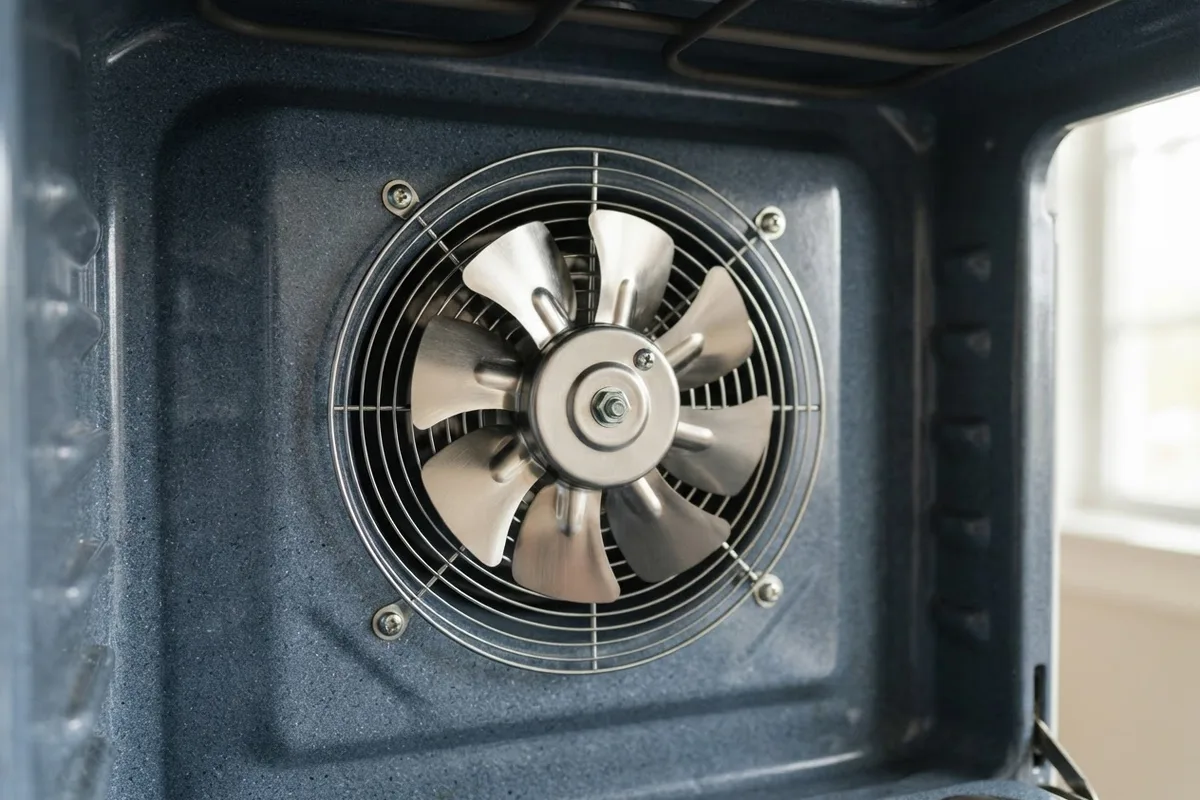
Convection ovens rely on a motorized fan on the back wall to circulate hot air evenly across baking racks. When this fan accumulates baked-on grease, food debris, or foil fragments, the blade becomes unbalanced. An unbalanced fan blade wobbles at high speeds, producing a rhythmic thudding, scraping, or loud buzzing sound during preheat and baking cycles.
Disconnect power and gas supply to the range before servicing the fan assembly. Open the oven door, remove the oven racks, and unbolt the metal fan cover plate on the rear interior wall. With the fan blade exposed, spin it carefully by hand to check for smooth rotation.
Look for debris wrapped around the motor shaft or heavy grease buildup on individual blades. Clean the blades thoroughly using a soft cloth, warm water, and a mild grease-cutting dish soap. Avoid harsh abrasives or bending the fan blades, as misaligning the metal fins will cause even severe wobble. If you notice a blade is bent or cracked, replacing the fan blade assembly is necessary to eliminate the noise and prevent damage to the motor bearings.
Check for a Failing Convection Fan Motor
If cleaning the fan blade does not stop the noise, or if you hear a high-pitched squealing, grinding, or loud humming sound whenever the convection setting is active, the convection fan motor itself may be failing. Convection fan motors contain lubricated bearings that wear down over years of exposure to extreme heat. When bearing lubrication dries out, metal surfaces grind together, creating a loud noise that worsens as the oven heats up.
To test the motor, ensure all electrical power to the range is disconnected. Remove the interior fan cover plate and reach in to wiggle the fan blade shaft gently from side to side. There should be virtually no lateral play or slop in the motor shaft. If the shaft feels loose, or if turning the blade by hand produces a rough, grinding sensation, the internal motor bearings are worn out.
Replacing a convection fan motor involves disconnecting wires from the rear of the unit and unbolting the motor housing. While a confident homeowner with basic hand tools can complete this repair, homeowners unfamiliar with electrical wiring should seek professional help. If your oven is experiencing broader heating issues alongside noise, reviewing guides on why your oven is baking unevenly or checking if your oven broiler is not working can help diagnose related system failures.
Examine Gas Igniter Click or Electric Element Buzz
Not all oven noises come from moving fan parts. Electric heating elements and gas igniter systems produce distinct operational sounds that can sometimes become abnormally loud.
In electric ovens, bake and broil elements expand as electricity flows through them. A faint, low-frequency hum during heating is normal. However, a loud electrical buzzing or sizzling sound accompanied by visible sparking indicates a failing element or a loose terminal connection at the back wall. Turn off the oven immediately if you see sparks. Unplug the range, inspect the element for blistering or pinhole burns, and tighten any loose mounting screws securing the element feet to the oven cavity wall.
In gas ovens, a rhythmic clicking sound occurs when the electronic spark igniter attempts to light the burner tube. Standard ignition takes 3 to 10 seconds. If your gas range clicks continuously without lighting, or makes a loud booming sound when it finally ignites, gas is accumulating before ignition due to a clogged burner port or a weak igniter. Stop using the range if you smell gas, and shut off the gas supply line immediately.
Oven Noise Troubleshooting Quick Reference
Use this comparison table to quickly identify the source of unusual sounds coming from your oven and determine the appropriate corrective action:
| Noise Type | Likely Cause | Recommended DIY Action | Difficulty Level |
|---|---|---|---|
| Metallic Rattling | Loose racks, pans, or back panel screws | Re-seat racks, remove unused trays, tighten rear panel screws | Easy |
| Scraping or Thudding | Unbalanced convection fan blade or debris | Unplug unit, clean grease off fan blades, check blade alignment | Moderate |
| Squealing or Grinding | Worn convection fan motor bearings | Unplug unit, test shaft play, replace fan motor assembly | Moderate to Advanced |
| Loud Buzzing / Sparks | Failing electric element or loose wiring | Unplug unit immediately, inspect element for burns, replace element | Moderate |
| Continuous Clicking | Dirty gas burner ports or weak igniter | Clean burner ports with a soft brush; call a pro for gas valve issues | Easy to Advanced |
When to Call a Pro
While tightening loose screws, cleaning fan blades, and re-aligning baking racks are safe DIY maintenance tasks, certain oven noise causes require specialized tools and expert training.
Always stop and call a professional technician if:
- You hear persistent clicking accompanied by a strong gas odor.
- You observe electrical sparking, charring, or scorched wiring behind access panels.
- The oven trips your home circuit breaker whenever a fan or element turns on.
- The noise comes from an internal cooling blower deep within a built-in double oven wall unit.
Working with gas lines, high-voltage electrical connections, and sealed control boards carries inherent safety risks. Incorporating regular maintenance habits—such as those found in our guide to monthly appliance maintenance tasks—helps prevent unexpected component wear. When complex repairs arise, True Appliance Repair can match you with a local appliance pro to diagnose and resolve your oven issues quickly and safely. Typical oven repair costs range from $150 to $400 depending on the part and labor involved, though pricing varies by area and model.
FAQ
Is it normal for a new oven to make noise during preheating?
Yes, modern ovens naturally produce subtle clicking, popping, and humming sounds during preheating. Clicking sounds occur as thermal relays cycle power to heating elements or igniters, while popping noises stem from metal interior walls expanding as temperatures rise. A low humming sound from the cooling blower fan is also normal.
Why does my oven make a noise even when turned off?
Many modern ovens feature an automatic cooling fan that continues running after you turn off the bake cycle. This blower protects internal electronic control boards from ambient heat buildup and usually runs for 15 to 45 minutes until the oven cavity cools down. However, if the fan runs continuously for hours, the oven temperature sensor or high-limit thermostat may be faulty.
Can a noisy convection fan damage the oven if I keep using it?
Yes. Operating an oven with a wobbling, unbalanced fan blade or grinding motor bearings can cause permanent damage. The vibration can loosen electrical connections, damage surrounding insulation, or cause the fan blade to scrape through the rear cavity liner. It is best to resolve fan noise before running long baking cycles.
How much does it cost to fix a noisy oven fan motor?
Replacing a convection fan motor typically costs between $150 and $350 for parts and professional labor, depending on the oven brand and model. If you replace the fan motor yourself, the replacement part alone usually costs between $50 and $120.